Friday, December 29, 2006

The Last POTW of 2006

Two-double-oh-six is about to go down in the record books, and we are closing it out with the final Picture of the Week.

Knowing that I would be crunched with preparations for covering the funeral of former President Ford, I had another photo all picked out and the post pre-written. Then William Duffy has to come along and drop the self-portrait seen above into the pool.

Absolutely killer light, composition and gaze. The photo is a bit of a rule breaker in that the backlight (the second of two speedlights) is placed on the highlight side of the subject. This gives a very three-dimensional look and makes the sweat pop.

Very cool shot, William.

If you haven't yet joined the Flickr Strobist group to show us your own hot shots, we've just passed 4,000 members. So jump in. It's free, and you are in excellent company.

I am knee-deep both in ongoing funeral coverage and shooting the class-of-the-NFL Baltimore Ravens this weekend. Oh, and I also drew New Year's Day duty. Yee-ha.

So this is definitely probably the last you'll hear from me until next year.

Happy New Year. See you in a well-lit 2007.

Thursday, December 28, 2006

Taking Chances, Classic Lighting and Hairballs: A Closer Look at the Grecco Book

UPDATE: Great news for tablet/phone/pod-toting photographers. Grecco's excellent LatDP is now available on a variety of tablet formats, here.

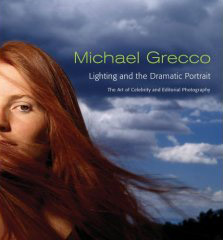
Having been a good boy this year (or, at least, not getting caught) I got a few things on my Christmas list. One of those items was Micheal Grecco's book, Lighting and the Dramatic Portrait.

I know that many of you are ahead of me on this one. And there has been a fairly spirited discussion on the book on the Flickr Strobist group.

But I have finally read the whole book (in chunks each night before going to bed since Christmas) and wanted to check in with my two cents worth on it. I'll start by saying what the book is not.

It's not a beginning lighting book. There isn't enough info on beginning lighting to start from zero and have a good sense of the technique and the craft. Ditto the info on cameras.

Unfortunately he kills fully a quarter quarter of the book speeding through these two topics. I suspect there was some arm-twisting from the publisher and/or editor, as this is clearly not the main thrust of the book. He gets through it quickly, with too much info for the experienced shooter and not enough for the beginner.

If you are looking for a general book on lighting, this should not be your first read. Maybe not even your second. That said, when he gets to his strength, the book really earns it's keep.

The main body of LATDP is, for me anyway, a treasure trove of info. I have already highlighted the bejesus out of my copy, and will probably make more notes on the second run-through.

Many of you have given glowing reports of the book. From others: Eh, not so much.

I think the book is refreshingly atypical in its approach, and wanted to report on what I have learned.

His main premise is one of learning - and then eschewing - the classic portrait lighting techniques. This is a view that I have been coming around to on my own over the last few years.

I look at it this way: Why go to the trouble to set up lights just to end up with a technically good, yet nauseatingly predictable photo?

I mean, do you ever walk into a place and see soft light coming in from twin 45-degree angles and think, man, that's a hot look?

Of course you don't. You notice edgy light. Back light. Beams. Spots, Mottled shadows doing cool things. That kind of stuff. So why is it that when we first dive into off-camera light, we go for well-exposed, classic, predictable, boring light?

That isn't the kind of light what stops us cold when we are paging through a magazine. But we sure do go to a lot of trouble (and expense) to make it.

I am as guilty as the next person. Well, more was as guilty as the next person. After all, it is "safe" light. And it does look very technically competent, for lack of a better word.

Having just described "Classic" portraiture lighting in the previous paragraph, here's what Grecco has to say about it:
"In most cases when I see this kind of lighting, I get a hairball in my throat. Not only of how predictable it is, but because of what it generally represents: slick, pedestrian lighting that is to me, schlocky!"

And how.

This guy does not just walk the walk, either. He goes on to break almost every lighting rule in the book. And if you think about this for a sec, how could you ever hope to stand out in a crowd without taking this approach?

Don't get me wrong. The crowd is a pretty safe place to be. For weddings, corporate shooting, events, etc - that's where the steady paychecks are.

Do I ever just bang out a classically lit portrait? Sure. All the time.

Why? Usually it is a time constraint - I know classic is safe, and I may not have the resources to go for multiple looks. Also, it frequently fits within the editorial mandate in that I do not want to inject too much vision into something and divert attention from the subject itself, which is the real story.

But more and more, I find myself tired/bored/impatient/downright angry with the idea of "expected" lighting. I think I am spending more time and energy taking chances with my light. And when I do I am generally happier with the result.

Grecco gives example after example of how he chooses to break the rules while on assignment.


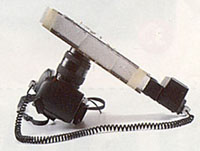
One of my favorite examples - and so simple - is how he lit the NYPD Blue stars from the bottom with a hard light to get the upside shadows. (Click above to see bigger.) Then he gobo'd the light from the two guys' faces, then lit the faces from the top with gridded lights.

Well, of course. Why didn't I think of that? In a small setting, you end up with scener mood light coming from below and face light coming from above - both from the camera's horizontal axis.

That's not something you're just going to happen upon. That is the product of always looking for a way to break the rules and create a "look."

I really like the guy's problem solving, too. His is almost all location work, so he gets thrown a lot of curve balls. But Grecco can hit a curve.

Shooting a portrait of a man in a stainless steel freezer, he wraps the area in front of the freezer in seamless white background paper and throws his lights into that for smooth, gradient reflections. Then he shoots through a slit in the paper. But he's not done yet.

On top of that, he grids the guy's face, to pop it. Then, on the lights illuminating the freezer, setting he uses not one but several various shades of blue on the different flashes. This guy is going beyond using blue to connote "cold" and using a whole palette of blues to add layers of depth and three-dimensionality.

Take ringlights for example - something I am starting to play with for the paper's Varsity section. He uses them not as a main light, but as perfect, lens-axis fill to bring dramatically angled light into a contrast range that his camera can handle.

Well, duh. But not that I ever would have thought of that on my own.

He spends a decent amount of time on technique and anecdotal stories about the care and feeding of subjects. This bedside manner stuff is so crucial to producing killer portraits. Great portraits aren't taken - they are given.

Realistically, I will never have Grecco's budget, his assistants, his technical support or his tax bracket. But I also won't have his pressure. Nor will I have subjects with super-inflated egos like the ones he has to deal with.

His step-by-step descriptions of how he has gotten some of these people from "what they want to do" to "what he wants them to do" is valuable stuff to a real-world, working stiff like me.

To read the book, you'd think he regularly gets on his knees and begs for just five more minutes to squeeze in a concept that the subject may have nixed in favor of their own. Or maybe time constraints were bearing down on him. Whatever.

When it comes to making the shot he wants to make, this guy is water finding downhill. Whatever it takes.

While I do not work at Michael Grecco's professional altitude, I am pulling stuff from this book that I will use nearly every day. If I were a corporate shooter, it might apply less to me. Safe is big bucks in the annual report world.

If I were shooting just for me, I'd be eating this stuff up and darn-near wearing it out in practice, in hopes that before I used it all up the thought process might rub off on me.

But shooting environmental portraits for sports and biz at The Sun, and shooting illustrative projects for features, the inspiration from this book will last me a long time.

Monday, December 25, 2006

Ubercheap Ring Flash: Cereal Box, Styrofoam and Foil

UPDATE: Dennis' site has been taken down, but the how-to page on the ring flash has been archived here. I am leaving the old links hard-coded into the post, in case Dennis gets his site back up.

As always, thanks for the heads-up to this situation that I received in the comments section.

-DH

_________________________________

What is it about ring flashes that just seems to attract supermodels to the photographers who use them?

Yeah, so maybe I did just make that theory up. But, OMG, what if it were true? And what if you could test the theory out for next to no money?

Well, of course you would.

Fortunately, Czech fashion photographer and self-described "hackmaster" (I just love that term) Dennison Bertram has a cool-beans tutorial up on how to make a super cheap ring flash housing for your speedlight.

Given that you already are synching off-camera, you may well be able to build this thing for free from scraps of stuff around the house.

And you thought cereal box snoots were cool.

This is simpler, cheaper and possibly more efficient than the Tupperware version that was blogged here a few months ago. It definitely has a rough-edges DIY look to it, too.

But you could spend a dollar or two and gussy it up some on the outside if you wanted. I am thinking that black craft bendy foam stuff. Whatever it is called.

Anyhoo, check out Dennison's website for the how-to.

And no, sadly, Czech model "Lenka" does not come with the project plans. But build it anyway and test my supermodel theory. If it works, report back ASAP.

Seriously, this guy is really thinking. He also has DIY plans for a cheap "tilt/shift" lens and a pinhole lens for your digicam. I am building a pull-down menu for the sidebar of other cool photo sites to visit, and he is gonna be one of the first entries.

I am using his ring flash model as a jumping-off point. I have already made about a dozen mental revisions that center on increased efficiency and better light distribution around the ring.

Use some of that scrap Christmas styrofoam and an empty box and build one, too. We'll compare ring flashes (and the resulting pix) soon.

Saturday, December 23, 2006

Merry Christmas and Happy New Year from Strobist

Whether you observe Christmas or a different holiday, please accept my best wishes for a happy holiday and a healthy New Year. Don't look for any new posts until the day after Christmas, as I will be spending Sunday and Monday enjoying time with my family.

My two kids are practically vibrating around the house in anticipation of Santa. My youngest will be very happy to see Christmas get here, and with it a long-awaited end to the added pressure to be good.

Speaking of presents, I offer the following suggestion: Save some of those pieces of white styrofoam that hold the toys and electronic gizmos safely suspended in their boxes. There is a very cool little DIY lighting project coming on Tuesday which will make good use of that stuff.

If your house is like ours, I am sure there will be plenty of styrofoam lying around by midmorning or so.

Merry Christmas and Happy New Year.
_____________________________________

Related Link: How to Shoot Better Christmas photos

These... Are the Voyages of The Starship Enterprise

Continuing our "show us your photo crib" theme, Washington, DC-based shooter John Harrington checks in with his capitol city diggs.

Criminy! The theatre at my local mall does not have displays that big. You may be wondering how a photographer could have the means to be so well-equipped. I would answer that not only is John a good photographer, but he knows how to handle the bidness end of the bidness, too.

Yeah, he's that John Harrington. Folks, if you really want to make it, learn the biz stuff.

Here are two wide views of his workspace:


Comparing my office to John's, the most positive thing I can say about mine is, uh, my office gets better gas mileage than his does.


John is also one of those photographers who saves his credentials, with quite the "memory wall" to show for his efforts.

He is using a neat new kind of light, too. These are called "Rololights," which are multi-tube fluorescent-light softboxes that roll up into a case. He has posted some Rololight-lit photos in his Flickr stream, so take a look if you want to see more.

This is fun - who's next?

Just post your pix on the Strobist.com Flickr group and leave a comment on this post comment to let us know that they are up.

(Thanks, John!)

Thursday, December 21, 2006

TGIF/POTW - 12/22/2006

It is Friday, and only three days until Christmas. (Or as my Santa-anticipating 8-year-old girl said tonight, "Two and a wake-up!")

Friday means Picture of The Week around these parts. And Strobist reader SciPug has sprouted off-camera antlers and is going buck wild with trees and clouds.

Actually, I got a really nice e-mail from him before I ever saw the photo drop into the pool. The excitement in his note was palpable. Told me he had just made his best photos, ever.

It is so neat to see someone really start to get the feeling that they have total control over relative light levels. It opens up whole new worlds in just about every area of photography.

SciPug was actually visited by the Strobist Bird of Happiness when he was making this photo. So he should have known he was going to make a good shot.

You'll have to click through to the Flickr page to see what I mean. And if the bird comes for you, don't flinch. It's a good thing.

Nice shot, Zeke.

Tagged: Here are My Five Things

I have been tagged by Ted Leung.

According to the rules as I know them, here are five things you do not know about me:


1. I skipped second grade, something I later regretted.

2. I started investing when I was eight.

3. I wet my pants during a 6th-grade science fair and walked home in embarrassment - five miles away.

4. While interning at the Orlando Sentinel in the '80's, I was almost arrested for riding on the hood of a car on International Drive to make a photo.

5. My absolute favorite food is chicken and dumplings.


That said, I now tag:

Ryan Saghir, of Orbitcast
Mike Johnston, of The Online Photographer
Chris Marquardt, of Tips From the Top Floor
Lee Abrams, The music guru of XM Satellite Radio
Chris Garrett, of DSLRBlog

Wednesday, December 20, 2006

Show Us Your Photo Cave

Reader David X. Tejada popped a few photos into the Flickr Strobist group of himself, just messing around with SB's in his office.

(We pros do this a lot, BTW. It is best not to test on the job.)

Don't get me wrong. You're all beautiful and stuff, David. But what really interested me was seeing the working space he had created for himself. We got to see pretty much all of his lair because he shot the lighting setup from a couple of different directions.

At one end of the room is what many of you would call, uh, heaven. David has his big lights anal-retentively safely stored on the wall, with everything in its place.

At the other end is his desk and graphics/workflow/office area. Pretty much what you'd expect, except - what's this? - an octagonal Home Depot-looking thing on the wall at the right of the frame.

Looks like a big 'ol DIY tungsten ring light to me.

Hopefully, David will share some info on that, tell us how he made it (assuming he did) and show us some shots done with it. I have no idea if he will, because he is reading this for the very first time just as you are.

(Hi, David! Howzit going?)

So, David showed us his. Now you show us yours. If you are a reader and a professional shooter, let's see where you hang!

David has set the bar for you. A neat little lit photo of yourself in your photo crib, with the fifty-cent photo tour thrown in.

Stick some pix in the Flickr group poolFlickr group pool, and leave a comment here so I will know you are in. Then I will pick some photo pads to pull up to the main site and all of the amateurs can drool.

Not that you pros should feel superior to the amateurs. While you have to go to work to shoot a photo, they get to do it for luv...

(Click on the top pic for lighting info.)

Tuesday, December 19, 2006

Hopefully, the Off-Camera Flash was Safe

Ever drop an expensive digital camera?

I have. They are surprisingly robust, all things considered. What matters is (a) how high they were dropped from, and (b) where they land.

I'm thinking this one might have to go to the shop:


Speaking of extraterrestrial photo gear, check out the Nikon cameras (small|hi-res) in the space shuttle. Wonder where they keep the Canon stuff?

(Via RobGalbraith.com)

Editor's note: After putting this post up before bed last night, I had one of those realistic, all-night-long dreams wherein I was secretly using my own Canon gear (which I do not really have) on assignment for The Sun. Then, I would just bring the cards into the office to edit, tone and caption so no one else would know.

Strange.

Equally strange is that this is the first time I have ever had a dream that was in any way related to the website. Which is surprising when you consider how many evening and late-night writing sessions are spent in its support.

Monday, December 18, 2006

One Flash, Two Colors

Pop Photo's Peter Kolonia brings back a classic Dean Collins trick this month, wherein he shows you how to get two colors out of a single background light.

I probably would have chosen to use a different set of colors than he did in his example shot - cool gel on the background portion and warm on the hair portion would be my choice. But the technique is pretty nifty.

If doing this with a speedlight, you'd need to make it into a quasi-bare-bulb light first. Use a Sto-Fen Omnibounce, or just a small Tupperware container.

:: More detailed bare-bulb info ::

Sunday, December 17, 2006

Speedlinks, 12/18/2006

• Alien Bees has introduced a sweet-looking, monobloc (self-contained) ring light. Rumor has it Strobist reader Kirk Tuck is already engaged to his. (Must. Keep. Wallet. Closed.)

• Got a herd of dust bunnies on your sensor? Learn how to clean that baby. (Warning: Cheesy illustration after link.)

• Strobist reader Conrad Erb has posted a tutorial on how to tighten a loose hot shoe on a Canon 20D.

• Amazon is enabling, nay, sucking up, to holiday shopping procrastinators. They are tossing in $5 gift cards with many magazine subs. It brings American Photo and Pop Photo down to less than $10/year, net.

(Browse all 500 eligible magazines.)

January Lighting Seminar Reminder

What with January's Lighting Seminar right around the corner, this is just a reminder for those of you who are attending not to lose track of the date. We had quite a long lead time on this one, and a related comment on the last post prompted me to refresh your memories.

We are still on track. Assuming I am still on the right side of the grass on Jan 13th, I will be ready to go. So you should be, too. There will be further updates as the date grows near.

(For you newer folks, the seminar is long sold out. But there are others in the pipeline, so stay tuned.)

Friday, December 15, 2006

TGIF - POTW, 12/15/2006

This beautiful and evocative off-camera flash Picture of the Week was made by reader Patchlead, all the way down in Australia. He used a Canon EOS 20D, the aforementioned (small) off-camera flash, and a whole lotta pops at full power.

If any of you wanted to play around with this idea, you could shoot with just a hint of sky left in a late-evening photo - enough to separate the trees in the back. And/or you could hide yourself behind a big tree when you popped the flash(es).

Even still, this shot would be hard to beat. Very nice. Make sure you see it big, too.

Not a member of our Flickr group? Just get on the bus, Gus.

It's free.

BTW, in a fit of lucidity, someone suggested we change the Flickr group name from the "Strobist" group to the, uh, "Strobist.com" group. Well, duh. Why didn't I think of that?

So, my prior ignorance notwithstanding, that's exactly what we just did. All URLs are the same, so no worries.

Honestly, sometimes I do not know how I had the intelligence to survive for 41 years. Mrs. Strobist freqently wonders the same thing. Aloud.

Thursday, December 14, 2006

Bits and Pieces, 12/14/2006

Strobist in National Geographic Traveler

I woke up to a nice surprise this morning when I checked the Flickr discussion threads.

Strobist was mentioned in a "best of the web" photography story in the Jan/Feb 07 issue of National Geographic Traveler magazine. It's all I can do not to go buy a couple of hundred copies and pass them out to total strangers on the street corner. Cool beans.

Thanks much to Strobist reader and Travel Photographer Emeritus Bob Krist for bringing the site to the attention of the writer.


New MPEX Arrivals

This may be rather like dangling meat in front of an alligator, but Moishe got in a selection of used SB-24's and SB-28's. He rates them as 8/10, which means they may have some cosmetic signs of wear, but work just fine. SB-24's (2 available) are $65 each, and the SB-28's (8 available) are $100. Foist come, foist soived.

He is also now carrying the Wein HSH adapter, which slips onto any hotshoe flash to give it a very solid and useful "household" PC connection. If you have a good flash that does not have a PC jack (cough, Canon, cough) these are sweet. They also have a female 1/4x20 socket for mounting purposes.

FYI, Canon flashes are a tight fit on these. You simply pry the lips of the shoe mount on the HSH up a tad with a regular screwdriver and all is well. They are solidly constructed out of metal.

And for you guys in need of a more, uh, Freudian light stand, he got in some LomoPro 10-foot light stands at only $30 each. You outdoor, mix-light shooters - especially the skater types - may find these more useful than the compact stands. And at about half the price, too.

Link: Midwest Photo Exchange

Wednesday, December 13, 2006

How to Photograph Christmas Lights


Normally when we talk about balancing light on Strobist, it usually means balancing ambient with flash. But getting good photos of holiday lights involves a different kind of light balancing: Continuous ambient with fading ambient.

You don't need a high-end camera for great results. You can use a very inexpensive digital camera and do just fine. You don't even need flash. It all comes down to what time of the day you shoot. And a couple of other little tricks.


Timing and Balance

Photo by Troy McCullough

The problem with the vast majority of Christmas lights photos is that most people wait until way too late to start shooting. After it gets completely dark, you can either have the lights or the surroundings properly exposed. But not both.

Conversely, if you were to shoot the lights in the middle of the day, they would not show up at all. The trick is find the sweet spot (actually there is a whole range of sweet spots) where the ambient light and the Christmas lights balance.


Photo by David Hobby, Baltimore Sun

Understanding this will ensure that your photos are way better than those of your neighbors. After all, isn't that what Christmas lights are really about?

How to Do It:

1. Arrive early. The best time to shoot is before it gets totally dark. More specifically, get there before what looks like mix light to your eyes, too. Arriving around sunset will give you time to plan your shot before the good light happens. You may have to ask your subject to turn the lights on early - most people don't flip them on until the good light is already gone.

2. Compose your photo in such a way as to include as much sky as possible in the background. Shooting from a low position can help. Even better: If you have your choice of shooting direction, shoot into the afterglow of the evening sky.

3. Once you get your picture framed, set your camera's white balance for "tungsten," as if you were shooting indoors without flash. All of those little lights are tungsten balanced. As a bonus, the tungsten setting will turn your afterglow sky royal blue once your light balances out. The sky will look great - even if it is a cloudy evening. And your lights will gleam crystal white -- or whatever color they are supposed to be.

[UPDATE: Since 2006 when this was first written, there has been a steady move from tungsten to the use of LED holiday lights. These days, the best approach is still to start with the tungsten setting -- but check your other white balance settings to see which looks best.]

4. A light foreground (like the snow above) or water (as in the boat photo) can give nice foreground interest. See what you can find. In a pinch a reflective car roof will do. As a bonus, it will steady your camera.

5. Use a tripod or a beanbag to steady your camera. You'll be shooting in the range of a quarter second to a full second at twilight. If shooting with a smartphone or tablet, use both hands to brace it against something solid.

6. Now, wait for the light to happen.

Shoot a test shot every minute or so. At first, you'll be exposing for the sky and the lights will appear unimpressive. Check the back of your camera after each shot to watch the Christmas lights appear to "come up" as the ambient light level goes down. Your eye is constantly adjusting to compensate for the dropping light levels, but the changes will be happening nonetheless. Your camera will record them differently from the way that you eye sees them (you can see a much greater contrast range) so shoot and chimp.


Photo by Michael DeHaan

Somewhere in between sunset and full dark, the Christmas lights and the ambient light will start to mix beautifully. You'll have about a 10-minute window which will give you a nice series of subtly different lighting variations. Remembering to keep your camera as still as possible, shooting lots of frames through the mix light. Ones and zeros are free, so don't be stingy. You do not have much time. You can delete the duds (or blurred photos) later.


The trick of using tungsten white balance and shooting through the mix works for all kinds of light-filled scenes, not just the typical holiday lights. Church nativity scenes -- even the annual trip to get a Christmas tree -- look great at mix light.

Incidentally, this time of day is when the architectural photographers make the big bucks. And they are smart enough to tell everyone in their subject building to leave the lights on that night, too.

Once the ambient and artificial lights cross balance in intensity your opportunity will fade quickly, along with the evening light. You will know both are gone when your photos start looking like the "bad light" photos you used to take.

Even if all you have is an inexpensive point-and-shoot camera and no tripod, good results are still within your grasp. Patrick Kunzler, a night photo editor with the Chicago area Daily Herald group of community newspapers, offers this great video tutorial with even 2007 point-and-shoot technology:


Finally...

Afterwards, take a moment and put your camera away. You still have a few minutes to enjoy the scene with your eyes. The human eye has the remarkable ability to compress a large dynamic range into a scene your brain can process. Just relax, soak it in and think about all of the shopping you have left to do.

This is one of the few times that both shooting pictures and enjoying the moment do not conflict with each other.


Next: Hit for Average

Sunday, December 10, 2006

Speedlinks: 12/11/06

In today's links: Business, lighting, hacking, Photoshopping, and using the latter for societal manipulation:


Speedlinks

• Dan Heller runs a neat little blog on the business of photography.

• Strobist reader (and corporate shooter) Kirk Tuck is spreading the small flash gospel.

• What do you do with your old point-and-shoot digicam now that you are a DSLR user? You take it apart and hack it, of course.

• Lunacore Photoshop Training has a free tutorial on retouching skin.

• Speaking of retouching (and the implications of the Quest for Perfection) Dove produced a brief, thought-provoking movie of the process of producing a "beauty" billboard image:

Saturday, December 9, 2006

Turn Your Flash Into a Super Tele

If your subject is at a distance which requires a telephoto lens, the light from a small strobe could be pretty diffuse by the time it gets there.

Add this fact to the shortcomings of on-camera flash, and it's no wonder that added light is underused by many amateur wildlife photographers.

Walt Anderson's Better Beamer flash extender is a Fresnel lens that mounts on a shoe mount strobe to refocus the light into a tighter pattern. Field tests and sample flash patterns are here.

Luminous Landscape has a review of the Better Beamer. While most of the info deals with on-camera flash, the better possibilities are in conjunction with off-camera strobe.

A Fresnel is different from a snoot. While a snoot merely restricts the beam of light (wasting some of it) the Fresnel concentrates much of the light into that tight beam. This gives you the ability to reach out forther with a telephoto lens, or to throw more light into a restricted beam shot outside to better overpower the sun.

This Strobist group discussion is full of information on shooting wildlife with strobes, including some common-sense cautions. There is also this excellent tip from Kin Lau to ensure that the over-zoomed flash is pointed exactly at the subject. He remotely triggers a flash which is mounted on someone else's camera, someone who's tracking the same subject.

Wildlife photographer Frans Lanting uses small flashes - including ones with similar Fresnels - extensively in his location work. There is a good interview on his general technique here.

By Mike H.

Friday, December 8, 2006

Strobist UK Opens, And a BIG Thank You to All

The international theme continues. After opening an Amazon Canada page last week, the Strobist UK Bookshelf opens today.

Further plans include a space in Amazon France, Amazon Japan, Amazon Germany, Amazon Neptune and possibly Amazon West Virginia, if we can surmount the language barriers.

As with Canada, this link will make it easy for you British types to find the lighting books recommended on the site, without international shipping charges attached. It is all very similar to the U.S. setup, except they apparently sell the books by weight.

Something to do with "pounds," I'm told.

I'm looking into it.

I have found that the UK is very similar to the US, except that you guys speak English, play football with your feet, and drive on the wrong side of the road.

Cheers, and thank for your help in supporting Strobist when you shop at Amazon UK.


And, Speaking of Thanks

I wanted to take this opportunity to thank you guys from the bottom of my heart for the Amazon holiday shopping trips that have been initiated via Strobist. That one little extra mouse click makes a big difference when I try to work out whether all of the time and work I put into the site is worth the effort.

Please accept the heartfelt thanks of my entire family.

This new media stuff an amazing process when you think about it. I stay up late most nights to offload everything I have learned from my quickly aging brain. People then read it, learn new techniques and form a community of serial flashers. Then those flashers gear up on MPEX and click through to Amazon from Strobist, and the circle becomes self-sustaining.

As a wonderful bonus, we have all made hundreds of new friends this year. I have to say that I think this whole concept is way cool, and I thank each one of you for being a part of it.

TGIF - GOTW

It's Friday - and yeah, I know that I normally do a single reader Picture of The Week. But some of the stuff put into the Flickr Strobist Pool this week was outstanding.

I could not narrow it down to just one. So, I decided to consult the Strobist.com Rule Book, and it said:
Rule #1: You can do anything you want.
Rule #2. See Rule #1.

So, what the heck. This week, instead of a Picture of the Week, we have a Gallery of the Week.

Leading off up top is Wylie Maercklein's beautifully lit portrait of spritely model (and fellow Flickrer) Brenna.

Brownie points to Wylie for working wide open with a 50/1.4, even though he would have had enough light from the flash to close down and ruin the photo with too much depth of field were he not thinking.

Next up is John Black, who made lemonade out of lemons by making a photo inside a hole near his house, the digging of which repeatedly kept him from sleeping past 7:00 a.m.

Oh, the humanity.

Zepper_7 spent the week getting snooty in the bathroom, with this photo of his muse, Kari, as the result.

Shooting for the Decatur Daily, Gcoz7 worked from ground level to produce what I can honestly say is the, uh, best photo of two high school-aged twins who compete at golf that I have ever seen.

Folks, if you have never been assigned to shoot two high school golfers in one picture in the middle of the day, you really do not understand what a personal success a photo like this can be.

And last is this beautiful picture, by reader Knottyy. It is all the more poignant when you click on it and read the circumstances under which it was taken.

Please, keep 'em coming. And if you are not a member of the Flickr Strobist Group, get that way ASAP. We want to see what you are doing with your flashes.

Thursday, December 7, 2006

David X. Tejada on Location Shoots, Bart Simpson and Saddam

NikonPro has a neat little feature up on our own David X. Tejada. Lotsa good info in there - including how to defeat a subject who shows up for a corporate shoot wearing a "Bart Simpson strangling Saddam" T-shirt.

I dunno how long it'll be up - the link is for the current cover story.

Also at NikonPro this month, another Strobist reader is featured: Bob Krist talks about why he has shelved his Nikon D200 and now travels with a sub-$1,000 D80.

From MPEX: PW's in Tight Supply

If you are hoping for a set of Pocket Wizard Plus II's in your stocking this year, you'll wanna be extra good between now and Christmas. And even then, it'll help to know someone in the biz.

They have proven to be very popular (no surprise, given that they were redesigned to be switch hitters for only a few bucks more than the old models) and are back-ordered in many places.

MPEX has scored about 60 of them - that's individual units, not pairs - and he has them for $186 each. FWIW, that's one reason I was so happy to partner with MPEX - Moishe is like Max Klinger (from M.A.S.H.) when it comes to scrounging gear.

PW has the elves making them as fast as they can, but expect things to be a tad tight while they catch up to the demand.

Conversely, for those of you who have not been so good, I am told that coal is plentiful this year. And there will be enough to go around for the foreseeable future.

Wednesday, December 6, 2006

On Assignment: Stainless Steel and Cookies

A while back, we looked at double diffusion as a means for controlling the surface reflections on glass bottles. Having recently talked about the concept of apparent light source size I wanted to revisit the technique and tie the two concepts together.

The assignment was to shoot the winners of the holiday cookie bake-off for the food section at The Sun.

The cookies were all non-reflective and textured, ranging from light sugar cookies to dark ginger snaps. The page designer had chosen as her backdrop a shiny, stainless steel tray. To further expand my range of surfaces, she put the cookies in highly reflective foil baking cups.

This brings up an interesting exercise in light control. The cookies are going to eat the light. The steel is going to reflect it in a predictable manner. The foil cups are going to reflect back every light source in the room.

Before I get into the idea of double diffusion, lets back up to the concept of seeing the light source from the subject's perspective.

If you remember, it's the apparent size of the light source that matters. If you are unfamiliar with this concept, go back to the Dohrn piece to bone up.

Here is the lighting setup. Imagine for a sec that you are a cookie on the tray and that the diffusion material (the translucent sheet tented over the cookies) is not there.

When you look up from the tray, you are going to see a big softbox. I was in the studio, and needed mucho watt-seconds for lots of depth of field, so I was using a Profoto head in a softbox.

This softbox, coming from the top of the frame, is going to define the texture of the cookie as it lights it. All nice and smooth - no problems there.

Now, imagine you are the stainless steel platter. Not only are you going to see the big light source, but you are going to do something extra that the cookies do not do. You are going to reflect it right into the camera like a mirror.

And if the photographer gets out of the line of sight of the reflection, the tray will appear black. Not good.

But technically, the reflection of the softbox is not really a problem for the camera. It looks pretty cool, actually.

The problem comes where, on the steel tray, the reflection abruptly stops. We are talking about a near mirror-like surface, after all.

Again, remembering that you are still the stainless steel platter, try to imagine what you would see if the photographer stuck a sheet of diffusion material - in this case, Rosco Tuff Frost - between you and the light source.

You still reflect everything, and you are gonna throw back that softbox at the camera.

But now, instead of a sharp line where the softbox abruptly stops (within your field of view) you have a fuzzy, diffused edge to the light source. (Think of a window behind a shower curtain if it helps.)

Mind you, your reflective properties have not changed. And you are still going to throw back a faithful reflection of the light source. But the diffusion material has altered the appearance of the light source. So it has altered the reflection you are going to throw into the camera.

The final effect, from the camera's point of view, is to radically alter the apparent surface quality of the stainless steel. It is as if I had sprayed the tray with a dulling matte spray.

The quality of the light on the cookies is unaffected. They just need big, soft and directional. So they are happy.

(Hey, how could they not be happy? They are cookies. Everybody likes cookies.)

So now that we have tamed the (predictable) reflections in the stainless steel, what about the more complicated reflections in the foil?

Well, turns out this is pretty good solution for the foil, too.

You have a big apparent light source - the diffusion sheet itself. Which means that the light is spread out over a large area, so the intensity of the reflection will be modest and easy to manage, tonally speaking.

But also, the edges of the apparent light source are nice and fuzzy. So the reflections (technically, they are called "specular highlights") will have smooth transitions at the edges, too.

Let's back up now.

What we have is one hard light. We diffused it with a softbox to make a broad source. Then we diffused that with a sheet of translucent material to control the apparent edges of the broad light source.

Sounds more complicated that it is. Just look at the setup shoot, imagine you are the tray, and it should all make sense.

Here's the cookie photo at 1024-res, so you can see the light reflections - especially the transitions - more closely. That stainless steel looks like stainless steel should.

On a much sadder note, I had grand expectations for one important aspect of this shoot that went unmet. Tragically, while the cookies looked very good, they had been judged about a week before. So they were terribly stale.

So, all things taken into consideration, I would have to give this session very mixed reviews.

Next: How to Photograph Christmas Lights

Tuesday, December 5, 2006

The Skinny on Skin, and a Master Retoucher's Portfolio

When I first saw the Skin book pop up on the Amazon reports, I really wanted a little more to go on than the reader reviews listed on the product page.

It just so happens that one of our own, Greg L, has posted a review up on the Flickr Strobist threads. Short answer is 'two thumbs way up.'

But we'll get to that in a second. First, take a look behind the scenes at what one of the real hotshots in the industry (a different guy) is doing when it comes to retouching.

Glenn Feron has been doing this stuff since the 1970's. You know, back when his version of Photoshop was an airbrush. Cruise through his site and you will never look at a celebrity magazine cover the same way again.

And we're not just talking smooth, blemish-free skin, either. Need some cleavage reshaped? No problem. Is that booty not quite bootylicious enough? Feron is your man.

Does some of this stuff stray so far from reality that it strains credulity? Yes it does.

But the point remains that, in the absence of the "before" photo, 99% of the public takes the "after" photo as gospel.

Makes you think, huh?

Good lighting can only go so far. And that, apparently, is not enough to satisfy the hyper-perfect standard of celebrity portraiture. Honestly, I am so glad I do not have to deal with standards like this on a daily basis. Not to mention the egos.

Nope, as a photojournalist that creative playground is completely off limits to me. But not to many of you.

No way, you say? Follow me for a sec.

You'd be more rudimentary and subtle than Feron, of course. But you make a real estate agent or two really happy with their headshot, and before you know it people start talking - and you are one busy photographer.

Very few people complain that they look too young, too tan or to thin in a photo.

The trick is to be subtle enough for your client to retain a smidgen of deniability as to whether or not you actually worked your Photoshop magic. You know, maybe they just looked good that day.

Really good.

Back to the book, Skin, here's what Greg had to say about it after getting his copy:


"If you are a PJ and all your images need to come straight from the camera I would suggest you pass on this one. The lighting section, while good and informative, is not the driving force behind this book.

But, if you are interested in improving your photos with all the tips, tricks, and tools available with Photoshop CS2 then this is the book for you. While the author's emphasis is obviously on skin color, contrast, tone, saturation, and retouching, the knowledge gained will apply to almost any photo.

The first section, an essential in-depth chapter on color calibration, had alone sold me on the book. But the real guts are the step by step tutorials on improving pictures and portraits through Photoshop and the demonstrations of the variety of ways to skin a cat. Many of the previously mysterious and misunderstood tools and options in Photoshop are explained and put to practical application.

This book is over 400 pages of small-font information and lessons. It also includes a CD with all the images used in the lesson plans, lighting diagrams for print out reference cards, etc.. This book will take some time to fully read and digest but will forever have a place on the reference shelf right next to my computer.

Basically this book lets the cat out of the bag on how all those beautiful portraits we drool over are retouched."


Asked later in the thread whether the book is for Photoshop beginners, Greg says:

"Not beginner basic, no. It is expected that the reader has a decent level of experience with Photoshop, layers, masks, common tools, etc..

They do cover some basic stuff like blur layers but also get into more advanced techniques like (well advanced for me) split toning, luminosity blending, figure thinning, octave and overlay sharpening, cmyk -vs- RGB, using contrast and tonal structure of B&W in a color photo, etc..

Some of this may be basic to a pro retoucher, but is just the stuff I need as a long time Photoshop amateur."

I've heard enough to include Skin on my next Amazon order. Even though I cannot use much of this stuff for the paper, it is an area I really want to know more about. I am still pretty much a luddite when it comes to Photoshop's true capabilities.

And even if you aren't into the high-end Photoshop stuff, make sure you cruise by Glenn Feron's website .

It's amazing.

Monday, December 4, 2006

Micheal Grecco Interviewed on Lightsource

I love the serendipity of the web. Check this out:

1) Someone gives me a heads-up on Micheal Grecco's new book in the Flickr Strobist group threads.

2) I promo the book on the main site.

3) The folks at Grecco's studio notice.

4) They pop into the Strobist Flickr thread about Grecco to say hello.

5) Bill and Ed at StudioLighting.net ask them if they can interview Grecco on Lightsource's podcast show.

6) And here it is.

The show is 64 minutes long, and clocks in at 31 megs, so dial-uppers be warned. But I am half-way through and it is definitely worth a listen.

Strobist Now at Amazon Canada

For those of you who wrote in looking for an easier way to hook up with good reading in the north country, I am pleased to announce that Strobist is now affiliated with Amazon Canada.

Good books are good books, no matter where you read them. And I am told that Canada is much like the US. Except that the people are nicer, they drink better beer and all of the lighting books are frozen solid to the shelf for eight full months out of the year.

The Strobist Amazon Canada store is housed in an old, restored c. 1890's factory set on 12 beautifully wooded acres somewhere in the northern half of Jeff Bezos' hard drive.

Thanks much for the idea - and the repeated e-mail kicks in the butt to actually follow through.

I am in the process of setting up an Amazon UK affiliate sites for Strobist's British readers, so watch this space over the next couple of weeks. Ditto the French, German and Japanese sites, if I can figure out a way to wade through the respective languages.

(The last time I tried to order food in French, they brought me something that looked like snails.)

Next up will be to make a drop-down country button for the sidebar. But until then you can reach the Canada page here.

As always, thanks much to you folks who help to support the site by doing your Amazon shopping via Strobist links.

On Assignment: David X. Tejada, Kicking Butt with Small Flashes

First update: Adds podcast link to bottom of post.

Alright, confession time.

I was scanning through the new pix in the Strobist Flickr pool and I come across some thumbnails of mix-light, outdoor photos.

As I was deciding whether or not to drop this guy a "hey, pal, we try to limit the pix to off-camera strobe around here" note, I opened one up.

Well, shut my mouth.

Not only is Colorado-based pro David X. Tejada using his SB-800's subtly, effectively and creatively, he is doing it in ways that do not call attention to the light itself. He's just making killer pix.

You want subject-driven lighting?

Here it is, from one of our own.

Do I wish I had made these photos? Yes.

Will I be, uh, incorporating what I have learned into my own photos? Sure will.

Take the top photo, for instance.

This is not the garden-variety, mix-light city scene it first appears to be. It's a shot of the mass transit train rolling past, done for the maker of the cars. David just decided to amp the photo by including the cars into a beautiful mix-light scene of the city.

But, as you know, the shutter speed at that time a day is not going to be anywhere near what you need to stop the train. So David just let it fall where it may (1/13 @f/4) and used two small SB-800's on Pocket Wizards in the garage below him to freeze-blur the train as it went past.

This guy is going out on shoots with a little gear and a lotta brain.

(Click on any photo to see it bigger.)

Take this architectural shot, for instance. Looks like available light. But David has two SB-800's (just outside of the frame on each side) to provide detail for the two planters.

Subtle, but very effective.

And that's the next level you reach for after you have grown tired of the "HEY-LOOK-AT-MY-LIGHT!" style of lit photography.

Finally, this simple graphic of an I-beam uses small flashes to add color and detail to the main subject by lighting it from each side. Ditto the guy on the left.

If you want to know what this picture would have looked like without flash, look at the smaller beam at right.

I talked to David on the phone after seeing his pictures pop up in the Flickr pool. He and I both agreed that, even though you own the big lights, it can be more fun to leave them at home and find ways to solve problems with the little fellas.

If you are a photographer and you want to see what can be done with small flashes on a larger scale, check out his stuff. He is providing good info on techniques in his Flickr postings.

And if you are a company who wants some good art, hire him. Just remind yourself not to worry if he shows up for your annual report shoot with a body, a tripod and a duffel bag full of "amateur" flashes.

And if you would like to hear David talk more about his lighting philosophy, you're in luck. StudioLighting.net has a podcast interview with him from a little ways back. It's 18 megs, so dial-uppers should be forewarned.

Next: Stainless Steel and Cookies

(Thanks for the heads-up on the podcast, Pete G.)

Sunday, December 3, 2006

November Hot List: Skin is In

It should come as no surprise to anyone who has been reading the site that Harrington's business book and Grecco's lighting book duked it out for the top spot in November. They are both great examples of how much knowledge $20 can buy.

But what did surprise me were a couple of new entries in the list, with one coming from out of nowhere a landing at number three. And the other one wasn't even a book.

I had never even heard of the book, Skin: The Complete Guide to Digitally Lighting, Photographing, and Retouching Faces and Bodies, by Lee Varis, until it starting popping up on the click-through lists from the Amazon links.

The everyman reviewers on Amazon are in love with it. And I even noticed a new topic in the discussion groups dedicated to getting great skin tone, although that discussion does not even mention the book. What grows from this site never ceases to amaze me.

Maybe it was an offshoot of the Garage Glamour book that may as well be paying rent on the list at this point. I dunno. But thanks for not posting the work-unsafe stuff to the pool...

(In all fairness, the book apparently covers much more than the title suggests.)

If you have read the book, please sound off about it in the comments section. I'm curious along with everyone else.

The other item that popped up (at number eight) was something that has long been a part of my gear bag: the Leatherman Wave multi-tool. This one started popping up shortly after the "What non-photo gear do you carry?" topic started up on the discussion boards.

I love my Leatherman, which is the third version I have owned. I tend to keep them for several years and then spontaneously give them away at some opportune moment, usually when traveling on assignment.

I gave away the last one to a Romanian farmer after he let me crash on his floor for a few days. You'd have thought I given him a car. He didn't even know they existed. Way cool.

I stuck an Amazon link in the sidebar for that and my other little buddy, the Swiss+Tech micro. They both rock.

Anyhoo, back to books. If you are making up your Christmas list - and you have been very good - you could do far worse than to point your benefactor to this month's list.


The November Hot List:

1. Lighting and the Dramatic Portrait

2. Best Business Practices for Photographers

3. Skin: The Complete Guide to Digitally Lighting, Photographing, and Retouching Faces and Bodies

4. Master Lighting Guide for Portrait Photographers

5. Matters of Light & Depth

6. Light - Science and Magic, Second Edition: An Introduction to Photographic Lighting

7. Secrets of Lighting on Location: A Photographer's Guide to Professional Lighting Techniques

8. Leatherman Wave

9. Garage Glamour: Digital Nude and Beauty Photography Made Simple

10. Professional Portrait Lighting: Techniques and Images from Master Photographers

Share

Twitter Delicious Facebook Digg Stumbleupon Favorites More