Wednesday, April 29, 2009

Strobies XS: Beautiful; Math Challenged?

Interfit has released some pretty cool-looking speedlight accessories and bracket system under a line called "Strobies."

Name similarities aside, there is absolutely no connection of any kind between this site and the Strobies XS stuff. And from a quality of light standpoint I really dig where they're going. My concern is how well the math holds up.

More wishy-washy waffling and indecisiveness inside...
__________


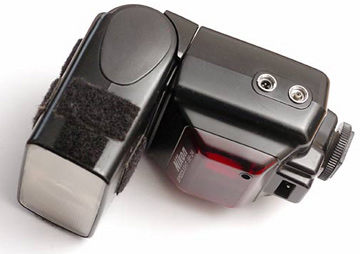
Remember when we talked about the difference between a speedlight and a mono with respect to the architecture of the tube and reflector?

This new mounting frame, left, brings the two different types of flashes together in terms of quality of light. At first glance it looks like any one of several DIY speedlight-into-softbox mounts, but they take it a step further and include a system-oriented mounting flange at the business end.

Now, the flash head (mounted into a beauty dish / soft box / reflector / etc.) has its light positioned in the focal point of the light modifier. The diffuser dome sends the light out in all directions, completing the deal.

This architecture (or, rather, the lack of it) is what is wrong with just about every DIY speedlight beauty dish. David Tejada's version comes close, but still does not duplicate the bare-tube-and-beauty-dish combo.


So, What's Not to Like?

Think about what has to happen for that speedlight to get to the quality of a decent-sized bare tube mono. The tiny little flash tube emits light, it is reflected (with some loss) by the built-in reflector and thrown forward. Then it is collected and diffused by the plastic dome.

This diffuser dome step eats up a lot of light, and it happens before the light ever gets to the first light-sucking bounce or diffusion surface of any of the Strobies mods. Thus, high 9's on quality of light, and (an estimated) low 6's for efficiency -- I would not expect a lot of output along with that beautiful light quality.


Maybe a Mono?

In essence, you are spending both dollars and lumens to get your speedlights to create the same quality of light as monoblocs.

They look very well made, and I would be curious to see a price list. Because for the cost of outfitting one of these strobe-to-quasi-mono setups, you may well be able to pick up an actual, small monobloc. I am thinking AB400 or Elinchrom D-Lite, maybe. And you would still need a speedlight to stick inside the "Strobie" if you went that route.

If you already have the speedlight of your dreams, and are working indoors for close-in portraiture, the "Strobies" might be just the ticket. This is especially true if you are looking for beautiful, beauty dish light and TTL workflow. That's a plus the monos don't offer. But if you need high quality and high quantity light, be sure to take a look at all of the factors before you make the jump.

These are new, and I haven't seen any prices yet. So a lot will depend on that. Please update us in the comments if you see any hard numbers floating around.
__________


More info: Interfit Strobies XS

New Online Source for SB-24 Manual


Thanks to a a tip from Bob in the comments of an archive post, there is now a new source for the much-loved c. 1988 Nikon SB-24 speedlight. This is especially important if you come across a cheaper used one that has long since lost the painted-on labels on the control buttons.

(More info on the flash itself here.)

-30-

Sunday, April 26, 2009

A Quick Technique for Edgier Group Shots

When I shot for newspapers, one of the most common visually subpar assignments was the two- or three-person group shot. Nothing against group shots per se, but the small group was usually indicative of a reporter who just couldn't say "no."

The story might really be about Person "A," but the reporter gets strong-armed into this really being a "group effort," (translation: I don't want to be the only one in the photo, blah, blah, blah...)

So the 2-3 person group shot gets a bad rap from the get-go. Which is a shame, really, because most group shots are a good opportunity to play.

Why? Because you typically have nothing to lose since the normal group shot in the paper is a huge yawner to begin with. Hit the jump for a quick tip for carving out quick group light.
__________


Experimenting on Captive Subjects

Let me begin by saying that I especially love one thing about lighting classes: They are attended by a roomful of people who think it is perfectly normal to play around with light for no good reason whatsoever. So naturally, I use them as guinea pigs for lighting ideas that I have in the back of my head.

Lord knows, they are much more cooperative than my kids. Heck, the cat won't even stay in the same room with me at home any more.

I have a project coming up this summer that will call for shooting some edgy looking small group shots, so I want to work a look that has a little more cowbell than the typical big-soft-light group. Nothing wrong with that light -- just a little too been-there-done-that for me at this point.


For the group above (R to L, Damian, Romain and Christian) at the CERN workshop, I started with my fill to place my baseline exposure before even considering the key lighting. The fill is an umbrella right behind the camera -- sort of a poor man's ring flash. A little better than ring, actually, as it is softer and does not leave that "ring signature" on the background wall.

I saw one immediate problem. The fill was not pushing to the back of the scene very well. This was because of the difference in distance between the fill as it hit the subject on the right (a coupla feet away from the camera) to the distance to the back wall (10-15 feet away). Of course the wall is gonna be dark, right?


Solution: Back that flash up. This is where the on-axis umbrella kicks the ring's butt. With a ring flash, your light location relative to the camera is locked down. With the on-axis flash, not so much.

So, by backing up the light we get better penetration of the fill into the back of the scene. Not perfect, but way better than before.

Now, it is just a matter of dialing in the baseline exposure before we accent the faces. This is a piece of cake, and easy to do by eye without a meter. Just light the scene with the umbrella fill, adjust the power until the scene looks good, and then alter either the flash power or the aperture until you see that the shadows -- areas will not be lit by your key(s) -- are where you want them to be. Check your histograms to make sure you are not falling off of the table on your darkest tones. Unless you really want to, of course.


You can set the base fill by dropping your power on the umbrella. But you'd probably want to just close down your aperture in a case like this, to buy yourself some depth of field. I am not gonna carry Romain in the back as tack sharp, but I may as well get him recognizable.

Which brings up an important point. Just for the heck of it, we shot them exactly where they sat in class. Sort of an exercise in lighting angles. If I was shooting them critically, I would want to compress the distance to hold focus on all three.


Now it is just a matter of adding the key lights. Remember, we are in total control of both the quality and the intensity of the fill, as we nailed that stuff down first. What that gives you is both the ability (and the excuse) to get a little atypical with your key lighting. We can go hard, grids, edgy angles -- whatever. Their faces will hold it because we have pre-determined the look and depth of the shadows.

For the key(s) we went with two hard speedlights, one of which sported a grid spot.

As the lead dog, Christian, right, got his own key light. It was gridded to control the beam spread. But I was able to light both Damian and Romain with the same speedlight, which was also bare.

You can more easily get away with hard lighting when you have pre-set your fill. Because while the transition from highlight to shadow will be quick and hard, you have decided exactly how far the drop-off will be. You can play it safe or be increasingly risky, by altering the intensity of your fill light.

You can see a setup shot here, courtesy Mark Howells-Mead of the Swiss Strobists Group. (Check out their meetup schedule if you are local, too.)


Here it is again. I took some liberties with the seams on the back wall (which turned it into a pretty cool backdrop) and removed a sticker.

But what the hell, I am not bound to the newspaper's rules anymore. It's not a completely finished look. But this quick experiment give me enough to go on to where I feel comfy trying it for my project later this summer. I tried a second variation (still honing it) on a single portrait early this month. And I really like the way it is evolving. I will hit that one on a later post.


Test, Test, Test.

It sounds weenie, but it will give you the courage to try new stuff when you really need a different look. And when you get dealt your fourth three-person group shot in a week, a new look is exactly what the doctor ordered.

Wednesday, April 22, 2009

Working Around the House

[UPDATE: Results from the shoot-your-own-sales-brochure experiment -- the house received multiple offers over the asking price and sold quickly. Twice, actually, as the first buyers had some trouble putting the financing together at the last moment.

Advice: If you are a decent photographer and are selling your house, most definitely help it to stand out from the competition by spending a day shooting photos of it for your real estate ad. And consider creating a website of your own to really show it off.]

__________

I have been playing architectural photographer this week for a new blog I am working on.

This blog will have one post, and is designed to do one thing -- help us sell our house in a down market.

I have a separate post about the mechanics putting together a blog/brochure. It is mostly designed for general consumption, as I think the idea has worked out really well and might get a little play as a house-selling strategy.

But this lighting post details the problem solving on some of the photos I shot, because any readers heading to the other post for the general real estate / recession stuff probably would not understand our interest in the lighting end of it.

(Heathens...)

Architectural Digest on the cheap, after the jump.
__________


Some General Stuff

Some of the techniques were the same throughout the shoot, which happened over Monday and Tuesday of this week. I had shot some available light stuff earlier, when the daffodils were more in bloom. But most of the lighting pix were done over a couple of days, along with the gazillion other things you have to do to sell your house.

No umbrellas of softboxes were used. Not that I was trying to avoid them. But a Flickr commenter pointed it out after the fact, and I found it interesting. That was mostly a function of lack of space. I was hiding flashes everywhere, and bare lights are smaller. Ceilings (and sometimes walls and doors) were my bounce cards.

No tripods were involved either, which is a little unusual for architectural stuff.

Why? Because Chuck Norris don't need no stinkin' tripod... No, actually, I was working off of an ambient base for most of the shots, and I needed an appropriate exposure to let daylight work as a contributory light source. Mostly pretty comfy handheld range.

Everything was done with two-to-six SB-800's, a D3 and a Nikon small-chip 12-24. That's not a typo, either -- that 12-24 is my FX format wide zoom. It covers full FX frame down to 19mm. I would get an FX-format 14-24, but I simply cannot be trusted with a lens that wide.

Strobe triggering was done optically. That is to say that each shot started with some kind of on-camera flash for fill, which triggered all off-camera SB-800's in SU-4 mode.
__________


Let's start in the living room, shall we?

This picture (final seen up top) is built on the ambient coming through the doors at back right, and the lamps in the room. The ambient exposure is a compromise to pull all three of those continuous light sources in as best as possible. This is a late shot with no flash, and I think I may have opened the ambient up half a stop or so from this level. But you can get the idea.

There are four flashes -- two fill and two accent. I lit the room up to about one stop down with two flashes aimed at the ceiling -- one on camera and one out of frame at camera right.

One accent flash (also camera right) brought the couch and painting up to full exposure from a hard angle. It was a snooted, bare flash. The other accent is hiding behind the tree on the ground playing a little subtle pattern on the ceilings.

Why? No logical reason. Just to do it for a little interest. Kinda like no-underwear Wednesdays.

Exposures? Flash power? Aperture? Couldn't tell you.

I built the ambient highlights exposure as stated, and filled with the bounce flashes for a good baseline exposure. Then I accent-lit to taste. (If that's a little bit Greek to you, you can read more here.)
__________


Almost forgot about the powder room, as I shot it last month. This is lit, but with on-camera flash. This room is only 3x6 feet, so bounce off of the ceiling is a default choice. The trick is going into vampire mode for the mirror.

The solution is to shoot with a very wide lens, vertical, from a very low position. Keep the camera vertical to keep the lines straight. Use the top part of the frame and you just got yourself a poor-man's shift camera -- no reflection.

The other reflection to watch out for is that of your back wall being nuked by the flash. So I angled the flash a little forward to paint a more pleasing reflection of the back wall in the mirror. (Even still, I smoothed it with a little Gaussian blur.)

Exposure is straightforward, but delicate. Exposure at a reasonable aperture with manual (bounce) flash, then dial in the shutter speed until you get exactly the amount of glow you want from the continuous lights. The walls and floor of such a small room act as fill cards, so the shadows magically fill themselves. You actually have very little choice in the matter.

I left the towel a little rumpled just to not be too anal.
__________


The kitchen had me scratching my head for a few days as I wondered how to light it. I wanted to show the whole room, which had no windows -- and lots of very warm CFLs as light sources.

At first, I did not know where I could hide a flash. And in the end, I wound up hiding five speedlights in the frame -- plus one on-camera aimed at the right wall, to trigger the others and fill the front. The room is entirely lit by hidden speedlights, with the only ambient coming through the back door in the living room at rear.


How do I light thee? Let me count the ways.

1. Main fill / trigger light on camera, as mentioned above.

2. Main light in the room: An SB-800 hidden in the overhead fixture. Nifty, huh?

3. Not so nifty: The flash was wedged in off-center with a diffuser dome, so it threw a cockeyed light pattern onto the ceiling. I disguised this somewhat with another SB low and behind the counter. It was snooted and aimed up at the fixture to splash a more even circle of light around it.

4. My over-sink fluorescent lamp was swapped out for an SB which was duct taped to the near cabinet wall. (We had already packed the gaffer's tape.) A sheet of white paper on the underside of the bottom of the cabinet gave a soft bounce surface. This also lit the fruit bowl nicely.

5. Same thing, over the stove, but no paper needed -- the range hood interior was already white.

6. Last but not least, a flash was stuck in the living room and aimed at the ceiling to bring the whole room up. Sliding door daylight was the basis for the ambient exposure.
__________


Here is where I shot the kitchen from. I made this photo later in the evening (we needed the full dark) with two SB-800s and some road flares that we painted white.

Kidding. The fireplace was lit with a few small candles. We shot in the dark with long exposures and the candles really glowed the place up when we opened up that shutter -- even lit the kindling box nicely.

But now the room has to be lit believably. Again, one SB in the overhead fixture (I later cropped that out, but still a perfectly natural spot for a key light. Problem now is contrast. So I fixed that with a fill strobe bouncing into the kitchen at camera left, which smoothed it all out.

Fill was set a coupla stops down. You can see the ratio on the floor at bottom left. Highlights are key-lit, shadows are fill lit. This is the area that shows you how much fill to dial in. Make it look like your eye sees the room normally. No ratios -- salt to taste.

The room was left just a little dark overall, to let the fireplace sing a little bit. We pretty much bought the house the moment we rounded the corner and saw that kitchen fireplace 17 years ago.
__________


As it starts to get dark on (a rainy) Monday night, Susan asks if I remembered to shoot her garden in the back. Of course I did not remember to shoot it, because I am a total moron during allergy season. So I stepped out onto the deck and saw this mix of tungsten light and deep, foggy twilight.

Okay, technically I only saw the foggy evening and imagined the tungsten light, but I knew I could make it if I worked fast in the last few minutes of light. Before I even go back to get a strobe, I metered an ambient shot and dropped the exposure about two stops down. The color was real -- no tungsten white balance needed.

Working very quickly, I grabbed an SB on a stand with a dome diffuser and stuck a 1/2 CTO on it. (I wanted tungsten the way my eye sees tungsten.) Where to put the light? Heck, I am batting pretty good aping our normal fixtures, so I went to the well again. I put it on a stand right next to our deck light, which is on the house edge of the deck, in the middle.

I powered my warmed-up flash to balance the ambient with a couple of test shots and it looked great -- except the shadows were too contrasty. That's easy enough to fix, quick and dirty, with a two-stop-down on-camera flash. It looks great when you are using it to erase contrast with off-axis light. (More on that here.)

If you look at the deck shot bigger, it looks very crisp and 3-D, but legible everywhere. I was rushing fast (gotta get the garden with the last bit of light) but with a little time I would have prolly dropped the fill ratio a bit. Just a matter of taste, tho.
__________


The waning foggy light made the garden look lush, if a little flat. And the garden was way darker then the grass in back. So with the last bit of twilight I grabbed an ambient (somewhere in the 1/4 - 1/2 second range) and exposed for the grass.

A little on-camera fill with the flash zoomed way tighter than the lens gave me a nice center-vignette, and I underexposed that a stop or so. Then I grabbed my stand flash and pulled the dome and gel off for some off-axis light. It came from the far corner of the deck at camera left and was aimed just past the center to feather the key a little.

The ratios are very tight, but even so the two lights bring the garden up to the level of the grass in a very sharp, 3-D way. Bare light sources do that very well, but you do have to keep your fill levels in mind. (Here for bigger.)
__________


Among the fifteen shots I did for the house brochure, this detail of the library master bath shower area went very quickly. It is white-on-white, so again the exposure is delicate. But that is not to say it is difficult.

Bathrooms are just big softboxes -- and you work inside the box. The key light is an SB on a stand in the shower behind the curtain. Aim it at the back right wall and you have a nice, soft source. But even in an all-white room, the fact that the key is behind the curtain means the shadows will be too deep.

An Orbis made quick work of that. Just dial up the fill light in manual mode to taste -- chimp and go. That way, you can keep the whites white, and have just as much contrast range as you want. The ring light fill adds no directional light signature, either.
__________


The last one I am going to mention was a little bit of a challenge to work through. Ben's room is only about 10' x 11', and the loft bed soaks up a lot of that.

Note the two-toned rails on the right side. We had to augment this design after he fell out of bed during the middle of the night. (That'll wake everyone in the house up quickly...) We still have not stained and poly'd the extra rails yet, but he is pretty much in jail up there.

Problem is, there is just no place to hide a flash in here, and my goal is a lit/natural balance. So this one was a little bit of a head-scratcher, too.

The exposure was based on the light streaming in through the window, or more accurately, what that light was doing in the back of the room. No leaves on the tree yet, so the view is not worth saving. Thus, I could let the window blow out a little and also grab some under-bed ambient from the desk lamp.

Now, to build the rest of the frame with flash, but only up to a ratio that looks like normal room light the way your eye sees it. Fill on the far left was from a stand-mounted flash, up high tucked into the corner of the small room. The wall was blue, so we had to correct the bounce color by taping up a shoot of newspaper to get it neutral.

If you ever need to fix the color of the splash your flash makes on the wall, newspapers are a pretty easy fix. For a few more years, anyway.

The other side fill was easier, once I realized that the open closet door out of frame at camera right made a great big reflective light panel when you shot a flash into it. The trick was not overdoing either of the fill lights.

This picture is an rarity in the Hobby household, as we have not actually seen Ben's carpet in several years. It is usually covered in about two feet of Legos, most recently Technics and Mindstorms. He builds these weird robots and vehicles and is teaching himself the programming.

He is even trying to blog a little bit (all by himself, as you can see) but I think we need to work on the "actually developing content" part. To be fair, I must say that his site is better than my blog was at 8-yrs-old.

I digress.

That's it for the lighting stuff. I am working on a more general-audience post on the "buy my house" pseudo-blog idea, which will go up shortly. One more thing, which I will not be mentioning in that post:

If anyone within the sound of this post actually ends up buying the joint, you'd better believe there will be a full Starving Student light kit (with an SB-26) a boxed set of Lighting DVDs and a case of cold, delicious Diet Mountain Dew left behind when we move out.

Just reveal your secret decoder ring flash status after we agree on a price.

How To: Use a Free Blog to Help Sell Your House

NOTE TO REGULAR READERS: This half of a two-post Thursday is very off-topic. But I thought it would be of use to those of you who, like us, are trying to sell your house in a tough market.

It's a how-to on using the web to make a spiffy "For Sale" brochure on the cheap -- and how to make it work for you. If you want the lighting low-down, you can see how we lit many of the photos in the other post.

__________


The Three Dreaded Words: Sell Your House

We are hoping that the market is not completely dead -- only mostly dead, as Miracle Max says in The Princess Bride. But we are realistic and do know we'll need all the help we can get.

Our first step was to choose a price that would let us stand out within our price range. After we stopped crying, we then cobbled together some free web resources to try to create an spiffy online brochure on the cheap...
__________


Before You Start: Get a Good Address

No, not for your house. That boat has already sailed. I mean on the web, where your address is called a URL.

The good news is that the best one for you is probably still available, unless you live at 1600 Pennsylvania Ave., or at 10 Downing St. Your current address makes an ideal and most logical URL. Our address is 7353 Broken Staff, so that became our URL.

Well, almost.

What I wanted was to build this on a free blog platform, so I grabbed www.7353BrokenStaff.Blogspot.com. You can set up a blog for free at Blogger.com (where all of the ".blogspot" blogs hang out) in about 2 minutes.


My address was available on Blogger, as was the straight "dot-com" version when I checked on GoDaddy.com. You can easily by the dot-com and have a (free) redirect set to point to your Blogger site.

Cost is about ~$10, and it is not even really necessary. After all, we are going for zero budget here, right? But if you want to live large, by all means buy it and redirect to Blogger.


Next: Build a Site

I love Blogger because it lets you tinker around under the hood with the HTML, which is how to make a blog template look like a nice "For Sale" brochure. But blogs have post titles, post dates, multiple posts, etc. You do not need that, and it is a little distracting in this context.

If you have even a slight amount of experience with HTML, it is easy to find those things in your template (use the "Edit in HTML" method in the template) and get rid of them.


Now, your "blog" starts to look more like a normal web page. BTW, I chose the "White Minima" template and it was a very easy one to tweak.

You'll want some pictures. More on that later, but you might need to address it in your template. I chose to use Flickr, as it is free and I already had an account there. And because Flickr's standard photo size is 500 pixels wide, I "stretched" my Blogger Minima template to accommodate that photo width in the main bar.

Again, it is easy to find in the HTML code. Just make sure to adjust your blog's total width in pixels so the main and sidebar add up right, with a little space in between.

You do not absolutely need to do that, as Blogger handles photos quite well in 400px sizes. Just upload your pix to Blogger and Bob's your uncle. I just wanted a little more splash, so I went wider. And if you are an HTML newb, I would go the latter route.


Tweak the Sidebar

You'll need to swap out the typical sidebar stuff. Nuke the blog roll links, archives, etc. and replace those items with the info you would want if you were buying your house.


Some ideas for sidebar links:


1. Local schools

2. Restaurants

3. Recreational facilities

4. Nearby public transportation

5. Don't forget your Realtor's contact info (or yours, if you are a "For Sale By Owner")

6. Be creative. Use your imagination and have a little fun.
__________


Take LOTS of Pictures

You cannot have too many photos of your house. The more pix people see, the more it helps them qualify your house for a visit. It also keeps them from wasting a visit if your house is not for them.

If you are a total klutz with a camera, ask a shutterbug friend. You should plan to end the shoot in the rec room with pizza, beer and a good game on the tube.

If you are a regular reader here, this will be the fun part. If you just happened by from another site, you are reading Strobist, where we are really into lighting. And again, you can see how I created many of my brochure photos here.

But I also recommend the site PhotographyForRealEstate.net for great advice on the subject. Larry will totally hook you up with the skills you need. It is one-stop shopping for this kind of thing.


Location, Location, Location


Where are you? One easy way to show them is to embed a Google Map.

They can see exactly where you are, get driving instructions and find any nearby items of interest that you missed. While you are at it, place some clickable markers on a public map you can create. Now, when you embed that map, the markers will be on your brochure site, too.


Spread the Word

When your house gets listed in the Multiple Listing Service by your broker, (or you may have to buy into that somehow if you are attempting a FSBO) give them a good selection of most of your best photos.

Then request a link that says, "For more photos, go to [YOUR BLOG URL]." This will draw people from the visually restricted MLS format to your splashier, picture-heavy site.

You may wish to buy classifieds in the local newspaper, or perhaps on Craigslist. In that case, it may make sense to spring for that $10 dot-com URL to keep it neater.

That would be an easily worded link in, say, a cheap newspaper classified ad:

East Columbia Townhouse for Sale: $299,000. More info and photos at www.7353BrokenStaff.com.

It's cheap, but has lots of leverage. I ended up not buying the dot-com name (we just went with the Blogspot address) as we chose not to buy newspaper advertising.


Next Step: Cross Your Fingers

That's where we are now, as of Thursday, April 23. It is all up to the fates, but we are hopeful that the upgraded pictures and visibility will make a difference. We'll check back in and let you know how it went.


One Last Thing

After the house sells (humor my optimism for a moment) do not tear down the brochure blog. What better way to help you remember your old house -- or for the next owners to be able to email a tour of their new house out to their friends and family?
__________

UPDATE: From the comments, a really cool example of a house site (although not a tweaked blog) in Atlanta.

Tuesday, April 21, 2009

Verb of the Day: "Potatoe-Chip"

EDITOR'S NOTE: I am hard at work this week on something a little different, but it is gonna take me a coupla days to finish it up and write about it. In the meantime, I thought I would toss the following out to snack on...
__________

In case you were wondering whatever happened to former U.S. Vice President Dan Quayle, he is now apparently popped up teaching spelling in Germany.

No, not really, but that is the first thing I thought of when I saw "potatoe-chip" being used in a California SunBounce video on YouTube.

Turns out that is just the way they spell it over there. Heck, maybe Dan was German. And for those of you in other countries wondering what the hell a snack food has to do with our former VP, well, best not to ask.

You say potatoe, I say potato -- but as a verb? Yep. Hit the jump, and we 'splain dis to you.
__________


When You Jump Out of a Burning Hotel, Aim for the Firefighter with a "Sun-Mover"

Okay, so maybe I consider a typical collapsible bounce panel and think, "Looks fine to me." But CSB's Peter Geller is German. And Germans tend to have a whole extra frontal lobe in their brains just for engineering. And Peter is not happy with your typical collapsible reflector.

I first saw a Sun-Mover about a month ago when I got to play with one at PMA. And when I say play, I mean, like, "play a drum" play.

They are oval shaped, and hold their considerable tension even in the wind. This creates a flat, predictable surface for bouncing light. And since the super-strong frames are constructed out of, like, transparent aluminum special high-strength steel, it is pretty much like holding a solid reflector. They even have motorcycle-like handles.

I'll shut up and let them explain:


I would not know how to describe the way a normal flex-reflector screws up the light when it gets a little breezy, but but Peter just points his German engineer brain lobe at the dictionary, and bam, "potatoe chip" is now a verb. Perfect.

And why should you care if it stays flat? Because a flat disc can throw a very efficient, focused, predictable beam of sun way better than a potatoe-chippy reflector can. Check out the before and after shots of light being reflected way into a doorway (about half-way down the page.)

For a lot of people, this level of efficiency might be overkill. And they are certainly not the cheapest reflectors out there. But for those of you who shoot using sun (or hard strobes) and reflectors in the wind and want predictability -- or long throw -- they are pretty flippin' sweet. And you can play bongo solos on it when you are kicking back after the shoot.
__________

We are, of course, huge fans of junk food here at Strobist International HQ. If you are wondering where to get the miniature Pringles, that'd be a Dubai thing. Sadly, we can't get them in the US, either.

UPDATE: Amazon for the win! If you are in the US, they are in the "gourmet" food section -- $17.72 for a 50 pack case, with free shipping for Amazon Prime folks. It's a Mini-Pringles Bonanza! (Thanks for the tip, Charlie!)


Saturday, April 18, 2009

OT Sunday: Stepping Outside the Box of the Business of Photography

FAIR WARNING: It's one of those "lengthy manifesto" weekends...
__________

A few months ago, I posted on the idea of collaborating with subjects -- and sharing the photos -- as a shortcut to reinvigorating your photography.

Granted, I could have worded the headline better -- a lot better. But since that post I have dived even further down that particular rabbit hole, and wanted to pass along some thoughts and experiences and alternate approaches to any of you who may be interested.

If you are a purist and just come here to read about light, bail now. But if you are interested in looking at the business of photography from a different direction, feel free to make the jump.
__________


In the Driver's Seat

I am not a potted plant -- I know there is a recession going on and times are tough all over. But flipping that around, that means many photographers probably have the occasional free day and with it the ability to decide how to use it.

As for me, I'd rather be shooting. But my last six months have been so crammed with travel and teaching that I have been all but unassignable. I am working through the string of commitments, and hope to be much less scheduled going forward. I feel bad any time I have to have to turn down a job, especially one that is in my subject area. But prior commitments precluded my ability to do just about everything, pretty much since last fall.

I have kept my sanity by self-generating projects that can be shot during the days when I am in town. I have one more trip coming up next week, and then I will be free to take whatever comes my way, assuming anyone I shoot for still remembers my phone number. And because of the projects, I have new work to show from my otherwise "dead" period.


The first example was the night chopper shoot which was done with the Howard County Police Department. That was a collaboration with pilot Perry Thorsvik, and allowed me to push the limits of what I thought would be possible with remote flash. I approached it exactly as I would approach an assignment. Because that is exactly what it was -- albeit a self-assignment.

In addition to stretching my technical skills, the photos from this shoot have proven to be useful for the HCPD, of course. But what has pleasantly surprised me has been the number of inquiries that I have gotten on the photos. I tagged them pretty well in Flickr, which I suspect has been the main funnel for people finding the images.

I have had several inquiries for their use as an advertising image from helicopter equipment and accessory manufacturers, enough so that I realize the commercial value of the photos to the point where I am not going to let them go until the right situation comes along.

It is a unique set of images, in part because it would have been pretty expensive to make them absent the collaboration of the police and the pilot. It is more than just renting a chopper at sunset -- you have to have a pilot who is invested into the creative process sufficient to be willing to have a flash going off repeatedly in his cockpit. (Thanks again, Perry!)

I expect at some point that photo is going to marry up to the right creative budget, and when it happens it'll just be gravy. Even if it never sells, its primary value to me is in its uniqueness and demonstrated technical ability. It has also created value for the HCPD (never a bad thing to have some very happy local cops around) and it was a lot of fun to shoot.

The photos simply wold not have happened any other way.


Another self-gen project I am in the middle of is a series of portraits of "Rising Stars" for the Howard County Arts Council. They are young professionals and college students in the performing arts who will be competing this weekend for a big chunk of change in a local "American Idol" -type competition that showcases this area's vibrant arts community, while putting on a heckuva show as the very talented competitors go for the big bucks in front of a live audience.

For me, this was a no-brainer for a self-generated project. I didn't get a penny out of it. Didn't even bill expenses. But what I did get was the chance to photograph a series of talented young people (of my choosing) who would not otherwise have the budget to commission these types of shots. All we had for each session are two people, working together, to make the photos they wanted to make.

No editors, no art directors, no external budget constraints, no deadlines, no schedule. And, speaking of budget, there is a "stone soup" quality to these kinds of things that makes shooting locations (and helicopters) magically appear for free. And more important I am free to experiment with new lighting styles that I can revisit later with more confidence when the meter is running.

Case in point is Kassi, above. Rather than paying a model and renting a location, my goal in self-gen shoots is to try to be a catalyst to jumpstart the creation of interesting stuff, external of the normal commercial/editorial process. I have license to stretch, so I will be comfortable with the new techniques when it matters.

In addition to all of the selfish stuff above, Kassi's promotional materials get kicked up a notch or two, as does the visibility of the Howard County Arts Council -- the later being another part of the positive vicious cycle for raising the profile of the arts in Howard County. In a way, I am latching onto a machine which is already running well and adding a little more horsepower to the process.

The use of the word "selfish" is not coincidental -- there is a distinctly self-indulgent quality to these shoots that is just not present in the shoot-for-hire jobs. They are creatively luxurious. (Or luxuriously creative -- I dunno which.)

The icing on the cake -- significantly so, for me -- is that many of the shoots will have a second life at some point as a blog post, something which is always sitting in the back of my mind. But I do watch that compass point, too. I am making a point of generating available light shoots in this way, just to do it free of any external influences. The process is the best way to charge creative batteries that I have yet found.

And as for the blog, trust me when I say that the Kassi shot will make a more interesting lighting post that would the series of guys-in-ties I shot (just) for money recently. (Sorry, guys. This crowd is so past the softbox and grey backdrop thing...)

It paid well, but I can honestly say that the only thing interesting about it was the check. Which, comparatively speaking, is very hollow. And it speaks volumes about only pulling out your camera when there is money on the table.

The best part of collaborative shooting is how easily doors open when you take money out of the equation. After 30 seconds of trying to figure out what the catch is, the people involved become creative allies in a way that frequently eludes the people working in a purely transactional project.


But Does it Scale?

Yes, it can. A few months ago when Mohamed Somji over at GPP asked me to come up with a series of courses for the Dubai workshops, in addition to a couple of lighting courses I broached the idea of teaching this process to a group of students in the form of a hybrid lecture/shooting workshop.

Earlier this month we took a group of mixed amateurs and pros and spent half a day discussing the motivation and process behind a self-generated shoot. And then we went out and did one -- shoot, edit and all. Because of the number of shooters involved, we had to choose a subject that could soak up more than a dozen photographers. So rather than our first idea -- shooting at a school for children with special needs -- we went for a wonderful boutique hotel in Dubai that looks like it came right out of the South of France. (We thought the school, and especially the students, would have been a little overwhelmed with a herd of shooters.)

A slow, fat pitch across the visual plate, to be sure. It was more of a commercial target that I would have chosen individually. But let me tell you that, if you are going to have a group of people visually exploring something for a couple of days, you can do far worse than a hotel that comprises a series of french-style villas in residential Dubai. We had a blast.

Honestly, I didn't know what to expect in terms of working as a team, image quality, etc. But before it was over I was just sitting back watching the students stretch themselves creatively -- with no commercial pressure -- and gelling as a group. The people at the hotel, of course, will be thrilled with the DVD of photos that will be arriving soon. But the fact that they are getting something of significant value should not at all diminish what the photographers learned through the process of creating the photos.

Every one of them now clearly has the ability to gain access to subjects that simply would not happen without the photographer serving as a catalyst. Where they go with it is up to them, but I could already see the wheels turning. And from a portfolio perspective, it unlocks the Catch-22 of "you only get paid to shoot what you can already show in your portfolio".


Frame it From a Different Angle

As photographers, we tend to spend so much time navel-gazing that we sometimes miss the forest for the trees. If you are not careful it can get to be all about creative rates, editorial credits, ongoing promotion, keeping your portfolio current, etc. But focusing inward like that means that you almost certainly preclude out-of-the-box thinking.

I believe that it is very important to step back and look at your profession within the context of a rapidly changing industry of visual content and information flow. We are still in the beginning phases of the information age, in the process of transitioning from the industrial age. Whether you choose to admit it or not, WIRED editor Chris Anderson is absolutely right when he says that information now wants to be free.

This is a double-whammy for shooters: There is no marginal cost to reproducing information (visual or otherwise) and every Tom, Dick and Harry how as nice camera and considers himself a photographer.

Result: A gazillion iffy images online, for a buck a piece -- or less.

This is scary as hell for photographers who think only in terms of what they earn per hour shooting. Especially if you are locked into a single perspective when examining your career.

Lately, I have been trying to step outside of my box whenever possible to look back from a distance. Three years ago I considered myself a photojournalist. And my perspective was limited to that of a photojournalist -- which today, I am sure you'll agree, is pretty depressing. In the time since then I have changed my perspective from that to one of a photographer who blogs. And sometimes, a blogger who photographs. Which means I have two markets that can either be tapped separately, or (when things really work well) simultaneously.

In the past few months, I have tried not to think of myself as a photographer/blogger (or blogger/photographer) but rather as a node in a world-wide conversation that happens to be about a small niche area in photography. Granted, it probably sounds like I am turning the BS meter up to 11 in an effort to pad my resumé. And I would grant you that -- if I were looking for a job.

But I am not hunting. What I am doing is constantly looking for a way to re-examine my place in the business ecosphere to force the creative process for new ways of thinking. And it is the change in perspective that (for me, anyway) is the catalyst for new ideas. I keep a pad (or iPhone or cocktail napkin or whatever) and write them down whenever they hit me.

So rather than looking at other bloggers (or, even worse, other photographers) my idea-stealing hunting ground when I am aiming for the fences is more likely to be Silicon Valley, or some loft in SoHo, or an article in Fast Company or WIRED. Look outside your immediate (and/or secondary) sphere for the most creative and novel ideas that you can apply to your business model.

Different business models are there, if you are willing to look for them. For example, how about something in the area of photography just about as far from money as you can possibly get: Documentary photography.


Case in Point

I few months ago I had lunch with Jamie Rose, a fellow photog in the DC area. It is one of those round-table things (actually, long Vietnamese soup trough things) where ideas, jokes and general BS are thrown around in equal measure.

After lunch I spent 15 minutes talking to Jamie about a relatively new project called Momenta Workshops. At Momenta, they don't just go out into a field of lavender in the South of France to shoot pretty pictures. They marry students with experienced, documentary photographers and point them at real situations -- including NGOs around the world -- to both test their mettle and learn in a real environment.

I was listening to Jamie, with her infectious enthusiasm, but I still wasn't really getting it. I was only then coming to terms with the power of flipping a market on its head and looking at your industry from a different direction. I could see it from my perspective, but not yet from Momenta's.

But in talking more with Jamie and others at Momenta, the power of their mission began to come more into focus. Think about it from the perspective of a documentary workshop with a far-flung NGO for a moment. You have four groups at play: The teaching photojournalist, the students, Momenta and the NGO itself. And rather than thinking of it as a straight, commercial model, try to think of it in terms of a symbiotic ecosystem.

Yes, there is money changing hands. But it is changing hands in different directions -- and for different reasons -- than is normal for documentary photography.

The students are the engine which makes it all happen. They want to learn, first-hand, from top-notch documentary photographers. And that is the economic catalyst which makes everything possible. They are leaning from the likes of Ami Vitale, Chris Usher and David Alan Harvey and others -- amazing first-hand resources.

The photographers, in turn, are being funded by the process of teaching what they have hard learned over decades of work to the potential next generation of documentary photographers. And doing so in an economically efficient way. The teaching photographers, in turn, use the money to fund future documentary projects.

Momenta, of course, shares in the income. This also funds them as working photographers. (Jamie, for example, shoots documentary, too). And it completes the cycle and allows the process to self-replicate. If successful, the engine continues to turn over by itself.

While I would like to think that I am pretty quick on the uptake on these nodal kinds of business models, I was missing the more important part. What are the NGOs getting out of it?

Says Momenta's Chris Anderson (confusingly, a completely different Chris Anderson than the WIRED editor referenced above):

We are doing what I call "industry building" by both training providers, and training as many organizations as possible see the value in visual media and will ultimately come back for more material over time.

One of my favorite questions that surprisingly gets asked all the time is, by "assigning journalists to work for NGOs and non-profits for free, you are taking jobs from working photographers."

It never fails to give me a hearty belly laugh because our aim, from the get-go, is to help create a vibrant and thriving industry. The average professional has no idea how many non-profits and NGOs there are who have zero idea of the value of visual communications. Worse than that, they have no idea about use contracts, fee structures, etc. Hell, I'd say about half of them have websites that look like they were done off legal tablet in 1996.

This is doubly true for the developing world. There is simply no awareness of the value of what it is our creative professionals can bring to the table as far as value in fundraising, identity building, and outreach awareness. 


In short, Chris and the others at Momenta are training both the photographers and the NGOs at the same time, and creating a mutually beneficial relationship that is potentially self-sustaining. They teach the photographers how to be better documentarians, at the same time raising the visual literacy of the NGOs and letting them see the value of well-executed documentary work about their organization.

What is most interesting to me is the peer-to-peer aspect of the education process. There is no Time Magazine or NGS editor involved. This is right from the source: People who need to be documentary journalists marrying up directly with organizations who need documentary journalism. Even if the latter does not yet know it.

This post is already insanely long (sorry) but Chris wrote back such a lengthy and impassioned response to my request for information that I highly suggest that you read it in full if you are interested in learning more. Please bear in mind that it was written shooter to shooter, and is a little rough around the edges.

But it rang so true that I thought it should be out there in it's entirety for people who might be interested in pursuing this path. His full response is available as a download here. And you can learn more about Momenta here.


Sorry About Your Sunday

If you are still reading, God bless ya and sorry for the length. I knew it would be long when I started writing, but I had no idea. Just a lot of ideas all trying to get out.

Granted, there are a lot of things to be depressed about in the current photography environment, when it comes to the business side. But more and more, I am starting to believe that as each of the old business model seems to evaporate, a new one emerges to take its place. Even if it may seem like you have to stand out in left field to see it.

Tuesday, April 14, 2009

Desert for Dessert


I'm back from GPP in Dubai, and (mostly) caught up on the work that always piles up at home when I am away. It was great meet new friends and to see many of the folks from last year again.

After going hard for six days straight, our treat once again was to head out into the desert to get the chance to shoot in an environment like no other.
__________


As a GPP Repeat Offender, I am now fortunate enough to have some contacts in-country. Or, rather, in-Emirates. Nigel and the guys in the Dubai Strobist group had hooked us up with Samir, who in turn hooked us up with Mostafa over at Sharjah TV, a national media outlet headquartered on the other side of the desert.

Next thing you know, we are all set to go into said desert to do a TV feature segment while shooting Omar and his falcon. I had always wanted to learn more about falconry -- right up to the point where Mostafa informed me that some of the birds can go for over a million dollars. Yet another thing that is beyond my tax bracket.

So we head off to the desert -- in a Jag, of course. I'd tell you what kind, but it was too cool to even have a model nameplate on it. It was much like my Scion XA, in the same way that Omar's falcon was much like my kid sister's parakeet.

Driving us was Hala, a supermodel masquerading as a super-producer for GPP. McNally was there, along with assistant Drew and fellow instructor Bobbi Lane. McNally, who was going to photograph Hala, learned his lesson from last year and brought along an Elinchrom Ranger. That's 1100 watt-seconds of battery-powered retinal burn -- enough to make any octabox happy in full desert sun.

Being reliably thick-headed, I went with my speedlights -- and ended up using only two. I can easily overpower the desert sun with a single speedlight -- if I get to choose the time. That's kind like waiting until Mike Tyson is 87 years old and showing up to beat the crap out of him. But as a strategy, it is very effective.


A Bird in the Hand

Fortunately, Bobbi knew all about falcons from an earlier stint at a birding facility, or falcon farm, or whatever you call it. So she was a big help in letting us know all of the stupid things not to do, which with me is a full-time job.

So we get to the shoot location and Omar pulls out just about the most gorgeous bird of prey you could imagine. Basically, a meat-shredding machine with wings and an attitude.

Our light is still six fingers from the horizon, so that tells us we have about a buck thirty, give or take, until sundown.


First step is to scout the angles and backgrounds. I use my hand to judge how bright the sun would be on Omar and his falcon, with a Sharjah TV cameraman in tow all the while. Bobbi, meanwhile, is already making photos of Omar in the late afternoon light.

I know that I cannot hope to compete against the sun with speedlights if I soften the light form the SB's, so I set up a quick crosslight around Omar where Bobbi is busy shooting available light. Normal process -- shutter on 250th, choose an aperture that underexposes just a tad, and power back up with hard crosslight. The ambient fill sets the shadows at a manageable level.


Only problem is, the color and surface quality of Omar's traditional Arab clothing (it is called a "kandura") is throwing back nuked gamma white from the hard strobes. I can put a dot in it in post, but mostly I am just biding my time here waiting for sunset.

The important thing is that I look like I am making good pictures. With the cameras rolling, this looks a lot better than wondering scratching my butt and around looking for camel truffles, right?

As the sun gets lower, my options start to improve. We find the spot where we will shoot Omar using the sunset as a backdrop.


The sunset looks good dropped down a stop or two, so we grab a couple of sillos as we wait. Just because the light is not flash-friendly, there's no need to waste the time not shooting photos.

I mean, seriously, how often are you in the desert with a man in traditional Arab dress and a falcon?

Next year we are going out as a group to do an overnight at one of the desert encampments, so we can actually enjoy the sunset and the cool night air that follows. When you are shooting, it all happens so fast you do not get a chance to savor it.


As the light levels start to drop, I kept my two-hard-light setup (just bare flashes on stands) and did a little sidelight / front fill on Omar. The backdrop is the still-live sunset, and all of the subject light comes from flash. Key is off to the far right and gives shape and lighting direction.

The fill is from a stand right next to the camera, and fills the shadows to control the contrast range without adding any new direction to the lighting. This on-axis fill, combined with a hard key gives a cool, 1950's kinda look which I am currently digging. You can see the fill shadow just to the camera left side of Omar.


And since we are using bare light, you can really get that key light far away, too. This gives very even lighting over a large area, which makes it almost look as if it is a soundstage with a backdrop.

One of the disadvantages of working with speedlights is you tend to have to work close. Makes for nice light, but it falls off fast. So you end up working with small framing areas. Not so when you can back those babies up.


Low Ambient = Easy Umbrella Light

As soon as the sun disappears, I know from last year that the light levels will start dropping faster than stock prices did last October. And as the ambient drops, the small lights become powerful enough to use with modifiers at reasonable power settings. This is important because the light won't last long so you don't wanna be waiting on the recycle.

We put a Westcott double-fold on one of the SB-800s. That flash will become the key light. The second is fitted with an Orbis ring flash adapter. That flash will become the on-axis fill.

Working quickly, I grab an exposure for the darkening sky behind Omar. It is dark enough now to where I can use an aperture to which my flash can easily bring up the subject.


Since I plan to have the key light 3-4 feet over Omar's head, I grab a quick shot of the sand, lit by the key light from the same distance, to make sure my flash is set at an appropriate power setting. If this is off, I can quickly correct either by moving my aperture and compensating for the background by moving the shutter in the opposite direction. Or I can just vary the power on the flash before we put it up in the air. This is much quicker than doing the testing with the light in the final position.


Here's the setup shot, thanks to Bobbi. The final picture is worth the trouble, but I am still washing fine, desert sand out of my butt. (Come to think of it, If Carson Kressley asks, I am exfoliating.)

We are lucky enough to have Drew, Joe's assistant, acting not as a voice-activated light stand, but rather a VAB: A voice-activated boom. The speedlights and compact stands are light, and can be used this way for reasonable amounts of time without killing an assistant. But no worries - Drew is not my assistant, so there is really no long-term downside if anything bad happens.


The Result


By dropping the light in right on top of Omar, lots of cool things start to happen. From a direction standpoint, you get fairly dramatic light on his face, which adds a nice mood. And the light is soft enough so that it wraps well, too. (Click the pic for bigger version.)

But from a distance standpoint it is also doing good stuff. Omar's face is fully lit by the close-in source, but his white kandura falls off a little as it travels away from the key light. This helps to control the tones on the bright white material in a way that we could not accomplish if lighting from a distance.

Also, as the light is right over Omar, the sand falls off nicely as it approaches the near foreground. This is a problem that you have to deal with when you light frontally. If you will remember last year, Joe did this by gobo'ing the bottom of the umbrella.

That top light is going to leave some eye socket shadows, and it will get pretty dark as you travel down the kandura. That is where the Orbis comes in. I use it not as a main, but to provide directionless, on-axis fill.

No magic ratio to report, either. Given that you have set your exposure for the key, you simply dial in the power on the Orbis fill to taste. You can see what the fill is doing in places such as Omar's eye sockets and the kandura under his arm.

As for the light, I love the combined effect of top soft light and on-axis fill. Omar gets strong, moody light and I can fill his eye sockets as much or little as I want. The kandura moves to a creamy white, with texture and detail everywhere. And the pool of light created in the sand again makes the scene almost look like it were done against a painted backdrop.


Waiting for the Light

With low-power speedlights, for some looks you have to wait for the ambient to come to you. And when it gets there it will be moving fast, so work out everything you can in your mind as you are waiting for the levels to get manageable.

Honestly, the whole evening comes down to just a few of minutes. And you do not want to mess that time slot up when it arrives. The earlier, hard light stuff is mostly a combination of experimenting for something I might want to do at a later date and getting Omar comfy with the process of being photographed.

Before the sun went down, Bobbi kept asking if I needed her to back out and stop shooting. But really, having her there to work around (and keep Omar occupied while I planned and thought) was a huge help. Much better than having Omar (and the TV guy) stand around and watch me walk around with that WhatTheHeckAmIGonnaDoHere look on my face.

After we wrapped up, collecting gear in the dark, Hala drove us all to a very nice restaurant, where Drew and I were promptly kicked out for wearing shorts. With sand leaking out.

It turned out to be a blessing in disguise. "Plan B" was a wonderful, casual Arab restaurant where the food absolutely could not have been better. And sand-leaking photographers in shorts were welcome, too.

Monday, April 13, 2009

One Light, One Kill...

Okay, so imagine you are Zack "OneLight" Arias (that's him above, with the cheeky grin propping up the Cosmopolitan) and you are attending your first GPP in Dubai as an instructor. You hear it falls to the new guy to take the group portrait.

That "new guy" thing is a crock, of course. But I'm betting Zack doesn't know this. I did it last year in 129-degree heat, so this year I get to chill. (Oh, and I did it available light...)

No pressure -- you are just gonna light a couple dozen people in a very dark theatre is all. Oh yeah, but one of them happens to be Joe '57-Speedlight' McNally. No pressure there. And the pucker factor isn't lessened any by instructor Chris Hurtt and yours truly constantly mentioning how daaaark that big theatre is, either. Plus a few well-timed flash pops on his PW frequency just to keep him on his toes.

So what does Zack do? He steps up to the plate, points to the left centerfield fence and takes the first pitch downtown: He lit the entire group with one SB-25 speedlight and a, uh, Gary Fong Lightsphere. How, you might ask?

Like this.

(Insanely high ISO photo by someone who picked up my camera at the Vista bar one night in Dubai.)

-30-

Thursday, April 9, 2009

Yet Another One of Those "Nude Water Buffalo" Epic Fashion Shoot Videos


Certifiably insane UK shooter Drew Gardner, who has more imagination in his left pinky fingernail than I do in my whole body, released a full-length, behind-the-scenes DVD in the UK last month. Thanks to MPEX, it is now available as an import in the USA.

If you are one of those "dream big" type of photographers (or want to see just what it takes to make these kinds of shots) hit the jump for more info -- including a trailer.
__________

Long story short, it is a soup-to-nuts look at two fairly complex shoots in his forest fashion/fantasy series. This is big-light stuff (Elinchrom Rangers) on medium format digital.

Here is a short promo clip:


The first of the two shoots on the video are the badger shot excerpted above. The second is a shoot with a model on a water buffalo that resulted in the stunning photo seen on the cover (NSFW-ish) of the DVD.

Nothing is held back. Prep, shooting, lighting, dealing with problems, post production -- it's all there.

FWIW, Drew was teaching a class on the "big idea" kind of shoot last week in Dubai, except for it was scheduled at the same time as a rare, driving rainstorm in the normally arid city.

That did not stop him dragging the 1200 WS (sponsor-owned) Profoto 7B's (along with his mortified class) out into the rain to shoot, either. They drew the short straw on the weather, and ended up airing a montage of rain shots that was the feel-good hit of the closing night slideshow.

Equal parts madness and brilliance -- just like Drew's video. It is available at The Flash Centre in the UK for £20.00, and at MPEX for $24.99, respectively.
__________

NOTE: As mentioned above, the video a bit NSFW-ish with a decent amount of "side nakedness" in the second shoot -- and a few moments of "front nakedness," too. I checked very carefully because I am a thorough kind of guy. The cover photo gives you a good idea of the extent of most of it. And to be clear, Drew remains fully clothed throughout.

DIY Remote Trigger Debuts

Are you too geeky for PocketWizards?

Did you win your 8th grade science fair?

Do you know what an "opto-isolator" is?

Then you are a prime candidate for SPOT, the Strobist Project Open-source Trigger. Started quite a ways back, it has finally taken form -- along with a pretty cool case, as seen in this photo.

Features, specs and link after the jump.
__________


Here it is with no clothes.

Mad props to Till Seyfarth and all involved in this very impressive project. Next up, they will be showing you how to build a home-brew SB-800 for just $56.

(I wish....)


Specs:

• Synchs at up to 1/250th of a second
• Approximately 30-meter range
• Triggers through walls and windows
• 4 groups of adjustable flashes
• Remote power level adjustment for "old" flashes (e.g. SB-24)
• Cost of parts ~ €50
• Open source software


(Full info, schematics, wiki, source code, etc., here.)

Wednesday, April 8, 2009

James Rubio: Backlit Night Portrait

What do you do when you have a coupla minutes to make a quick portrait -- and the bright part of your frame calls for a shutter speed of a half-second?

You throw your one light into the back of the frame is what you do. At least that's what Hilo, Hawaii-based photographer James Rubio did in this cool wedding portrait.

Hit the jump for a quick walk-thru -- plus some tips for shooting with flash in this kind of (un)available light.
__________


Work Fast

He didn't have a whole lot of time to think about it, either.

"All these shots were done within 4 minutes from idea to completion since the Bride/Groom had to get to the reception," Rubio said. "It was very rushed and the shot almost did not happen."

That triangle structure would be pretty hard to resist as a backdrop. I probably would have gone for it, too. But the light was pretty much nonexistent, and James' series of photos shows exactly how he worked through the problem within just a few minutes.


The first try was to use a flashlight as a main light. There's not a lot of sky there, but the flashlight is not very powerful either. So they are easy to balance. Problem is, you have two continuous light sources. How do you balance that?

Remember, for (roughly) each third you add or subtract in distance, you change the brightness of the flashlight by a stop. That is to say, if your flashlight is 15 feet away and you need an extra stop out of it to balance, walk it forward to a distance of about 10 feet. If it is too bright, you'd walk it away to a distance of 22 (or so) feet to bleed that stop of light.

Yeah, I know it does not work out to exactly the 1.414-square-root-of-two formula that the pocket protector types would prefer, but a third is very easy both to remember and to calculate.

I digress.

So, while James could balance that flashlight and sky (and turn the sky a beautiful blue by balancing for the tungsten flashlight) he lost the beauty of the structure as a backdrop.

Okay, show of hands -- how may times has this happened to you:

You spend so much energy sweating the technicals, that you just keep working something like that flashlight shot and make a mediocre shot a little better as your grand reward.

Then, when you get home something really cool like the backlight idea hits you retroactively.

"D'Oh! Sonofa.."

Right off the bat, when you get a boatload of dark thrown at you, think backlight first. You can always add light to the front with a second strobe if you have it. But the first strobe will usually do a lot more for you in the depth and contrast department. And that department is in the back of the store.


Thinking on His Feet

Better idea: Stick that bare, wide-beamed flash way back in there and use it to light the couple and the structure.

Seriously, if I am using one flash, as often as not I'll throw it in as a back light.

James did exactly what I would have done while positioning the light -- one quick grab shot at his expected working aperture to gauge the intensity from the position of the light. No need to even focus -- this is just to see where the light will reach and what the exposure will look like. If it is way off, easy to adjust the light at this point.


So, by the time he gets back to his shooting position, the flash exposure is already close enough for horse shoes and hand grenades.

At that point, the only thing to work out is the shutter speed to get some sky. Remember, the ambient sky is going to be brighter (er, less dark) than the area under the shelter. So when you add light to under the shelter you have a nice light/dark tension to balance against.

James stopped stretching at half a sec, but I would have had no problem going further. Remember, you got almost no ambient under that teepee thing, so the flash is gonna freeze your subject even at a long shutter speed. If you accidentally juke the camera a little during a sec (or two) exposure, the worst that can happen is that your stick-hut vs. sky outline might get a little sqwooshy. That could look pretty cool, actually.

If your flash is doing the freezing, always keep going on that shutter to see what it'll do for you. (I'm very comfy going way into the Hail Mary range, myself.)


Where is the Fill Coming From?

The sand, for one thing. Not only does it wrap some nice, soft "uplight," but it warms it up, too. Ditto the structure itself -- you can see what the light reflecting of of the wood is doing on the edges of both subjects. Nice.

One thing I might do is to let the area directly behind them around the flash stay dark in post. It'll still hold because of the rim light, and you will lose the noise that is starting to happen back there.


But I Never Get Purple Skies...

You probably don't hang out in 1/2-second light at near dark, then. You can get some pretty funky colors in deep twilight. But if you don't, the best advice I can give for a "sunset in a bottle" is to shoot on the FL white balance.

This adds 30CC's of magenta into the mix, which will amp any sunset -- even a nonexistent one. Just remember to green the flash with an FL gel, and maybe an added 1/4 CTO for warmth.


Where to Aim the Flash?

Personal choice. James chose to let the light wrap through a little, giving those nice burst rays. But you could also rim light them from directly behind.

If you are gonna rim light them, I'd put it behind the bride. Why? Because the groom is basically an accessory on the wedding importance scale. (Seriously, who are we kidding here, guys...)

But if you want to make sure that flash is right behind her, one easy tip is to rotate the flash head 180 degrees and use the ready light to tell you for sure that you are hiding the flash behind the subject.


For the Marriage-Minded in Hawaii...

If you are thinking of getting hitched in the islands, check out James' portfolio. He's got some great stuff there -- and he is not afraid of the dark, either.

Sunday, April 5, 2009

Three Cheers for Three Years

Woot! Strobist turns three today!

Strobist's first post was written in late February of 2006, but did not go live until April 6th. That means we are hopefully out of the terrible twos, and well on our way to potty training.

While the goal of the site has always been to learn about lighting (and have fun doing it) other stuff happens, too. And of the many cool things that stem from all of this I wanted to take a moment today to talk about one of my favorites.

Hit the jump for more on that.
__________


Credit Where Credit is Due

A small but growing portion of the revenues generated by this site are routed through Kiva.org, a micro-lending organization that works with entrepreneurs in developing countries. Some of you long-timers will note that I have mentioned these guys before, back in November of 2007.

As a group, we have so far participated in the funding of 37 loans, in amounts from $25 to $250 per loan. There is no interest collected on the loans other than the good feeling of helping people who are working hard to make better lives for themselves and their families. (Which is a heckuva a lot better than the stock and bond markets have done lately.)


So, where is it going? Afghanistan, Benin, Cambodia, Ghana, Lebanon, Mexico, Moldova, Nicaragua, Nigeria, Pakistan, Paraguay, Peru, Tajikistan, Tanzania, Togo, Uganda and Viet Nam, so far.

What is especially cool is that there are readers in each of those countries who are logging on to learn more about light. Okay, in the case of Tajikistan, one reader. But still...


Just above the country list is Muhammad Sediq Omar, whom you helped to expand his farm in Afghanistan. Beneath him is Yahaira San Juanita Rios Hernandez, who improved her restaurant in Mexico as a result of your learning about snoots and on-axis fill.

(BTW, is that a nice frame of Muhammad, or what? Lotsa neat compositional things happening in there.)

In a climate of risk-loving investment banks that managed to lose more money than it is possible for most humans to imagine last year, it is important to note that we have yet to lose a single penny in default on any of our micro-loans.

This downstream effect makes me feel great every time I think about it. A big thanks to both the readers and the advertisers who continue to make it possible.

If you are interested in participating in micro loans on your own, you can find out more about Kiva here, including a documentary on them from Frontline that was my first introduction to them.
__________


Thanks, also, to the readers who have translated (and are translating) Lighting 101 into PDFs in many different languages. As a result of your work, many more people will be exposed to basic lighting education. You have no idea how appreciative I am -- and they are. BTW, Polish and Hungarian are up next.

As for year four, we have a few fun things in the on-deck circle. But in truth this is largely an exercise in serendipity, and I'll be as surprised as you to see where this strange trip takes us in another year.


Many thanks,
DH

Share

Twitter Delicious Facebook Digg Stumbleupon Favorites More