Tuesday, April 29, 2008

How To: Sync a Canon G9 at 1/2500th of a Sec

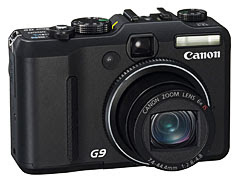
The Canon G9 is my knock-around point-and-shoot camera. It has 12.1MP, a fast lens, does video and actually syncs well above its nominal sync speed of 1/500th of a sec -- if you know how to do it.

There are a couple ways to pull this off, and the cheapest way is actually the best.

The first thing you have to know if you are going to sync the G9 (or G7) at high speeds is that the camera's onboard flash has to be turned off. Ironic, I know. But the engineers at Canon programmed the flash to sync at 1/500, so when the flash is on that is where your shutter is gonna max out.

So, now that we have turned off the flash, we'll be synching an off-camera flash via the oh-so-handy hot shoe up on top of the camera. The easy way is to use a Pocket Wizard, which works fine but will in practice limit you to a max of about 1/1000th of a second.

This is because of the very minor lag times introduced by the circuitry in the PW itself. This is even more of a hindrance with some of the other wireless remotes, to the point of not being useful at all for some other wireless trigger units.

What you need for really high-speed sync is a simple, dumb wire. This will mean you are limited only by the shutter speed and the power level of the flash.

Why the power level? Because power level (for a speedlight) corresponds to the actual duration of the flash pulse itself. A full-power flash lasts about 1/1000th of a sec. And no matter what synching method you use, you will not squeeze that flash pulse into a 1/2500th of a second's time.

So, first understand that you can expect a full-power manual flash to be fully deployed up to about 1/1000th of a sec. A half-power flash will buy you up to about 1/2000th of a sec. And beyond that, you'll need to limit yourself to a 1/4 power flash, max.

You may think you are synching a full-power flash at 1/2500th, but you are not getting all of it. Just mind the math and you'll be fine.

So, how do we squeeze all of this flash through, without a PW? We use a dumb PC cord. For the camera, you'll need a PC adapter, such as a Nikon AS-15, which converts a hot shoe to a PC cord. Then, you are all set, just as if your camera had a PC jack.

Connect the PC cord to the flash, either by straight connection or via a hot shoe adapter on the other end, and fire away. This will buy you the full synch capability of the G9, but it seems a little cumbersome.

Fortunately, you can bypass all of these steps with a simple, neutered Nikon SC-17 cord. Which is what we will be learning about in the next post.

Monday, April 28, 2008

Greetings from the Land of Cranes

Finally over my jet lag in Dubai, where the temperature is currently 167 degrees. Although, that's fahrenheit, so that's not as bad as it sounds. The humidity is 132% and the breeze is zero mph. Or less.

But it is totally worth it, as I have been hanging out with the other intructors and learning loads about some really cool stuff without having to pay. More pix and some cool links after the jump.

Dubai is perpetually under rapid construction, with three new skyscrapers popping up in in my field of view during the time it took me to write this sentence. I have met some wonderful folks, and am very much looking forward to meeting those of you who have signed on for the next five full days (gulp) of seminars.

Among the cool people I have gotten a chance to meet for the first time is David Nightingale, of the absolutely lovely site, "Chromasia". As you can see here, David will do whatever it takes to get the photo, even if it means steadying his lens with a huge tripod and his hand with a "Stella" beer...

Seriously, go right now and check out Chromasia. You can see a few of his contruction shots here, here, here and here.

Here is Burj Al-Arab, the totally over-the-top hotel as seen from our hotel's roof. Our hotel is perfectly fine, of course. Until you compare it with the Burj Al-Arab, which is a "seven-star hotel" which is, like, three more starts than anyone else has.

If you have a chance, take a few minutes and explore Chromasia. I am loving David's stuff and wanting to know more about HDR now
.

Sunday, April 27, 2008

Lighting 102: 6.1 - Gelling for Fluorescent

On their face, gels are a pretty simple concept. You stick a colored piece of plastic in front of your flash and it alters the color of the light accordingly. But so much is possible from just this simple trick.

In this, the first of a four-part section on using gels, we'll be looking at their most common use -- converting the color of your flash's light to the color of the ambient light in which you are shooting. This is called color balancing.

We first visited the idea of color balancing in Lighting 101 where the two most important gels were discussed. The "window green," (or "plus green") gel converts the light from a flash to nominally match that of a fluorescent light.

A "CTO" gel similarly converts your flash's light to match the light from an incandescent (i.e., tungsten) bulb. But for today, we'll be talking about just the little green gel. It's certainly complicated enough to merit its own post, as you'll soon see.

While the fluorescent conversion used to be a simple process, this is no longer the case. But for the sake of discussion, let's assume that it still is. At least for the moment.

Traditional fluorescent light is green. About 30 color correction (CC) units of green, to be exact. By placing a 30cc window green gel on our flash, you make the flash's light match that of a traditional fluorescent environment.

If our ambient is green, and your flash is green, you're okay. Because you can correct for all of this similarly green light by setting your camera on the fluorescent light balance, and all is white again. This is because the FL white balance setting just shifts everything over 33 units of magenta. This is what balances out the green.

Take, for example, this shot I made a couple of weeks ago at Western Kentucky University, while teaching the PJ students there.


(Sorry, Jeanie. You were my most recent example...)

This is a fluorescent-lit studio. In this shot I lit Jeanie with an SB-800 in an umbrella and the flash was gelled with a window green gel. My shutter speed was opened up to let the background of the photo burn in to make a decent exposure.

But in addition, the green gel, combined with the camera on fluorescent setting, brings the colors up pretty close to correct. None of that sickly-green cast that happens when you forget to gel your flash and the fluorescents just come in the ugly green way they really look.

Pretty simple technique, right?

But in practice, there are two little gremlins that usually come into play. First, rooms can often have a mix of fluorescent and daylight. Maybe even a little tungsten thrown in for good measure.

In addition to that, fluorescent lights are now all over the map, color-wise. In reality, they can now actually be warmer than tungsten.

Let's take these problems one-by one.

First, on the multi light sources, sorry to say that you have to choose a source color and go with it. But this can be better than it sounds. My first trick, if there is a lot of daylight bouncing around in a fluorescent room, is to ask if I can turn off the overhead lights while I shoot.

If the daylight is enough to cause light balancing issues, there is usually more than enough to work by with the fluorescents turned off. Then you do not balance at all -- just shoot in the daylight with normal flash.

If that solution is not available, I will close the blinds or drapes to minimize the encroaching daylight. (This daylight comes through as magenta when you are set on fluorescent white balance.) One other thing you can do to help are to work on the opposite side of the room as the windows, to minimize the daylight contamination.

If you have a mix of fluorescent, daylight and tungsten, do everything you can to lose the fluorescent light. Then shoot on daylight with no color correction gel on your flash. The daylight and tungsten will mix a lot prettier than any green/other combo will.

(And if all else fails, hope it runs in black and white...)
____________


And as we said earlier, fluorescents are no longer just 30cc's of green. And for us photogs, that really sucks.

There is no good solution here. The important thing is that you have to be able to counteract your conversion gel with a white balance camera setting. That is to say that, even if your fluorescent light is not a perfect green, you pretty much have to live with the difference. Just green your flash and neutralize it (the flash) with the FL white balance setting. Sometimes the ambient will go a little weird. But it is better than not gelling at all.

For those super warm fluorescents, the ones close to tungsten, I will usually just treat them as tungstens. I'll CTO the flash, and set the white balance on the camera to tungsten. Again, not perfect. But better than nothing. And the flash-lit part will look good.

How can you tell where the fluorescents are, color-wise? The easiest was is to shoot an ambient-only shot and chimp your screen. If it looks more green, gel and balance for fluorescent. If it looks more orange, treat it as a tungsten. This is also a good approach for working in vapor-based light (sodium, mercury, etc.).

Your flash-lit subject (usually the most important part of your frame) will be okay. The ambient burn-in part may be a little off. But that's the price we now have to pay for having 57 varieties of fluorescent bulb colors.

And as for dealing with tungsten lights, we'll be hitting that in the next installment of Lighting 102.


NEXT: L102 6.2 - Geling for Tungsten

Thursday, April 24, 2008

New at Amazon: Minimalist Lighting, by Kirk Tuck

Minimalist Lighting: Professional Techniques for Location Photography is a new book by Austin-based commercial photographer (and long-time Strobist reader) Kirk Tuck.

For those of you looking to grow the small-light thing into a practice of shooting for editorial, corporate and advertising clients, Kirk's book serves as a road map in his effort to show you his lighting gear choices, philosophy and techniques.

The book begins by chronicling Kirk's own transition from Big Lights to using small flashes for his assignments. From there it grows into a full discussion of specific small flash gear and demonstrated lighting styles.

Minimalist Lighting is not a book on theory. It is nuts-and-bolts book with lots of examples, setup shots and lighting diagrams. Kirk also gets into DIY, talking about things like lighting with shower curtains, making your own high-capacity battery packs and waterproofing flashes with baggies.

He covers all the bases on various synching options, stands, clamps, light mods -- and a section on wireless TTL. There was even a piece on how to secure a flash to a wall using one of those little AS-19 flash feet and some tape. (I had never thought of that, actually.)

There are lots of books on light and lighting. But to my knowledge, this is the first one that specifically addresses so much of what you can do with small flashes while shooting in a corporate/editorial style. It's all about learning to use smaller-power light sources to "go with the flow" of the ambient of a scene, rather than just nuking the whole thing with a gazillion watt-seconds.

If your thing is shooting skateboarders at twilight with their hair engulfed in flames, you'll probably want to wait for the next train. Minimalist Lighting is not about cutting-edge, push-the-envelope visual stuff. Kirk's style is clean an personal, with a corporate look that keeps him busy as a professional shooter in Texas.

But if you are looking for a book to show you exactly how one man is making it happen, and to fill in the gaps in your own skills, Kirk will be happy to show you his way. This is a book for photographers who want to learn how to light clean and corporate, without buying (or hauling around) a ton of lighting gear.

Minimalist Lighting: Professional Techniques for Location Photography, is published by Amherst Media. It lists for $34.95, but will be selling on Amazon for $23.07. There is also an additional 5% pre-order discount if you purchase before the book ships, which is estimated to be on May 1st.

Kirk's Website:
KirkTuck.com

Wednesday, April 23, 2008

Marry Me, Katharine Gammon

Wired Magazine, my favorite mag for just about everything -- especially photography -- blogged about this month's cover story and included lighting diagrams from the photographer. They were done Joe McNally style, on airline cocktail napkins by photographer Brent Humphreys.

Please, Katharine, let this start happening every month. I will link to you forever and ever, 'till death do us part.

-30-

Tuesday, April 22, 2008

On Assignment: Controlling Daylight, Pt. 1

Last week, I photographed Jessie Newburn, a local blogger and social networking maven. I shot in the middle of the afternoon to use this portrait as an example of how to light an outdoor portrait with a couple of small flashes on a sunny day.

(First step: Cheat.)

Being able to create a speedlight-lit photo like this any day, rain or shine, is a pretty straightforward process, if you take it one step at at time.


Tame the Sun, Then Use It

The first thing to do when choosing a location for a lit outdoor portrait on a sunny afternoon is to get rid of the sun. The Big Shots use huge gobos to shield their subjects from the sun. But those cost big bucks and you have to cart them around. My solution, find some shade.

Being in the northern hemisphere, for me that means finding shade on the north sides of buildings. So that is where I looked when selecting a background for this shot.

As we have seen before, shade is your friend for outdoor lighting. It kills the direct sunlight, and leaves you with diffuse light that is several stops darker. The lower quantity and more diffuse quality of the light both work for you when it comes to combining the ambient with flash.


Looking at this wide shot of the shooting location, you can see how a shade environment helps the cause greatly. We shot under an embankment that leads up to a town fountain.

Unless you live at the equator and you are shooting at noon on one of the equinoxes, you can always from a shady building side to shoot against.


Here's a quick available light test shot, taken at 1/160th of a sec at f/5.0 at ISO 200. I went with a normal, moderately high sync speed that just about any camera could hit. (No special camera hacks today.) Remember, if you can knock down the ambient, you do not need insane sync speeds to do this kind of thing in the middle of the afternoon.

What we are going to do is to use this shady area ambient light as fill light, and then use flash to create the main light. So, as you might be able to guess, the next thing I do is to knock that aperture down however many stops I want the fill light to be below the main light.

This is your choice, based on how much drama you want to add into your photo. I took it down from f/5.0 to f/11, which is two and one-third stops. This makes for a nice, contrasty lighting ratio for some real texture.


You can now see the ambient-light-only photo, shot at f/11 at 1/160th at ISO 200, which shows you what my photo will look like before the flash is added. I consider this process as setting up a "baseline" exposure for the photo. Whatever the flash doesn't illuminate will look like this.

Now, it's just a matter of lighting Jessie. Bringing an SB-800 in close, shooting at 1/2 power in a shoot-through umbrella, I bring her back up to a nice exposure -- with a much better quality of directional light. This is further enhanced with a 1/4 CTO warming gel on the flash, warming her but leaving the rest of the environment cool, for nice color contrast.

(BTW, we had taken a little break from the Lighting 102 course, but we'll be diving back into that very soon -- and the "gels" section is next.)

So we now have a dropped-down ambient and a warm-lit Jessie, which makes a pretty nice photo. But if you have an extra flash laying around, you can use it to add texture and dimension to the background of your photo.

In this case, I shot it at a hard angle against that back wall to splash a little (ungelled) light back there and bring out the wall's texture. Remember, if you are using your ambient as a fill light, at a ratio you choose, you can use your second light to add depth and texture to your environment.


As you can see from this pullback shot of the scene above, I raked the flash across the back wall. In this frame, it is on the right. It was set at 1/8 power and I was using a Honl Shorty Snoot to control the spill. The fact that there is no gel on the back flash allows us a little front-to-back color contrast in the frame, too.

(Click here to see it bigger. FYI, I was shooting from the left side of this frame, towards the wall on the right side.)


Looking at the top shot again, hopefully you can now see all of these elements coming together in a way that allows you to recreate this style in any full-shade environment. Sometimes when you look at a picture with three or four lighting elements going on at the same time, the reverse engineering can be difficult.


Again, the lighting elements being used are:

• The cool, ambient shade light, dropped 2 1/3 stops, becomes the fill light -- smooth and dark for a baseline exposure.
• Then we build Jessie back up with soft, directional umbrella light.
• We warm up the main light for nice skin tones and color contrast.
• We rake a little ungelled hard light across the background, for color contrast, texture and depth.


And while a high sync speed always helps, this shot shows us that you Canon 5D (1/200th sync) shooters can absolutely do this kind of stuff. And for those with a full 1/250th sync, the upshot is that you can shoot at a faster shutter speed, which means a more open aperture to get the same ambient exposure. Which in turn means that you can use the flash at lower power for faster recycling/shooting speeds.

Example: Instead of 1/160th at f/11 at 1/2 power on the flash, you can shoot at 1/250th of a sec, at f/9, and drop the flash power level down to 1/2 power -2/3 stop. (Or, 1/4 power +1/3 stop.)

Same look, faster recycling.

I shot a second look of Jessie at this some location. We'll hit this shoot again for a "Part 2" post soon, and also take a look at how to tame those umbrella and light stands, which pretty much turn to sails on a windy day.


NEXT: Controlling Daylight, Pt. 2

Welcome, USA Today Readers

If you are dropping by after reading the story in Wednesday's USA Today, we're glad to have you.

Fair warning: You may at first be a little overwhelmed with some of the current lighting info on Strobist.

Don't worry, that's cool. We were all beginners at some point, too. To help make some sense of it all, read our Welcome Page to see what we are all about. Then get ready to hit the Lighting 101 section if you want to start from square one.

For the regulars, hit the "Keep Reading" link for a couple of videos from the USAT interview, one of which is a sort-of lighting demo. And kudos to USAT staff photographer H. Darr Beiser, who creatively avoided unnecessary work by making me light myself...


Videos from the USA Today Interview

They interviewed me at the local library, where I frequently go to work. I am there so often, it is kinda like the "Norm" thing, from Cheers:


When Darr went to take the photo for the paper, he had me light myself on the spot, and then video'd me while I did it:


Many thanks to both Jeff and Darr -- but next time, please use Adobe After Effects to skinny me up some, will ya?

Monday, April 21, 2008

RadioPopper-Palooza

The long-awaited CLS-eTTL extending RadioPopper P1s are starting to arrive to people who were early on the shipping list. I was able to get my mitts on a set, and spent last Friday evening at a local lighting meetup trying to get them to fail.

Keep reading for an unboxing video, an installation video and a torture test from our meetup.
__________


Zeke, over at nicephotomag.com, was so excited to get his P1's he fired up the video camera for the unboxing. He posted this on his site:


There is a little bit of a learning curve to installation and use of the P1s. It's not rocket science, but it is a little more involved than slapping on a pair of Pocket Wizards. Jared Platt has created an installation video, which has been posted to the RadioPopper site. You can watch in a separate window here.

__________


But How Well Do They Work?

I got to play with them for about an hour Friday night in a studio in Baltimore, where a bunch of locals were having a Strobist lighting meetup. Don "Wizwow" Giannatti was on hand, in advance of his East Coast lighting seminar.

The bottom line for the RadioPoppers: In a normal, large-room working environment, I could not get them to fail.

Full length of the 60-foot room? Fine.

No line of sight? No problem.

Firing with a TTL flash in an adjacent room for a little accent? Every time.

Once you get the hang of using them, it is basically just like using eTTL, or iTTL/CLS. But you no longer have the 33-feet, line-of-sight, 30-degree angle limitations. As with out in Phoenix, we tried some hi-speed FP sync stuff, too. Worked like a charm.


In fact, I had to leave the building to drive them to failure. Actually, to me more accurate, they were intermittent in this situation.

In the photo above, I had two SB-800s bouncing off of the third-floor studio walls in TTL mode with RPs. Firing my D300 three floors down from the middle of the Light Rail tracks on Howard Street at night, (which is just so stupid on so many levels) I got about a 50% firing rate. But the studio building is an old, brick. typical inner-city structure. This was a bit of a torture test, and pushed the limits of what they could do.

In normal working situations -- outside shooting, large interior room situations, etc. -- they perform very well. I think many people are really going to be stretching what they can do with wireless TTL.

One downside I note is that you have to remove and replace two screws to change the (AA) battery. This will be a bit of a pain for some, I'd think. But I am told the things sip juice pretty economically, so this will not be something you'd be doing halfway through a wedding.

The screws are metal-into-plastic. So use a little care and do not go Incredible Hulk on them so as not to strip the threads. This, BTW, was because the cases were off-the-shelf, which got around the need for the very expensive design molds that can add six digits and much time to the prototyping and production models.

One other thing you'll have to learn as a result of the RadioPoppers that has nothing to do with the RPs themselves. When shooting TTL from a great distance, you may have to dial down the light on your subject if it is a very small part of the compositional frame. This is a limitation of the TTL metering of the cameras themselves, and each system will behave a little differently. But I found it was very easy to dial in the right amount of flash from the shooting position via the CLS system on my D300.

I am not the only person out there playing with the RPs. Matt "Who Needs Instruction Manuals" Adcock jumped right in with them at a wedding shoot. Also, San Francisco-based photog Ed Pignol is playing with them here.

As you guys know, I am not much of a wireless TTL guy. But you CLS'ers and eTTL'ers will hanceforth have lots more capability built into your flash systems with the RPs. Congrats to Kevin King for all of the technical and economic hurdles he bested in getting a very complicated and sophisticated product to market.
_________

Read more:

:: RadioPopper.com ::
:: Brand New (Official) RadioPopper Flickr Group ::

Saturday, April 19, 2008

By Request: Brendan O'Shea's Post Production

Several people asked for some details on Brendan O'Shea's Photoshop work on the cool band photo featured on Friday. Brendan was kind enough to check in and supply the added info:


Says Brendan:

"I got quite a shock this morning when I checked my inbox. A few people have expressed interest in the post production, although it never works for me if the lighting's not a particular way.

The front light is a shoot through umbrella high enough to light everyone in the group. The backlighting is two more strobes, usually just outside the frame. Once again I go to considerable effort to make sure everyone is lit. This involves juggling positions and placement of subjects before I can take any shots at all. If even one person in the group is unlit, it's not going to work.

In the shot above, there was simply no way to light everyone and have the strobes out of shot due to the narrowness of the alley, so I decided I would hide the right hand strobe in a doorway as best I could, and erase it later if it was too obtrusive. This lane was a through road in the city with traffic, so experimentation wasn't much of an option.
As for post, in this case everything was done in Photoshop, but it was nearly there out of the camera.

Here's what I did with this shot: Cloned out everything that didn't help the shot (cigarette butts, onlookers in the background if there were any, lighting equipment) then I cranked up the Radius on the Unsharp Mask, but kept the amount fairly low. Sometimes it works, sometimes it doesn't. Really depends on the lighting.

Duplicated that layer, desaturated that new layer and changed the mode to overlay. Changed the opacity until it looked OK. Then I burnt in some highlights on her hair and pants to make them appear shinier. And that's it. Ten minutes tops.

I agree wholeheartedly with those who suggested a less Photoshopped look. I actually prefer the unretouched version (I'll put it up on flick as soon as I can) but when the average consumer can come up with some pretty great photos, I find I have to go a few steps further to give them a reason to hire me. Even if it means crossing the 'good taste' line.
I have no doubt shots like these will become this decade's version of mullets and platform shoes, but for now, and for a really good laugh in thirty years time, they're a lot of fun."
___________

Thanks much for the info, Brendan!

Thursday, April 17, 2008

Like Martin, Only More Spartan

After seeing the Martin Prihoda Delirium video recently, fellow west-coaster Andrew Jorgensen decided to see if he could get close to the look with a trio of speedlights.

Light is light, and if you can find ways to allow for the differences in power levels, you can do many things with your speedlights that the Big Boys do with their Profotos.

Jorgensen shot four guys from "djHere," a San Diego-based promotions company, for an article in Pacific Magazine. The location was Shelter Island, near San Diego.

He used a Nikon D300, with two SB-800's and a an SB-24. He set one of the SB-800's to slave to the others using the SU-4 slave hack.

That's actually not what the SU-4 mode is really for, but it works great. He used a splitter to sync the other two strobes via one Pocket Wizard. I would have probably just PW'd he SB-24 and set both SB-800's to slave to save running a wire. But his way worked fine, too.


Here's the setup. Even more than the idea of translating Profotos down to speedlights, I like love the Voice-Activated Boom he used to get his main light, shooting through an umbrella, high enough to shoot under it with no stand in the way.

He came fairly close, but was not able to get his backlights high enough because of the distance involved. No secrets there, you just need taller stands, closer distances (for a better angle) or more voice-activated light stand extenders.

Australian photographer Brendan O'Shea used the same triangle light (all small Sunpaks) to shoot the group, "Modern Legion" in an alleyway. (His was done in late March.)

Like Jorgensen, he used a little post work to pop it. Seems to work well for this light. And to O'Shea's credit, he not only was very close to Pihroda's look, but was out there before even seeing that video on the big light technique.

Just two quick examples to show that the idea of looking at the big light stuff and translating down to speedlights can work. You just have to be able to make accommodations for the differences in power.
_________

Related Links:

:: Andrew Jorgensen's Flickr Page ::
:: Brendan O'Shea's Flickr Page ::
:: Original Martin Pihroda Video ::

Tuesday, April 15, 2008

On Assignment: Par For the Course

Last week I went to Severn, Maryland to photograph a young female golfer who is sixteen year-old sophomore in high school.

She competes on the men's team and drives form the mens' tees. Before you start feeling sorry for her, she drives 240 and recently shot a 68 on a par-72 course. She can bring it.

I was shooting her for The Sun, and decided to do the job with my Canon G9. That little point-and-shoot might not look like much compared to the other guys' Nikon D2xs and D2Hs bodies, but it does some neat things that makes it very useful as an always-with-you camera.

I usually will do anything I can to hedge my bets or improve my odds before I even get to an shoot, and this time was no exception. The assignment gave me the basic details, and told me to meet Kaitlyn and her coach at the school's baseball diamond after school let out.

Baseball diamond?

Surely we can do better than that. So the first thing I did was to call her school's athletic director (the only contact number I had) and leave a message asking if we could meet at a local golf course instead.

But I was getting no love from the AD, who never did get back to me before the assignment. Thus the headline for this post. But you at least try.

So I decide to go with Plan B, which is to go with the only setting I had available, and knock it down some by using flash to raise up the relative values on my subject.

Problem is, the assignment was for 2:30 in the afternoon, so I was going to need a lot of watt-seconds to overpower daylight -- or a fast sync speed to make my speedlights appear to be more powerful. Which is why I decided to shoot the assignment on my Canon G9.

It'll sync up to 1/2500th of a second without using any kind of a power-sucking FP mode. You just have to tweak it a little so the camera does not know to limit it's shutter to 1/500th of a sec for flashing.

It makes nice files, too. It's 12 megapixels, but the smaller chip size means there is some inherent noise because of the pixel density. So I tend to think of it as an equivalent of an 8MP chip for blow-up purposes and not stretch those pixels out too far.

Anyway, it shoots as low as ISO 80, 1/2500th of a sec at f/8. Which, if you go with the "sunny-16" rule, tells you that it can sync a flash while underexposing daylight roughly three full stops. So it's got that going for it. Which is nice.

But I'm never one to just go with the math -- I like to test things. You know, see them for myself.


So I went out into the front yard grounds of Strobist World Headquarters. I hand-held a flash off-camera, aimed at a tree, and underexposed (cloudy) daylight by two stops. Worked just fine, and I still had some shutter speed / aperture stops left to go for safe measure. Cool.

The next day, when I got to the baseball diamond that would have to substitute for a golf course, I found a shooting direction that would give me a good tree line. The baseball diamond is still there, of course, but I was gonna drop it down to not be so noticeable. I am shooting into the sun, on a partly cloudy / sunny day.

I like shooting into the sun when I am lighting, as the sky can look really cool when you knock it down. Also, your subject is in shadow, which makes them easier to light and they are not squinting into the sun.


As is usually the case, my stand-in while I waited for Kaitlyn was my left hand. It has proved to be a dependable lighting model, if not a muse, for many years.

I cranked my ISO down to 80, and my shutter to 1/2500th (that is so sweet) and dialed in the sky exposure I wanted via the aperture. Nothing technical -- just chimping and looking at my screen on back.

Why this way? ISO 80 gives me the best image quality, which is especially important on a small-chip camera. And the 1/2500th shutter speed meant that I could use the biggest aperture opening possible for ease of flash balancing.

The sky looked best at 1/2500th at f5. Next step is to adjust the flash to give me a good exposure on my hand at f/5. I stuck a Nikon SB-800 on a stand, and softened it a little with a LumiQuest Soft Box II. From about 6 feet away, my hand looked good at about 1/4 power. I synched it with two daisy-chained SC-17 cords -- one neutered and one straight.

So, now I have my shooting aperture, shutter speed, ISO and main light power level all ready to go. Takes way longer to write about it than to do it, actually.

But want a little separation light, too, so I stick a second SB-800 opposite the main light, set to slave with the SU-4 hack. It was pointed pretty close to right back in my lens, so I gobo'd it off with a Honl shorty snoot.

By the way, I have become a big fan of speed straps and will be doing a piece on them (and how to make them) very soon.

This was set at 1/16 power, based solely on the way it looked hitting the left side of my hand in the shooting position. Speaking of shooting position, I always use a marker on the ground for consistency when I am setting up light before a subject arrives. Makes stuff much less complicated.

So, now I'm all set when she gets there.


When she arrives, I back myself up with a quick mug shot right off the bat. For this, I used a Sigma 50-150/2.8 on a Nikon D300.

Why the backup shot, different body and different lens? Lotsa reasons. It is insurance against a bad card, bad camera and/or a malfunctioning lens. Or if something happens and she (or I) have to go before we do the lit shot. Also, it gives the paper a file mug for later, when she shoots a double-eagle and we are not there to see it.

From here on out, everything is easy. As far as the technicals are concerned, she is pretty much the tree in my front yard. No surprises, no complex thinking. I can relax, get her to relax (which is more important) and shoot. I did make one adjustment -- she was a little bright so I dropped my shooting aperture a third of a stop down, to f/5.6. No big whup.


I shot about 45 frames, in B&W and color. I knew it was going to run in B&W inside the sports section, but shot color to have some just in case. They always convert the color originals to B&W, but I think the stuff shot in B&W looks better. Plus, shooting some frames in B&W first helped me to visualize it better for after the conversion.

You can still see the home run fence in the top photo, but it is very much muted. You can't clone it out for the paper, either. That's a real ethical no-no. Fortunately, the paper's repro quality (or lack of it -- we print on Charmin) is such that will mute the line even more if not kill it altogether.

Finally, if you get a chance, take a look at it the top photo bigger, or even full-sized. (Not even full-sized, actually, as I cropped it a little.)

That Canon G9 is a trusty little always-there sidekick that's currently going through the PJ ranks like a hot knife through butter. You can shoot real assignments with it, do amazing stuff with your suddenly-more-powerful flashes, record audio and even shoot full video for the web. That's a lot to like.

Here is the location kit I put together, packed for easy travel and opened up to show what's there. in a waist pack and with minimal shoulder wear-and-tear, I have a high-sync body with a a whole range of lenses, three light sources (SB-800's) with stands, grids, gobo's, umbrella, gels, etc., and SC-17 sync cords for close work. It's ridiculous how much you could do with something that takes up so little space and weight.


NEXT: Controlling Daylight, Pt. 1

Monday, April 14, 2008

Bits and Pieces, 4/15/2008

Nothing to tax you too much on Tax Day here in the US. Just a couple of things of interest to lighting photographers. Now if you'll excuse me I gotta get back to seeing if I can figure out a way to classify my SB-800s as dependents...


• Adorama will be hosting "An Evening with Joe McNally" on May 8th, in New York City. (Assuming Joe is past his jet lag from the workshops in Dubai, that is.) It's $25, but you get a $25 gift certificate if you attend. Which makes it free-ish. I'd jump on this pretty quick if you want to go.

• Quest Couch, the man behind all of the LumiQuest Light Modifiers, is looking for feedback on what, if any, kind of a DIY kit they should offer. If you are looking for this kind of stuff, now's your chance to make yourself heard.

• Finally, there's a new issue of The F/Stop out. But I don't think I am smart enough to understand it...

-30-

Sunday, April 13, 2008

HonlPhoto Speed Grids: Controlling Contrast

While hanging out with the Western Kentucky photojournalism students this weekend, I got a chance to play around with David Honl's new speed grids for a bit. Long story short, I like his better than my DIY versions -- for several reasons.

I have been spending a lot of time lately reverse engineering the light of a few photographers whose work I really admire. What I am seeing is that it is not the light that calls attention to itself so much as the light's ability to draw you into an image in a specific way. I love the idea of subtly -- or not so subtly -- highlighting a portion of an image to draw the eye in.

In the past, I would go on the assumption of the quality of the fill light somehow being less important than the quality of the main light. I'd pay less attention to the feel of the fill light, as it was just there to keep the main light from leaving the wrong kind of shadows.

But recently, I have been paying more attention to my fill light -- even creating it first -- and then laying main light down on top of that. For those of you who do not use a flash meter (as I don't) this can be a very helpful approach to creating exactly the lighting ratios you want.


Take this portrait of (WKU PJ student) Emily, for example. In the photo at left, I sat her in front of a metal case in the WKU photo studio and shot her with a shoot-thru umbrella straight on.

I did this purposefully, to create a specular highlight that I would then have to control. Basically, I wanted to give myself some excessive contrast to then knock down.

Looks fine, except for the line going right through her head. But this wasn't going to be my final photo -- or even my main light. I wanted the straight-on umbrella to be my fill light. But I created my fill with the same level of attention as my main would get.

Then I dropped my flash's power level down two stops. Now I have a darkish photo, lit only by my fill light. But the fill light has the same attention given to it as a main light, and I know that it is filling exactly two stops down.


Now, I bring a second SB-800 at camera left, with a warming gel, and fire it through one of Honl's grids. I used the 1/8 grid, which throws a tighter beam than the 1/4.

As I bring the gridded light up on her face and choose my power setting to get the best exposure, my grid becomes my main light and my umbrella becomes my fill. And the fill is exactly the quality and the quantity that I want.

As far as the grid itself, I really liked the smooth falloff at the edges of the beam much better than my DIY versions. The light was more uniform and the pattern was a little looser, too.

Not to poo-poo my DIY grids, because they have served me well. But the store-bought grids are also smaller (cubic inches are always at a premium in my case) and had a very rugged build. You could probably run over them with a car and they'd be fine.

But back to the light, this is something I will definitely be experimenting with over the next few weeks. I am putting together a portrait series as a long-term project. And I think that hard light, coupled with the right kind of fill, will be a good fit.

These production sample grid spots are going to get a lot of use over the next few months. (So, sorry, Dave. These are not coming back.)
_______

Related links:

Gear used: Nikon D300 | Tamron 17-50/2.8 | Nikon SB-800 | Honl Speed Grid
First Look: Honl Speed Grids
DIY Grid How-To's: Cardboard | Straws | Coroplast
WKU Photojournalism Program

Friday, April 11, 2008

How to Give a Seminar in Your Underwear

Ever have that dream where you wake up, totally unprepared, and have to go to school to take a test in your underwear?

That's what pretty much happened to me this morning.


__________


SWA Sends You an Extra Reservation, Just for Good Measure

If you'll indulge an OT rant, here's how not to start a trip off very smoothly.

Back story: I am heading to Bowling Green Kentucky this weekend, home of Western Kentucky University, possibly the most kickass photojournalism program in the country, to do an in-house lighting seminar.

Looking forward to catching up with my former colleagues Fran and Kurt, and eating on the university dime.

I throw all of my clothes in the wash.

My Friday flight leaves at 5:20 p.m., gets into Nashville an hour later, nonstop, no lost bags - easy stuff. I check in online on Friday at 10:00 a.m., because it is just an hour flight and I really do not care where I sit on SWA's first-come boarding service.

I pull the reservation for my 5:20 p.m. flight. Only, hey, look -- now says that I am on the 10:05 a.m. flight, which presumably is now climbing towards its cruising altitude.

Two seconds of silence. Followed by about a minute of

(The following paragraph has been edited by Blogger.com for content and language)

Motor BOATER?!?!? My motorboating reservation is for motorboating 10:00 a.m.???? Flock!

FLOCK!

Flockflockflockflockflock!!!


(Picture Hugh Grant in the opening scene of Four Weddings and a Funeral, only without the dashing good looks at the proclivities for cross-dressing hookers.)

Okayokayokay. Check flights between now and tomorrow morning. Everything full except a 12:40, which is close to full. Gear is packed. I think. Close enough -- just go with what is packed. Clothes are (MotorBOATER!) in the wash...

What's clean? two pair of shorts, some T's, some second-string underwear and a few pairs of mismatched socks. Doesn't matter. Gotta go. Now.

Susan drives me to the airport ASAP to save the short term parking expenses. Instead, all it costs me are helpful reminders from her that I maybe I should think about keeping a calendar.

(For the record, I do. It's just not written down. And thanks for lowering the stress level, hon...)

Get to BWI and to the check-in person to plead my case as a frequent flier of Southwest Airlines.

Only, hey, look, Mr. Hobby -- turns out you are still on the original 5:20 p.m. flight! Turns out we accidentally sent you two completely different reservations by mistake, just to keep you on your toes. No problem. You're all set.

Wait. You sent me a reservation for my flight, and an extra, "DoNotOpenUnlessYouWantAHeartAttack" reservation for a flight that leaves six hours earlier?

Yeah, oops, that happens sometimes. Sorry about that! Want some peanuts?
_________


So, now I am at BWI, six hours early, where I am either gonna catch a stand-by on an earlier flight or do the $9.95 internet-for-a-day thing and try to get some work done.

And try to get my friggin' blood pressure down to pre-Southwest levels.

So, if you are coming to the weekend lighting gig at WKU, and I look a might disheveled and about 20 years older, now you know why.

And thanks for letting me vent. I feel better already.


UPDATE: Sorry For the Screwup. $66.00, Please!

This just keeps getting sillier.

When I arrives at the airport only to find out that I had been sent the "special" extra reservation, Southwest check-in lady apologizes profusely and offers to stick me on standby for the interim flights.

"The 12:40 is only oversold by 2 people," she says. "Should be no problem!"

Well, that's something, at least. Maybe I will not have to wait at BWI for six hours unnecessarily.

So I put my name on the list for the 12:40 flight -- first in line past the oversold folks. Which means I have to check my hard case (stands, umbrellas, ring flash adapter, all the other not-too-fragile stuff) on the 12:40 in case I get the earlier flight.

12:20.

Hey, first good news of the day -- there is one seat available on the flight. (Gate agent man is cracking jokes at this point, asking if my last name happens to be "Hamilton," or perhaps at least "Jackson".)

It might be "Washington," I reply. At least someone still has their sense of humor today. Which is a good thing, I guess.

"That'll be $66.00 for the schedule change," gate agent lady says to me.

"No, you don't understand," I say. "I am trying to make the best of SWA's little mistaken surprise wake-up call today. Check-in lady suggested I do this so I will not have to wait at BWI all day."

"Sorry, she did not make a note on the file," gate lady says. "Nothing I can do."

(Baksheesh joking agent slips away at this point.)

"Surely you have some discretion here," I plead. "This all started when SWA mistakenly sent me a wrong reservation. And you clearly have a seat that will be going unused on the flight."

"Sorry!' she says. Nothing I can do..."

(Want some peanuts?)
__________


Now I am sitting all afternoon at BWI, thinking about the catch-up work I was gonna do at home today. And wondering if my hard gear case will survive on the baggage belt long enough to make it to Unclaimed Baggage -- or quietly walk away all by itself.

We'll see tonight.
__________


UPDATE #2: I got here, albeit with a few more grey hairs.

Bags were here, too, in unclaimed baggage. Or more accuately, sitting out in an open area near the office of unclaimed baggage. I grabbed the hard case and my backpack and the lady waived at me from inside the room. I guess I looked trustworthy enough to just come up and grab some bags without showing any form of ID whatsoever. Yikes.

But the weekend went great, otherwise. Great folks at the Western Kentucky Photojournalism Program, too. Now I just gotta get home...


UPDATE #3: If you are arriving here from Consumerist, we don't normally talk about traveling in dirty underwear. Strobist is about teaching photographers how to light.
___________


UPDATE #4: Mystery solved!

There were apparently two concurrent reservations for my R/T trip to Nashville: One made by me, and one made by the people at Western Kentucky. They were each paid for by a separate party, neither of whom knew about the other reservation.

Southwest apparently has no way to know whether some is booked twice for the same trip, which prolonged the confusion a bit. And the fact that they would not let me fly standby without charging me a $66 upgrade was as a result of the fact that I had not yet begun the first leg of (either) of my two, concurrent trips in the system in the system at that point.

Long story short, SWA's computers are not wigging out. But neither can they tell when someone is double-booked for the same flight (which I was, on the return leg.) In retrospect, I am amazed that some kind of a flag was not set off by the double-book.

I am a SWA flyer, and will continue to be so, because I think they do things better than the other guys on the whole. But I did learn a lesson or two this time!

Thursday, April 10, 2008

Reynolds Wrap Table Top

For those of you who were reverse engineering the shot of the flash last week from the cheat sheet post, make the jump for the setup shot -- and a link that has me laughing out loud.


Okay, here it is. It's shot on my TV cabinet. Which makes my (mostly) unwatched TV good for at least something. The backdrop is a sheet of Reynolds Wrap aluminum foil. This gives a cool look, plus throws back light like crazy.

I like to use foil as a backdrop when I shoot something techy-looking. In this case, I blurred out some of the wrinkles, too.

The light came from pretty much everywhere. There were three SB-800's slaved in the SU-4 mode on 1/32 power. I was working close, so I just set them all the same, down low, and then dialed in my aperture until it looked right.

Then I filled with another SB-800 in a Ray Flash to get front light everywhere, too. This is not something I would have done a year ago, but I am really starting to dig hard, wrapped light. I like what it does to all of those black, specular edges.

As for the power on the front light, since I already had a working aperture, I just dialed the front flash in on manual until it looked good. Back flashes drive the aperture, aperture drives the front flash. Sounds way more trouble than it is, until you try it.

I am shooting a project (some portraits that I will be OA'ing later) and am finding that I am hardlighting more of them, too. Just like being able to define all those edges. Starting to think five SB-800's is not enough.

(This is always a dangerous thought at 11:52 at night -- Amazon is open 24/7.)

And while I am thinking of the Ray Flash, there were lotsa Q's in the original post, so I am going to post a Q&A, along with a video next week. If you have any more questions, get them in via the Ray Flash post comments.
________


Oh, almost forgot that totally unrelated link:

Are you ashamed of your Photoshop skills, as you work quietly in near-total obscurity? Well, things could be worse. Much, much worse...

(That's just one post. Take a look through the site and don't laugh out loud. Betcha can't.)

Wednesday, April 9, 2008

First Look: Honl Speed Grids

UPDATE: David has a blog post about them here, with more info.

Here's what I will be playing with this weekend: Just got me a set of the not-yet-released Honl Speed Grids.

I'll be down at Western Kentucky University on Saturday, teaching an in-house lighting day for the PJ students. And we will definitely have to give these a test drive.

One more pic, showing the mounting system more clearly, after the jump.
___________

It mounts via a Speed Strap velcro system (or sticky velcro if you must) and is sized to fit all flashes up to the honker Vivitar 285HV size. (Fits the Viv almost perfectly, and the tension mount is sufficient to keep it in place on anything else.)

First impressions: Solid, nice falloff at the edges, come in two flavors - 1/4 and 1/8. (This is the 1/8.) As always, click the pix for bigger views. I left them open in case you want to embed them anywhere.

More pix coming when I have a chance to play...

Tuesday, April 8, 2008

On Assignment: Peter Yang Shoots Admiral William Fallon

Imagine this:

You have all of 25 minutes to shoot Admiral William J. "Fox" Fallon for an Esquire Magazine feature story. They need a portrait that conveys intensity, but you will be shooting in a typical office setting.

And on the day you show up, your subject (who also just happens to be the U.S. CENTCOM Commander) is busy focusing on the fallout from the just-announced assassination of former Pakistan Prime Minister Benazir Bhutto.

What do you do?

If you are A-list shooter Peter Yang, you're too busy thinking about your light to be distracted by all that other stuff.

His photo, and how he made it, after the jump.
___________


Photo ©Peter Yang

Pictured above is Peter Yang's photo, as it appeared in a double-truck from the U.S. April 2008 edition of Esquire Magazine. Please excuse the artifacts -- it is a copy shot. I wanted to show it in the context in which it appeared in print.

Before you read any further, take a moment to try to reverse engineer the photo. The light is simple -- only one source -- but will still require some decent decoding skills. Click it to see it bigger, as it was presented by Esquire .


I caught up with Yang by telephone recently, shortly after being stopped by his photo of Fallon in the magazine.

Yang says he was a little surprised to get this particular assignment, given the subject matter and styles in his portfolio. But he had a lighting style in mind he had used on a previous multi-country shoot on atheists, so he at least had an idea of how to visually convey the Admiral's tough reputation.

"I was told by his people that I would have about 20-25 minutes to shoot," Yang remembers. "Which usually means about 8-10 minutes before you get, 'Okay, you can leave now.' "

He had three different setups ready to go in Fallon's office: One on white, one on black and a third with a more standard lighting scheme. But he quickly realized that he was going to have to use light effectively to connote a visual feel that would match the story.

Writers will frequently try to help/guide/steer into their vision of the piece, and this time was no exception. A good shooter will pay attention to these things -- visual and word continuity are important -- without selling out his or her own vision.

Yang recalls him as being a nice guy. "But there was no sense of urgency in a standard portrait," he added. "How can I make you look intense?" Yang remembers thinking.

His answer was to use the appropriate style of light.

Yang shot Fallon with a Hasselblad H2, an 80mm lens and a Leaf Aptus 75s digital back. His single light source was a Profoto 7A with the head in a gridded reflector up high and in very close.

With the light source very close to the subject (it's just out of the frame) you get some apparent size even though you are just using a reflector. But with a harder, more directional beam.

Before you go nerding out (or crying poor house) on all of the gear, understand that in essence we are talking about a single, smallish, directional light source and a normal lens. Granted, the gear Yang used is probably out of your economic zip code. But at its core, it is very simple stuff.

Actually, most really good light is pretty simple, when it comes down to it.

But, unlike a big flash in a reflector, a speedlight will not come close to this look unless you increase its apparent size somewhat. When I need to make a close-in speedlight look like a standard big-flash reflector, I like to use a little LumiQuest Softbox II, which actually is not even supposed to be used on a speedlight. It is designed for a bare-tube head (Lumedyne, Sunpak 120, etc.) but I really like what it does off-camera, in close, on a speedlight.

The "Softbox II" spreads the light out in over a ~6"x8" area, but it hot in the center. They have softboxes that have more diffusion in the center, and designed for speedlights. But I like the straight one better.

At ultra close range, you are not gonna need a ton of watt-seconds to get some serious aperture. (And you'll need it, to hold focus on the ears.) It takes a little imagination, but you can usually translate different types of light down to speedlights.

And speaking of gear, Yang backed up the shoot on a Canon DSLR (Mk II) and actually prefers the display screen on the back of the Canon to that of the Leaf for chimping purposes. He said he uses the Canon as both a Polaroid and as a backup.

The nose shadow tells us that Yang came in straight, high and close, as we have seen above. He has it aimed a little down and in front of Fallon. The grid causes the light to quickly fall off up top, creating an "out-of-the-shadows" look. Pretty straightforward, really, when you create the shadow with the light source.

If you do not have a grid, you have to figure out another way to cut the close/high light from the top of the head. But rather than spoon-feed that info, it would be a good exercise for you to think about it and experiment a little. We'll be doing an exercise on this later.

Yang dropped some black fabric in back. Nothing fancy here, though. He got it at a local fabric store and taped it to the wall. He notes that almost anything -- even a white wall -- in the background is gonna go black with this lighting scheme. The black material was just there for good measure. Remember, this all comes down to lighting distance.

The end effect was one of intensity and drama, kinda like the way you'd shoot that guy from the X-Files who was always showing up with the critical, top-secret information.

BTW, Yang had previously tried the light out on his assistant's face. The takeaway: Always test first.

Within the short time window, he also produced photos from the two other setups. Yang notes that it had great light and made for very good portraits, but they were not as well-suited to the intensity level of the story.

As for color-vs-B&W thing, Yang could not remember who first suggested black and white for the portrait. He characterized it as a mutual decision between himself and the folks at Esquire. It was captured in color, of course, but the plan was to go B&W for this one all along.

Back to the shoot itself, as is frequently the case, the handlers proved to be running a little tighter than the actual subject. They wanted to move things along to get back to reacting to the developing geopolitical news.

You can always tell by listening for those subtle little signs that tell you your time is up. Like when they are saying repeatedly, "You gotta go, you gotta go, you gotta go..."

But Yang already had what he needed -- a dramatic portrait done in a typical office setting.

He quickly pulled all of the gear -- still set up -- out of Fallon's office. But Fallon came in a few minutes later to pass out some souvenirs and talk about photography.

"He was a nice guy," Yang said. "He has a natural curiosity."

Shortly after the Esquire article was published, Fallon's now very public views on the middle east -- particularly on the prospect of a potential war with Iran -- were deemed to be at odds with those of the Bush Administration. Admiral William J. Fallon announced his resignation on March 11th, effective as of March 31st.

__________


A Little Background


Yang is 30 years old. He was raised in Austin, Texas, where he was for a while a shooter for the Austin American Statesman. In fact, he still includes some work from the Statesman in his portfolio. That's both a nod to how fast he has risen, and how he did not let the fact that he was shooting for a newspaper constrict his style. All you newspaper shooters take note.

In fact, just ten years ago, you would have found him soaking up information wherever he could find it. I note that not to dis Yang (who a very nice guy and a heckuva shooter) but for two very important reasons:

One, to show the speed at which he has risen in the profession. And two, to point out that if you are currently hanging out in in the minor leagues on photo message boards asking gear questions, it is entirely possible that you could be work your way up to The Show in ten years.

To see more of Yang's work, take a look through his website.


ON ASSIGNMENT -- NEXT: Golf Feature
__________


Related links:

:: Peter Yang's Website ::
:: Esquire's Article on Fallon ::
:: Other 'On Assignment' Features ::

To London-Area Readers

Hit the jump for a heads-up on a lighting workshop at The Flash Centre which might be of interest to you.

DJ LaDez (from Lumedyne) is doing a flash workshop at The Flash Centre in London on April 28. Food, model, demos, how-to, etc. It's £60.00, but they give you a voucher for £50.00 towards portable lighting gear. Which makes it darn-near free if you were gonna get some lighting gear anyway.

BPPA members get in for £50.00, which nets to free if you use the voucher.

(More info here.)

Monday, April 7, 2008

Can-Do Approach to Cheap Lighting

"Back when we were young, we didn't have no speedlights. We had utility lamps. And we didn't have no light stands, neither. We had sticks. And cans. And we were glad to get 'em."

If my dad were guest blogging, you'd being hearing that kind of thing left and right. But maybe that's not a bad thing.

Hit the jump for an old-skool, ultra-low-rent lighting tutorial.
____________


One day after threatening you with gazillion-watt-second studio strobes, we head way down to the opposite end of the scale for proof that light is light. It doesn't care where it comes from -- only that it has to obey the laws of physics.


Sticks and cans. Cool beans. And besides, this oughtta economically balance out the Profotos I am gonna be throwing at you tomorrow...

(Courtesy Jim Talkington, over at ProPhotoLife.com.)

Beats Another Shot of a Wal*Mart

Before I get 10 gazillion emails asking if megablog Consumerist had permission to use my photo all life-sized and stuff:

Yup, they did...

I am a huge fan of Ben Popken and his merry band of little-guy advocates. Not to mention their impeccable art directing chops, natch. If you are like-minded and sufficiently generous with your pix, they have a Flickr pool where you can drop your pictures of Wal*Mart, Best Buy, greasy hambugers, etc. (Putting them in the pool makes them eligible for inclusion in the blog.)

I am always happy when I pop up on their site, doing my little part to stick it to Da Man. Besides, it gave me something to twitter about.

Sunday, April 6, 2008

Birthdays, Heresies and Watt-Seconds

Strobist turned two this weekend. And while I will admit that it is not yet completely potty trained, now is as good a time as any to announce some upcoming changes.

What to expect in the coming year, after the jump.
_________


Looking Forward

In upcoming weeks you will no doubt notice some changes. They will be welcomed by some, and poo-poo'd others.

This site started out in 2006 as a small trail of bread crumbs for photojournalism students and young pros on how to use their shoe-mount flashes a little bit better. It was designed to fill the gap between what they taught us about light in PJ school, and what we needed to know in the real world.

But over the last two years it grew into something way bigger than that. It became a place where people gather to learn about light. And believe me, I have learned more in that time than any of you have.

Given that we have spent two years digging very deeply into what kind be done with a small kit of speedlights, there is a growing danger that the site will just become a circular, self-derivative discussion. And since excessive inbreeding (especially the intellectual kind) never did anyone much good, it is time to shake things up a little.

Starting in year three, we will be expanding our coverage area into all kinds of off-camera flashes to see what we can learn form the photographers who use them.


(What the...?)

Why? Three reasons:

First and foremost, the beauty of learning to use your speedlights in manual mode means that every single skill you acquire is translatable to the larger strobes. That's such a cool thing, not to having to learn a whole new skill set just because you are moving to a larger powered light. And many of you are making (or have already made) that leap.

(That alone is reason to expand your speedlight abilities beyond TTL systems such as CLS and eTTL.)

Second, the vast majority of what is being done with big strobes today is translatable down to speedlights. And easily so, since you understand the 1/1-, 1/2-, 1/4-power thing. And as such, it is crazy nuts not to take a close look at those guys and see what we can learn from them.

Third, if you want to improve your game in any arena you really need to learn to look beyond the genre in which you are operating.

Here's how I thought while I was at The Sun shooting with light for a newspaper:

Say for the sake of argument that I was operating on a theoretical level of, oh, 20 on a scale of 1-100. Say the hot shots at the bigger papers were shooting in the 40's on the same scale. If I merely looked at what the other newspaper guys were doing, tried to learn from them, and partially succeeded, I might end up in the 30's. If I were lucky.

But if I looked at the very best people in the photo world, the 90th-percentile guys, learned from them and still failed to totally get it, I might end up in the 50s' or 60's. Kinda weird, granted. But that is the way I always thought.

So from here on out, I am going to make a concerted effort to expose you to some of the hot shots in the business in the form of reverse engineering exercises and "guest" On Assignments.

I don't care if they are using speedlights, Profotos or magnesium powder. Light is light. And we may as well be learning from the folks who are working at the highest levels.

If you have any particular favorites, leave me a URL in the comments. I cannot promise I can get them, but I can promise to look into each suggestion.

I will be translating the big lights down to speedlight-speak wherever possible. Because that is where most of us are working. Look for the first one in that series to appear later this week.

Speaking of shooting and "On Assignments," that is what you most requested on the last reader feedback post, so that is going to be given a higher priority. I want this site to be the place for the next-gen folks to learn about light that us older farts never had.

If you are a high-end pro and you are reading this site, I will very likely be hitting you up for a chance to pay your early mentors back. Or, more accurately, pay them forward. I cannot promise you riches. But I can promise you some serious, industry-wide traffic to your site. And I can also teach you what I have learned about search engine optimization for shooters.

And, as I have officially gotten bored silly with not being a regular shooter after eight months, I am back in the saddle. I will be shooting some jobs for The Sun (call me, Chuck) and would be very happy to be in the rolodex of any of you dear readers' various publications.

To that end, I have put some photos into my Zenfolio page, with appropriate contact info for possible location people jobs in the Baltimore, MD, area.

So if you are reading this from your scanning station (or, better yet, at the picture desk) of an editorial publication, I would be much obliged if you would take a moment to enter me into your system of stringers as Your Man in Baltimore. Of leave a note on the appropriate colleague's desk.

Having been a kept, in-house shooter for 20 years, this photographic dating stuff will be new to me at first. So I am going to be jotting down my "lessons learned" in the occasional OT post in the hopes that it might be helpful to some of you in similar positions.

I also have started work on what I think is a very special self-generated project. There will be more on that, soon. So between those two shooting venues, my OA's will be coming back, too.

And speaking of OA's, remember the Old Masters post from late last year? We are gonna be using those guys as a way to sharpen our reverse-engineering skills while we get our culture on. After all, they were the first quality reverse engineers of light. In short, look forward to some interviews with some dead guys in the mix. They have good stuff to teach us.

If that's not enough, we still have two sections of Lighting 102 to finish up. And then we'll be doing regular, real-world assignments as a group. I might be able up the ante a little to make it more interesting. I have a few ideas.
__________


And finally, for those of you who are interested, some stats from the year that was:

Over the past year ending April 5th, 2008, there were 503 posts, which received a total of 14,540,459 page views from 1,493,505 different readers from 208 different countries/territories. Heck, we even had one visitor from Antartica who read 8 posts over a span of 21 minutes.

Thanks for a wonderful year, and I am very much looking forward to learning along with you during the next.


Thanks,
David

_____________
(Handy flash photo at top by Ecatoncheires)

Thursday, April 3, 2008

Light Faster With a Cheat Sheet

Heading into the weekend, here's a little tip to help to make you more intuitive with your flash.

One of the first hurdles in learning off-camera flash photography in the manual mode is knowing where to set your flash for that first test exposure. For beginners, it can almost seem arbitrary or random. More experienced photographers, on the other hand, always seem to get it pretty close on the first try.

Raising your first test shot "batting average" is as easy as 1,2,3. Hit the jump for a tip that's so easy, you'll probably wonder why you weren't already using it.
________

Today we are gonna make a cheat sheet for your flash in three simple steps. Think of it as an mental reference point, to quickly get you in the ballpark for your most common shooting setups.

The only things you'll need are a small piece of light colored tape (I used electrical tape in white) a Sharpie (or similar, fine-point permanent marker) and a few minutes.

Here's the process:


Choose a Typical Working Distance and Modifier

Let's say, for instance, that you normally shoot people, at a lighting distance of about 6 feet, with a shoot-through umbrella.

Set up your flash and umbrella in your living room and point it at something of reasonably normal tonal levels about six feet away.

Choose a good working aperture for your portraits -- say f/8, for instance. Set your camera to a standard ISO -- say, ISO 400. And be sure to do this indoors at your max sync speed (usually 1/250) to knock out the ambient light portion of the exposure.


Zero In a Power Setting

Now, fire some test frames, adjusting the flash's power output until your exposure looks good. You'll end up with a power setting in the manual mode. Say, for instance, that this setting ends up to be 1/4 power.


Write it Down

As shown in the photo above, write the settings down on a piece of tape and attach it to your flash. In your case, you might down:


STU-ISO400-6ft-f/8-1/4


This will tell you that, through your shoot-thru umbrella, you can expect f/8 from 6 feet away at 1/4 power at 400 ISO.

Are you always gonna shoot with those parameters? No, of course not. But it is a good starting point for choosing your flash's power level. And if something changes, you'll quickly be able to interpolate a new starting point.

For instance, say you wanted to shoot at f/4 instead of f/8. You'd just drop the power two stops (to 1/16th power) before firing your first test.

If you wanted to move the umbrella in closer - say to about four feet, you'd know to either close down a stop to f/11 or drop the power from 1/4 to 1/8. In the example above, my Nikon SB-800 has a reminder to me that in a direct mode (at ISO 400, 50mm zoom) I can expect f/8 from 1/32 power at about 6 1/2 feet.

(FWIW, I am constantly surprised at how powerful these little flashes are in direct mode.)

The point is to have a normal rational starting point from which to shoot your first test pop. You'll then find that your first guesses are always pretty close, and the direction you have to go to fix it is pretty obvious.

Okay, so the direction you need to go to fix light quantities is usually pretty obvious. The problem is when you are, like, six stops off. Or is it four stops? It all looks the same -- nuclear.

Having a nice little cheat sheet on your flashes will get you in the ball park before you fire your first pop. Then, making a quick fix very easy. And pretty soon, you will not even need your cheat sheets to get close on the first try.

Reverse-engineering exercise:

If you like, take a shot at deciphering the lighting on the photo of the flash up top. Leave your thoughts in either the comments or on the photo's Flickr page. I'll post a setup shot next week.


_________

Related post:

:: GN: Your Free Flash Meter ::

Tuesday, April 1, 2008

Martin Prihoda is Back


For those of you wondering what happened to Strobist favorite Martin Prihoda, he's back. Never really went away, actually. He just deleted his (very popular) Flickr account to focus on his core photography website.

Martin made a video of himself shooting the musical group "Delerium" in Vancouver. He is using big lights here, but don't go turning up your nose. There is some good info for many of you both for now and for later down the line. And I especially like the advice he gives at the end.

Hit the jump after the movie for a little bit on how to translate this shoot to speedlights if you have suddenly misplaced your pile of Profoto 7B's...
___________


Nice stuff, huh? But 1/250th at f/14? That's a little bit too pricey a light level for a set of SB's.

But before worrying about that, you'll need to mod at least one of your three strobes (the front one) to approximate Martin's wrap-light look. I'd use a shoot-thru umbrella, choked up a little so make the actual light source smaller than the full 43" size. You'll need to bring it in a little closer, too.

The rim lights, at 45 degrees, can be left bare if using SB's, but they will be a little harder edged than the 7" reflectors on the Profotos.

(IMPORTANT: Do not forget to gobo the rim lights to control flare.)

But what about the lofty shooting aperture?

It's all relative, actually. Since you cannot overpower the ambient daylight like Martin does with the big strobes, you wait until the ambient comes to you.

If you shoot after sundown in twilight, you'll have all the power you need to overpower the ambient with small flashes.

I'd be looking to aim for a target of, say, f/5.6 @ISO 400. That's easy to get even through an umbrella. Simply wait until the twilight dips below 1/250th at f/5.6, and start shooting.

Remember, you'll wanna underexpose the ambient by 1.5 - 2 stops. So just shoot at 1/250th as it gets darker, until it dips down to that nicely underexposed level at 1/250th. Then just start tracking the waning light by dropping your shutter speed (1/125th, 1/60th, etc.) as it gets darker.

Sure, maybe one day you'll have a set of Profoto 7B's, a generator and a mohawk faux-hawk. But until then, you'll just have to exercise a little patience and wait on the light.
__________

Related Link:

:: Martin Prihoda's Website ::

Share

Twitter Delicious Facebook Digg Stumbleupon Favorites More