Friday, November 30, 2007

Lighting Basketball: Let's Trade Ideas

It's hoops season again, with pro, college and high school getting into swing of things. We have run a few posts on different ways to light basketball using small flashes, including here, here and here.

The photo at top was from our friendly little Final Four competition with Sportsshooter last year. You can see how the photo was done (with two speedlights) by clicking on the pic or here.

How are you using your lights this year? Are you using big lights? Small lights? A mix? Any new tips for one-light techniques? Two lights? Four lights? More lights?

The first action shot is by Chad Ryan, who is using larger, plug-in strobes. (Click on the pic to read what happened about a half-second after this shot was made.)

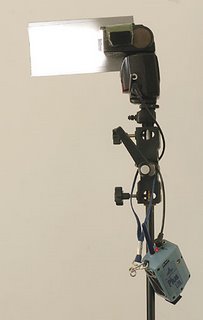
The action shot at left, by Daniel Hyravy, was lit from down at the other end of the watt-seconds scale. He used two Sunpak 383 flashes (at half power) clamped up in the stands with some $1.99 Home Depot green clamps like I used at Towson last year.

So, what are you using, and where are you putting them? Please hit us with a link to your pix and/or diagrams in the comments. That way we can all learn from you, too.

If we get enough good stuff, maybe a round-up post will be in order.

-30-

Thursday, November 29, 2007

Lighting 101 Now Available in PDF Format

Finally found an umlimited bandwidth site that hosts files for free. (Thanks to Rui M. Leal for the formatting effort.)

If you are a newb, Lighting 101 is the foundation on which the site is built, and is the best place to start. I have left a few typos in there, just for added charm. Lots of charm, actually.

The pix are only screen-res, but the price is right. Full refund if not 100% satisfied.
________________________

:: Download Lighting 101 PDF ::
:: Rui's Lighting Mods Blog ::

SECOND UPDATE: The MediaFire server is groaning a little unter the strain, so reader Scott Johnson kindly offered to mirror the download site. (Thanks Scott!)

-30-

You Got Questions, We Got Answers.

Who writes this stuff?

I'm David Hobby, a 20-year career newspaper shooter. I studied photojournalism at the University of Florida. I have shot for the Leesburg (FL) Commercial, the Orlando (FL) Sentinel, UPI, and lots of other publications as a freelancer/stringer/intern. I have been a staff photographer at Patuxent Publishing (Columbia, MD) from '88-'99 and at The Baltimore (MD) Sun from '99-'08.

I left The Sun in 2008 to blog and shoot full-time.


When/why did you start this blog?

Originally, Strobist was launched in April of 2006 as an excuse to get out of lecturing to my friend Gail Burton's photo class. I figured I would try to save some time by just writing it down once. In that sense, Strobist has been a spectacular failure.


How much time do you spend blogging?

About eight hours a day. There's a lot more behind-the-scenes work that you would think. Certainly more than I expected. I have met The Devil, and his name is "e-mail."


Dude, why Blogger.com? Why not your own URL?

I think Blogger rocks. It's free, Google indexes it better than any other platform (they own it) and it is very robust. Plus, being Google, I know it will be around in five years. Bandwidth is not a problem on this free platform either. I contacted them and asked if we were getting too big for the free service and they had a nice chuckle over it and sent me a shirt.

Seriously, they are great folks and I highly recommend them and their free platform. Without it, there would not be a Strobist.


What Blogger template do you use?

I use Minima Black, an old-style blog (not the drag and drop, widgety version) and it has been heavily modified a little at a time. I am not a coder. I completely suck at it. I just learn enough to do the little thing I am trying to get it to do by looking at other site's source pages.

If you are thinking of choosing a Blogger template to customize, I think Minima Black and Minima White offer solid, simple platforms from which to start.


How do I subscribe to your blog?

I make my entire post available over RSS feeds. You can subscribe by clicking here.


How much traffic does Strobist get?

As of November, 2007, over 1.5 million page views a month, from over 300,000 photographers around the world. The RSS and email feeds typically add another 1 million+ views per month.


My company makes lighting-related stuff. Can I advertise here?

Possibly! See here for more information on rates and reader demographics. But you should know the advertising has been full for some time, and people almost never leave. There's a wait list if you are interested.


Hey, I just saw this cool thing you should know about for your blog. What's the best way to tell you about it?

Leave me a comment on any comment-enabled (most are) post. I will see it. I get over 100 (non-spam) emails a day, so I have long since given up on trying to respond to every email. I wish I had time to, but it just got way too crazy. But I very much appreciate tips to anything lighting related, and I can promise you that I will see it.


What kind of stuff are you most interested in?

Anything that shows lighting technique used to get cool shots, if that particular technique has not been heavily covered here. Of particular interest are shot/setup articles, and especially videos. The preferred host is YouTube, although anything we can embed is acceptable.


Hey, I have, like, 300 porn sites. Where is the best place to spam links to them? In your comments?

(This, good people, is why your comments have to be moderated.)


Can I link to my own blog generically, in a comment?

The short answer is yes. But there is a fine line between comment spam and information flow. A link to your site raises the bar for the information that should accompany it in your comment. The more on-topic and discussion-oriented your comment is, the more likely your link-bearing comment will pass moderation.

For instance, this kind of comment:

"You has a nice blog. I has nice blogs to (Link, link, link, more links, link)..."

...ain't gonna make it.


Can I use your material in my site?

You may quote small amounts of material (one or two paragraphs) or abstract material, as long as you provide a link to the original post. You can get a "permalink" by clicking on the time stamp at the bottom of any post.


What about translations to other languages?

There is a blog that is following Lighting 102 in Spanish and Flickr groups which discuss Lighting 101 in Italian and German. I am an admin on all of these sites, which is a requirement as I do not permit content to be translated into sites that I do not control. It is a safeguard against infringement.

It is the only way to make sure all of the work I put into this site doesn't diffuse into the ether. Thanks for understanding. You can find more info on various policies in Strobist's TOS page.


Can I steal your entire posts for my automated scraper blogs that are pretty much designed to be Adsense link farms?

No, you may not. And if you do, the black helicopters will come for you. Or, I might just DMCA your website's ISP and they will fix the problem very quickly. But you won't like how they do it.


I am shooting a wedding on Saturday. What kind of flash should I buy?

No kidding. That is a verbatim question I have received. For gear and technique questions (hopefully better reasoned than that one) try the Strobist Flickr Discussion Threads. There are over 75,000 photographers ready to help you and learn from you.

Seriously, I do not think there is a more civil and helpful photo group on the 'net. Of all of the neat things Strobist has spawned, I am most proud of our group's friendly, knowledge-sharing ethic.


75,000 people? Are they any good?

You tell me.
_________________________


Have a question to add to the FAQ? Hit me in the comments. If it is helpful to a broad number of readers, I will add it. Thanks!


(Last update: 10/17/2012)

Wednesday, November 28, 2007

David X. Tejada Lives in Conference Rooms


So, how are we sleeping lately? Having trouble? Lemme see if I can help:

"Meeting shots..."

The mere mention of the phrase just nudges you towards somnambulistic bliss, doesn't it?

But while you are sleeping, Dave T. is minting coin. Because he knows how to light a room to get nice-looking corporate meeting shots.

"But I am a creative photographer," you protest. "And I would never waste my artistic talents on meeting sh- how much?"

If you are gonna shoot corporate, and by that I mean if you are gonna be a photographer and be able to afford braces when your kids' teeth start going squirrelly, this is a very good skill to have in your back pocket.

This, from a guy who just found out that he is two-fer-two in the "kids who will need braces" department. That's $10k worth of meeting shots right there. (My nine-year-old just got hers.)
___________________________


Points to note in the video:

1) Door + sheer white cloth + strobe = humongous softbox.
2) Choose a shooting angle and create a zone of light around it. You can shoot in either direction, but you have to light the room for a shooting alley and stick to it.
3) Gels make even corporate people having a fake meeting for a photographer look warm and human.

-30-

Save the Dates: Orlando and San Francisco

UPDATE: This is not a signup, just a save-the-date. More details coming later.
_____________


Just a preliminary note that I am planning to be in San Francisco for a lighting seminar on Jan. 19th, and in Orlando on Feb. 16th and 17th. Also looking at Philly and Phoenix (and possibly L.A.) in the coming months, too. (No date yet on those.)

I will update with better info soon. Venue suggestions in the comments are much appreciated.

-30-

Strobist Reader-Designed Pocket Wizard Caddy

Reader Hil, an industrial designer by day, has created a way to mount your Pocket Wizards to a light stand or directly to a flash. He calls it the Pocket Wizard "Remote Transceiver" Caddy.

Having tried it, I can can report that it works very well. Your "remote transceiver" is basically part of the stand when it is attached.

Why would you even want one of these? Most people just hang 'em by the included straps, obviously. I take the straps off of my older, non switch-hitter tranmitters so I can tell them from the receivers. (The transmitters do not need straps as they mount to the hot shoe.)

But those of you who shoot weddings or events (or work in any venue where you have to shoot and scoot) will appreciate everything traveling together as a unit and not banging around when you are on the move. They are currently available at MPEX, for $15.

(You also may remember Hil from the very cool PVC water-resistant speedlight housing we featured last July.)
____________________

:: More Info ::
:: Get One Here::

-30-

Tuesday, November 27, 2007

Chase is On the Case


Seattle photographer Chase Jarvis (whose background music is always kosher) gets all logistical in his latest video, showing how he and his group roll with all of their gear. The video above is the short version, clocking in at ~10 mins or so, and hits the basics.

If you want a master class in the logistics of transporting still, lighting, video, misc. gear and the like, be it by car, plane, expediter or donkey (seriously) hit the jump for the long form. In addition to being much more informative, it is half an hour of pure gear porn.

There are also links to learn about how to subscribe to Chase TV on iTunes, if you are so inclined.
___________________________


You wanna know what is cool about Web Photo 2.0? This is cool about Web Photo 2.0:

No one else has done anything like this, totally pulling back the veil on the tricks it took them many years to learn about packing and transporting imaging gear.

How many people who watch this over the next ten years will not suffer damaged (or lost or stolen) gear and blow an assignment because of these tutorials? Chase, you rock.

And that gear. Sweet mother of pearl... I needed a cigarette after watching this. And I don't smoke.

If you learned something of value, swing by Chase's blog and give him a shout out for putting this stuff together for free. And while you are at it, you can learn how to subscribe to his stuff via iTunes. So you can put the long form vids (and the short ones) on your iPod for portable motivatin' and educatin'.

As you are checking out his channel, explore a little in the iTunes "arts" area for more neat stuff that's waiting for you.
___________________________

:: Chase Jarvis on Packing Photography Gear ::
:: How to Subscribe on iTunes ::

Monday, November 26, 2007

A Little Light Painting

flyingstrobist
Pretty cool, huh? The photo is by fellow Strobist reader W. Brandon Voges, who shoots with Bruton Stroube Studios in St. Louis, MO.

Hit the jump to see a video of how it was done (shooting and post work) and a link to one of the coolest photographer website designs I have seen in a while.
__________________________


So, yeah, there's a little bit of Photoshop involved. (Ya think?) But this is just some fun stuff.

It makes me want to get the the white paint out and nuke the whole living room. Except, well, I am not exactly in charge of the painting decisions at my house.

:: Brouton Stroube Studios ::

A Photojournalist Looks Back

UPDATE: Corrects Lo Scalzo's mag to U.S. News and World Report. (Sorry, Jim!)

This is not about lighting, but I know more than a few photojournalists read this site. If you are a PJ and you have nine minutes and forty three seconds to spare, watch U.S. News and World Report shooter Jim Lo Scalzo's piece, Evidence of My Existence, which is currently being featured on MediaStorm.org.

It'll give you a little perspective.

-30-

Table-Top Lighting a la David Ziser

Personally, I like to preserve the memories of my desserts in the form of archival love handles. But David Ziser, over at Digital Pro Talk, would rather just photograph his food before eating it.

Using a Canon 40D -- and only the camera's built-in, pop-up flash -- he made this photo. It is lit pretty much entirely by that little pop-up flash, too. Can you reverse engineer his clever little on-camera-off-camera lighting trick?

(Click here to see how he did it.)

-30-

Sunday, November 25, 2007

Quick and Easy Location Macro Setup

Australian photographer Neil Creek dropped this macro shot of a fossilized shrimp into the pool over the weekend, and included what I thought was a pretty neat lighting scheme in the setup shot.

He used two speedlights and two small sheets of paper. Take a minute to figure out how you would do it, them make the jump for the setup shot.
_________________________

Using two lights on the table, he simply made a couple of semicircles out of two half sheets of paper, making the hard, low light of the flash soft but still directional. This creates a nice, even zone of light in which to wander around with his macro lens and take a mapped-out series of photos for stitching together later.

He didn't say, but I suspect that the work light is merely there to help him focus, and was likely not much (if any) of a contribution to the final image. (Up close, flash is extremely powerful, and the lamp is easy to totally overpower.)

This setup is worth noting because it is something you can do on location with found objects. Just lay the flash on the tabe and surround your subject with the curved strips of paper. Very nice to know. (Thanks, Neil.)

Click on the setup photo for more info on the gear used. The final photo is a pieced-together, 225-meg(!) macro panorama. Check out the results via Neil's blog.

Strobist Photos of the Year Contest: Call for Sponsors

UPDATE (12/07/07): To the contest's prospective sponsors: THANK YOU!

We have an embarrassment of riches of sort, with an oversubscription of offers. I have narrowed it down to five, and there are going to be many drooling photographers when prizes are announced next week. I will be contacting you shortly as to whether your offered prizes will be included.

Two things to remember: We will have opportunities to do this again, and those of you who do not end up sponsoring SPOY, will be glad they were able to enter it!

Thanks much,
David

______________________

Over the last few weeks, I have had a series of emails from businesspeople who are interested in raising their company's visibility among our readership and have proposed the idea of contributing prizes for promotional events.

Sounds like reason enough to have a party to me. (As if we ever need a good reason.) So I am officially shaking the trees to see who else among our photo-business-oriented readers might be interested in a one-time promotional event.

More details available, and some preliminary details on the contest, after the jump.
______________________


How it Would Tentatively Work: Sponsors

1. You would submit a comment on this post, with the prize your company is willing to offer, and your email contact info. (Your info would not be published, of course.)

2. Of the prizes offered I would choose five, based on appropriateness to our readership, retail value and coolness/creativity. Please bear in mind that people shoot with different brands of cameras. So, for example, a lens from a certain camera brand might be a little clunky if the winner shoots on another platform. (But a Canon G9, or Nikon P5100 would be a very useful, Strobist-friendly, stand-alone prize for any photographer, regardless of brand.)

3. Those five sponsors would get visibility in the following ways:

A) On the day in which the prizes are announced, with your URL being linked in the body of the post. This would reach both site readers and RSS subscribers.

B) On the day in which your sponsored winner is chosen, within the body of the post, similarly linked, and with similar exposure.

C) A one-week run as a 200px x 100px sidebar ad in early 2008. (At current readership, this one week would result in approximately 375,000 pageviews.


Total, during this time frame, your company's info and link would be seen about 450k - 500k times by a total of about 65,000 "absolute unique" photographers. (This is based on current individual-day -- and one-week -- statistics.)

And, of course, you'd get all of that good Karma from being the giver of a cool prize. Which is always nice.

For the purposes of distributing the prize, you would be responsible for shipping your prize to the winner, who could be located just about anywhere in the world. I would hook you up with your winner via email. Customs duties and taxes, if any, would be the responsibility of the winner.


How it Would Tentatively Work: Entrants and Judging

Assuming we get sufficent interest on the prize front, the winners would be chosen from among the photos in the Flickr Strobist Pool. I look at every single photo that comes through. Obviously, photos already in the Faves Pool already have a leg up. But I am sure that I have missed some really hot shots along the way. So if we go forward I will have a way devised for you to make sure your extra-special precious babies get a second look.

The pros and amateurs would be competing right along side each other. Do not be daunted by that, amateurs -- I find it pretty much impossible to tell the difference these days.

I would choose ten finalists and forward their URL's to a special celebrity judge who has already graciously agreed to choose the final five, in order. Heck, if I did all of the judging, it might end up being like choosing Dick Cheney to head the Committee on Who Would Make the Best Vice President. And we all saw how THAT turned out.

Of course, employees of Strobist.com and their families would, regretfully, not be eligible to enter. Ditto, sponsors. The winners of each of the five prizes would be announced on, respectively, the last five days of the year, Dec 27th - Dec 31st, 2007.


And read this part very carefully:

There would be no transfer of rights by the photographer to anyone.

As is the case with the Flickr Strobist Group TOS, your picture would, of course, appear on the main blog, though. But that "we own all of the entries" crap doesn't play here.

Mind you, this is all tentative based on who comes up with what prizes. So, potential sponsors, the ball is in your court.

The Problem is Not in Your Set

FYI: YouTube, on which many of this site's embedded videos are hosted, is experiencing widespread, sporadic outages.

It is not specific to Strobist. YouTube is under the hood working on it as I write this.

(Click the TV pic for latest info.)


-30-

Friday, November 23, 2007

Leftover Speedlinks, 11-24-2007

(Turkey carcass by MortonPhotographic)

• For you continental readers, Rui, over at Lighting Mods now features a dropdown menu of sources for small-flash lighting gear all over Europe. (His most recently updated info is on the right sidebar on his site.)

• Wiz has some thoughts on using direct flash in the vertical orientation (not that there's anything wrong with that) and a super cheap way to attach a bare flash to a stand, here.

• If you are a Fiest fan and a lighting geek (in other words, if you are reading this and you are a Feist fan) you can see a "making of" video of her song, "1234" on YouTube. Shown are fluorescent clamshell light strips mounted (over and under) right to the camera at about the 3:20 mark. They are using the (more expensive) nonflicker video-friendly bulbs, I am sure.

• Chase Jarvis executes a near perfect display of linkbaiting this week, publishing a mondo list of reader-submitted favorite blogs. It scored a 9.9/10 on the Problogger Linkbait Scale, with the East German judge having DQ'd herself because she and Chase were romantically linked during their college days. See it here.

• FlashFlavor posts on underwater dress trasher Kevin Beasley. How far can we be from a "fully-engulfed-in-flames" TTD session?

• Stumbled across a cool behind-the-scenes page on
Nikon's website. (Only hardcore Nikon geeks need apply.)

-30-

Thursday, November 22, 2007

SM DV Remotes -- Anyone Know Anything?

Alert Reader Gord H. emailed me to tell me about it after coming across a set.

This is the first I am hearing of them, so I do not have anything more about them except Gord's email and info from the website. They look interesting, although some of the website info alludes to a 1/180th of a sec max sync speed, which could be an issue.

Says Gord:
"I played with them at the local camera shop during a lighting seminar. Seemed to worked just fine and didn't notice any misses. Range was good as well.

Price wasn't bad. And with several options, seems like the eBay slaves on steroids with much butter build quality as well."
_________________________________


They apparently wanna make remotes so bad, they are willing to get violent about it. The company is HQ'd in Korea. From the multilingual website, whose English is much better than my Korean:
"Many times, our clients have the need for products that simply do not exit. To us, that is a call to arms. We enjoy the challenge of taking a simple concept and adding the right features to create real value for you."

Damn straight. Them's my kinda guys. Anyone with more info about them (like, uh, maybe where to buy a set to test) pipe up in the comments.


:: SM-Development ::

UPDATE: Apparently some of you guys have actually seen these locally and reported on them in a Flickr thread in August, which I totally missed...

-30-

Friday Flickr Faves -- 11/23/2007

Lotsa cool stuff coming upstream from readers lately. Click the pic to see a slideshow of the newest stuff in a new window...

-30-

Sponsor Thanksgiving Leftovers

Special thanks to the bidnesses that made our little corner of the world possible for the last month:

MPEX
PhotoShelter
Zenfolio
StudioStyles
HonlPhoto Professional
Apple / Hewlett Packard

And thanks also to those of you who click through to Amazon (who is doing the Black Friday sale thing this year, too.)

-30-

Paul Duncan, In the Spotlight Again

Back in the day at Patuxent Publishing, we used to have this Norman studio strobe head, called a "Tri-Light," which was basically a spotlight projector. It threw a tight beam with a sharp edge to it.

We, of course, overused the heck out of it, making really cheeseball photo illustrations.

(Hey, we were young and stupid.)

Paul Duncan, the guy who brought you the darn-near-free ring flash reflector, has built a cardboard baffle/snoot that gets you pretty close to the Tri-Light without the four-digit expense.

It has a sharper edge than a grid or a snoot, and you can customize it to get the shape and edge you want.

That's Paul at top, singing his snoot's praises as he tests it out. Love the mic, Paul. Click on either pic to get a larger version. (The diagram photo page has much more info.)

And leave your lounge-lizard musical selection requests for Paul in the comments. We'll post the resulting .mp3's next week.

:: Paul's Snootier Snoot ::

-30-

So Much for the Big Macy's Parade Debut


Aaron Johnson at www.whattheduck.net had a really cool surprise lined up for the Web 2.0 photo community. Until, well, better just watch the video.

(Happy Thanksgiving, y'all.)

-30-

Google, Strobist, You and Mavis

For the international readers, in the US today is Thanksgiving. It is a day in which we watch a big parade, pause to give thanks, eat turkey, watch football and take a breath to prepare for the hustle and bustle of the holiday season.

First of all, thanks to all of you for reading the site and especially for contributing to the flow of information that helps us all learn how to be better photographers. There are also a couple of neat things going on behind the scenes that you might not be aware of. If you are interested in learning more about it, make the jump. If not, well, happy Thanksgiving -- wherever you are.

________________________


I wanted to take a moment to look both upstream and downstream from the vantage point of this website, and to highlight the people who make this possible. Also, I'd like to introduce you to a few unexpected people who are directly benefitting from your readership.


Google

Upstream, it all starts with Google, who provides a venue, bandwidth and full-time tech support for this site -- all for free. I had a phone conversation a few weeks ago with one of the honchos at Blogger. I was worried that we had outgrown our little free corner of the web, and I wanted to know if I should (reluctantly) plan to move the site to a different venue.

Turns out, you can't really get too big for Google. We do quite a bit of bandwidth -- about 50k pageviews a day including lots of photos. And Google is totally cool with that process continuing to happen for free. As far as they are concerned, anyone who is creating new content and broadening the knowledge base of the internet is cool with them.

So, if there are any of you out there considering blogging, I would like to offer a kick in the pants to get on with it. It's fun, free and you'll learn way more than you think you will just by doing it. And if I may offer a plug for Blogger as a good choice for a (free) venue, it would be this:

1. You will never outgrow them, and
2. I think Google will still be around in five years or so.

So, thanks to Google and the Blogger team. I can tell you with 100% certainty that without their free platform and bandwidth, this site would not be here.


Readers and Advertisers

From my own position, I am thankful for the people who show up to read this stuff, and especially to those who contribute. I know that I have become a better shooter as a result of what I have learned from you all. And I think we, as a group, are increasing the rate at which people learn about lighting throughout the world. Which is way cool.

Your presence matters. That's what makes a market for the businesses who wish to gain exposure to a herd of photographers. And by advertising, they fund the site and make it all work. So thanks to them, too.


Unexpected Beneficiaries

Looking further downstream from us though, a portion of the money generated by this site is diverted at any one time through a portfolio of microloans which are spread out around the world by an organization called Kiva. They facilitate interest-free microloans, using PayPal as a payment platform (who donate their services, without fees) to match up lenders with borrowers around the world.

I found out about Kiva through a story on the PBS documentary series "Frontline," and have been lending through them ever since.


This is Mavis Fuah, a businesswoman in Ghana who buys bales of used and surplus clothing and then sells them by the piece to support her family.

Literally, the fact that you are clicking onto this site and learning how to light for free has directly resulted in her being able to expand her business with an interest-free microloan. We were a major funder on her loan, which was for a total of $750.

That's not a lot of money by western standards, but it makes a huge difference to Mavis. Click on the pic for more info.

In addition to Mavis, our outstanding loan portfolio includes:


Odia Asikhia, Nigeria, (Movie rental business)
Bridget Agbon, Nigeria, (Plastics sales)
James Edaki, Nigeria, (Soft drinks retailer)
Shahodat Ismoilova, Tajikistan (Perfume retailer)
Tomas Hernåndez, Mexico (Restranteur)
Juliana Dede, Ghana (Plastic container sales)

Like the platform which makes possible this site, the Kiva.org microlending process is free, and can be accessed from any internet-enabled computer. They are really catching on, too. So much so that they have a temporary limit on the amount of money you can contribute to any one microloan -- $25.00.

But merely by foregoing the interest you would have earned on that $25 for a year (comes to 75 cents at a savings account rate of 3%) you can, from your desk, make a real difference to a family who will probably never worry about whether they should by a Gadget Infinity remote or spring for Pocket Wizards. I would note that I have a 100% repayment rate, with no defaults or late payments, which is not unusual for a Kiva loan.

So, if you are looking for one more thing to feel good about this Thanksgiving, I suggest learning more about Kiva.org.

And if you are even remotely inclined to play with a blog of your own, jump right in a Blogger.com. The water is fine.

Wednesday, November 21, 2007

Why You, Too, Should YouTube


Colorado Photographer David X. Tejada takes us along on another location shoot today. Here's a question for you:

Why does Dave bother to shoot all of these videos?

I have been thinking a lot about this recently, and the bennies are starting to add up in my mind. Hit the jump after watching the video for more on why David in the world would continue to spend time and resources to keep doing this.
__________________________


The Bennies of Free TV

Consider:

1. David is sharing his techniques with other photographers, raising the industry's knowledge base one viewer at a time. That benefits everyone.

2. Just the simple, repetitive act of explaining to others what you are doing increases your understanding of your techniques and gives you new ideas. (I can vouch for that one on a daily basis.)

3. David's current clients -- and potential new ones -- get a chance to watch him work in a variety of settings from anywhere in the world, for free. That builds confidence -- especially with clients who may be hiring him from far away. And that leads to more jobs for David.

4. As his videos are watched (and linked and watched again) virally via YouTube, the natural process of the diffusion of knowledge also works for David by giving him more Google search engine juice.
__________________________


In this particular video, for our purposes, we'd probably note how David feathers the soft box past the subject to hit the reflector on the left with more light. This creates a more powerful fill reflection and more even one-light lighting ratio. But then, we're lighting geeks.

His clients, on the other hand, would see:

1. How David can easily turn a cluttered conference/storage room into a studio.

2. How quickly David can shoot an entire upper management team, and

3. How nice the final product looks.

I am sure David would echo this sentiment:

To a potential client, this level of transparency inspires far more confidence than merely viewing a portfolio of headshots.

(David, if you are watching, I would love to get your thoughts on this in the comments.)


100% Pure Juice

I would note that YouTube (and Blogger, for that matter) are owned by Google. And guess who indexes metadata and content to the biggest search engine in the world before it even appears on the web? And with careful use of metadata, David's search engine juice gets a little stronger every time someone views a video.

Taken as a whole, this is a cool, positive vicious cycle. David, Bert Stephani, Chase Jarvis and other photogs who understand this are already taking advantage of it.

There are slicker, newer video hosting/embedding sites out there. You think those guys are using YouTube by accident? I don't.

(And don't forget, if you are a pro and showing off your lighting secrets and techniques, tip us off in the comments with a URL for your video.)

Monday, November 19, 2007

Lighting 102: 4.1 - Restricting Light

Soft light is... nice.

Soft light is safe. It is flattering. It is, well, expected, for lack of a better word.

And don't get me wrong -- nice, safe, flattering and expected are good things. They put bread on the table every single day for pro shooters around the world. But the people who are doing edgy, risk-taking stuff -- fun stuff -- tend to not be the typical, umbrella-toting photographers.

Hard light -- especially hard light that has been restricted in some way or another -- can really get you out of a rut if you are looking for a way to amp your photos. Remember, using light balancing techniques, you can still control the ratio of the lit-to-unlit sections of a photo. This is true whether you are transitioning from a strobe-lit area to an ambient-lit one, or from an area lit by one strobe to an area lit by another strobe.

So, while apparent light size controls the abruptness of the transition to shadow, your various light balance levels will control how far you fall into the shadow. These two variables, used in tandem, give a wide range of control.

But the beam of the light source itself -- usually a hard light source in this context -- can be controlled via various light restricting devices. More after the jump.
_______________________

Gobos

A gobo is basically any type of a light shield. "Gobo" is a slang abbreviation for "go between." It can be either attached to the side of the light, or placed between the light and any place you do not want the light to reach.

This can be to solve a flare problem with a light that is aimed back toward the camera, or to shield light from falling onto the background, or any number of things. Gobos are extremely useful items that do not take up much room in a lighting kit. You should always have a few around.

For example, here is a group shot at one of the London seminars, in which we had just placed a warmed-up separation light in the background, aimed directly the group. As you can see, the light is also spilling onto the ceiling pretty badly.

We can solve that problem by placing a gobo on top of the flash, blocking the light from heading straight up.

The light now does what we want it to do, but not what we don't want it to do.

There is no reason you could not put a gobo on the bottom, too, for instance. In fact, you can have just about any beam pattern you want through the use of gobos, snoots, and/or grid spots. (You can see a full On Assignment write-up on this photo here.)

Any good mechanic will tell you that it is important that your car be able to go, but it is more important that your car be able to stop. This is also how I feel about light. Put the light where you want it, and keep it from going where you don't.

For instance, I could have a hard light that travels as a vertical strip by placing a gobo on each side of the flash.


Snoots

A snoot is essentially a four-sided gobo -- just a tunnel for your flash to restrict the light to a tight beam. The longer the snoot, the tighter the beam. Simple as that. But there are more controls to be had with a snoot.

You'll get fast fall-off on the edge of your beam if the inside of your snoot is black. This is because there is very little light bouncing around the inside of the snoot, contaminating the edges of the beam. You'll get softer edges to the beam if the insides are light grey, or white. And softer yet edges if the inside is silver.

You can see more on snoots and gobos in the original L101 post. I am a cardboard snoot and gobo kinda guy, but you can get ready-made (i.e., non cheapskate-looking) versions if you do not want your clients to catch a cereal box vibe from your gear.

A good example of problem-solving (including the why and the how-to) with a snoot is in this biz portrait On Assignment post.

You can also make snoots out of black foil to have teeny-tiny openings, as in this example. This gives exception light beam control, which is especially helpful with light painting.

Even with close-up photography, the ability to direct strobe light right where you want it can give you the control to light on complete different planes, even if the two planes are literally inches away from each other.


Grid Spots

Grid spots are essentially a patterned group of snoot built into one device. They offer much more beam control over the light. I have grids that will throw about an eight- by six-inch pattern at six feet. That's tight.

The longer the grid is (and the smaller the individual channels) the tighter the beam. The best two ways to make grid spots are out of black straws or coroplast, (a plastic version of corrugated cardboard.)

As an example of the level of light control with a grip spot, I bounced a light around the inside of a missing slice of cake in this photo. The light does not hit the white icing right next door. That's control. That's a grid spot.


Cookies

In addition to simple objects that are designed to block the light, you can shoot through complex objects to partially block the light, or to create a neat pattern of interest in your photos. Typically, these are colled "cookies," if they are 2-D and man-made, which is short for "cookaloris." It's an old movie lighting term.

They are usually a sheet of black cardboard, with a seemingly random pattern of holes. But my preference is to use found objects, such as potted plants, to create patterns as in the photo at left, which is explained in detail here. I cannot tell you how many times this technique has helped to elevate an otherwise boring photo.


Time to Play

So, those are my Four Horsemen of light restricting. But you'll never get feel for using them if you just read about them. So, for this session's exercise, we'll be making some light restrictors and test-driving them.

This is easy, sit-around-and-digest-the-Thanksgiving-turkey stuff. Your exercise is to make some various light restrictors and shoot some consistent photos, swapping out and/or moving the light mods.

For example, you might do something as simple as make a couple of gobo's and a few snoots of dfferent lengths and set a flash on a stand and shoot pic of the wall. By placing the different light mods on your flash, you should gain a good understanding of what it is that they do.

You'll want to be putting together a grid spot, too. It's a tad more complicated to build than the gobo and snoot, but it turns your flash's output into an amazing little beam of light. We are gonna play with that more later.

Tag your exercises as:

Strobist
Lighting102
exercise
restrict

You can view the completed exercises of others, here. There is a discussion thread set up for this post here.

NEXT: Restricting Light / Film Noir Assignment

Shoot Projects on the Cheap with your Peeps

Belgian photographer Bert Stephani posted a video last week that hits on a lot of cylinders for me. Taken at face value, it is a cool series of hard-lit shots of a gas-masked runner.

But before you watch the video (after the jump) take a moment to notice all of the things that Bert and his buds are accomplishing with this group shoot.


A Little Stone Soup

First off, Bert is making a cool series of pictures for a photo contest, which is always nice. Second, he is doing a photos to highlight a good cause: Environmental Awareness.

But more important, he is corralling a little peer power to help him create something in a group environment. I talked to Bert in Paris about this idea of freelancer working in somewhat of a vacuum as far as camaraderie is concerned. He lamented the fact that he does not get regular contact with a group of creative people.

I miss that environment from The Sun, too. Not that you guys aren't creative, of course. But it's not the same as working person-to-person with, say, the same group of Saturday shooters for a few years.

He rounded up his shooter friends Ake, Pieter and Didier, and also got help from Dirk, a local model. So, what's in it for everyone? Let's see:

Bert and Dirk get photos that they would not have otherwise gotten. Ake, Didier (who shot video) and Pieter assist, which is always a learning experience. They all have Bert pretty much in their pocket for a later assist, too.

Everyone gets a session of creativity in a group environment, which is always a welcome change of pace from the day-to-day grind of working as an individual freelancer.

It's basically a meetup, using just a few people, wrapped around a specific series of photos. This is a win/win situation that more photographers should employ whenever they have the opportunity. I plan to be doing some of this myself, starting in January.

(Hey, Ake, Bert, Didier, Pieter and Dirk: You free to come to Baltimore to help? Beer's on me.)
____________________

Here's what they did:


Links:

Bert's Blog Post, w/his edited pix
Ake's Blog
Pieter's Blog
Didier's Flickr Page, w/his pix from the day
Dirk's Model Page (streaming music warning, for those at work)

Gadget Infinity / Canon 5D Issues?

Are you using the Gadget Infinity remotes with a Canon 5D? Some are reporting banding issues in photos, especially with modded units. It seems to center around RF interference and CMOS chips.

Discussion is here, if you are having problems (or success) with the combo.

-30-

Another Crafty Bouncy Thing


Sean, whom I met in Paris last month, has a simple little bounce diffuser thingie he designed out of craft foam and Velcro. It's DIY-able, but if you are well-heeled, or time-poor, or just plain lazy, Sean will sell you one here.

(Don't tell anyone in Microsoft legal what he called it. You know how those soulless corporate types are...)

-30-

Saturday, November 17, 2007

Saturday Speedlinks: 11/17/2007

• At Digital ProTalk, David Ziser forces his poor backlight to do the work of two flashes for no extra pay.

• The F Stop Mag has a new piece out, which includes a great interview with high-end shooter Pier Nicola D'Amico.

• Ninedays Blog posts about how to dye the previously mentioned cheapo Home Depot canvas backdrops.

• Oldie, but new to me: Guy goes to a Halloween party dressed as a whole pack of paparazzi. Awesome creativity. (Found from people musing in the comments about how to turn 8 disposable flash cams into a ring light...)

• Patience is a virtue. For those of you who have been pining for the RAW-shootin', very flash-friendly 12MP Canon G9, Amazon has them for $443, with free shipping and a free 2 gig SD card. If you take the plunge, use the coupon code "7ACBUY5F" at checkout, and have the card linked on the G9 page already in your shopping cart.

I'm all over that one. (Expires Dec. 3rd.)

-30-

Thursday, November 15, 2007

HD RingFlash: Test Drive / Q and A

I have not had much time to play with my new ring flash yet, but I can already see that it produces light that is soft, even and strong enough for the kinds of photos I want to learn how to shoot. Click on the pics for larger versions.
______________________

I made this photo at the Patapsco meetup, just starting to experiment a little with still life photos. The leaf was frontally lit by the ring flash, with additional light coming from the top of the frame in the form of an SB-26 lying on the ground firing directly.

I like the ring-light-against-hard-light look very much, and I hope to be experimenting more with it soon.

(More sample photos after the jump.)

Everyday objects take on a whole new look when shot with a ring light as the primary light source. These leaves on the ground -- only lit with ring flash -- have a weird, Photoshopped/HDR look to them. This is right out of the camera, with just the one light. Definitely seeing possibilities there for experimentation.

Also shot at the meetup was Andrew N., the youngest photog present (sporting a modded Poverty Wizard trigger, no less!)

This is done outside in hazy daylight, with the ring flash overpowering the ambient sun. Just a straight, up-against-the-wall shot. And this wall really does not work well for showing the ring shadow, which is subtle with a light source this big.

Victim number two, Justin, shows how the look changes with the addition of one back/side light, which is positioned to miss the background. As with the leaf, this is a look I prefer to the one-light ring shot. With a ring and one or two small accent flashes, you could create a cool painted backdrop and do a neat, themed portrait series.

In fact, being assigned such a series would be a good excuse to build something like this. Or anything else that can give a disparate group of photos some continuity. (You listening, Dana?)

Pathetically, I can report that I have now shot with a ring flash everything in my house that I could find to shoot. This shot of a pair of jeans is ring light only. While I like the 3-D-yet-flat look, I will probably be more interested in shooting against raking lights for most stuff.

Getting in this close, the ring light is really big enough to be considered a "ring soft box" and the light gets flatter. But it is powerful enough (certainly up this close) to be made smaller and harsher with a mask made out of cardboard. That's on the list to try, too.

I was down in Charlotte, NC last week, doing a workshop at The Observer where my friend Bert Fox is the new Director of Photography. During a break I drug out the ring flash and set up a quick, triangle-lit portrait of Shawn, one of the the shooters for the newspaper group.

This is the first chance I have had to set up a couple of additional light sources, and I really like the possibilities I am starting to see with the ring flash as a component of an overall lighting scheme. The background is a white wall in a studio (could be anywhere) and the grey tone comes form the distance ratio (light-subject distance vs light-background distance) which we talked about earlier in Lighting 102.

This is ring flash in front with two gobo'd SB-26's coming from the back/sides. Check it out larger to see the detailed look of the light.

The goal in experimenting is both to start to explore the possibilities and to get the ring flash out of my system, so I will be likely to pull it out at opportune moments instead of on every single shoot for the next six months.

_____________________________________


Questions and Snarky Comments Dept.

You guys aren't exactly the shy type, so I thought I would bring some of the comments and questions from the "how-to-build page" up for all:


So the camera resides inside the tube? Do your arms not hit the sides of the tube when in use? Is the reason for this to keep the lens from vignetting?

The lens is in the PVC tube. The camera is just behind it. The tube, being just a little wider than the shade, can stick out a little bit without vignetting.


How are the flashes triggered? Are rf-triggers required or is it enough to just use the camera's master-trigger (via flash)?

I have triggered several ways so far. PW's (all internally placed) Nikon CLS with the pop-up flash (on TTL and on manual) and PW'ing one flash (either an external rim light or one of the two internal flashes) on manual and slaving the other(s) in SU-4 mode.


The three questions that arise for me, is why the notch in the pvc tube? just for grip or does it serve another purpose? You mentioned that you wanted to do ttl, how can this be achieved accurately with the strobes pointing forward but sensors pointing inwards? Lastly what method did you use to connect the strobes to the camera (main reason for that question is because you said you could do ttl) love to finally see a nicely designed ring flash though.

1. The two notches allow for zooming of the lens with my fingers (side notch), and the top notch allows the pop-up flash to pop up with the body stuck as far as possible into the PVC tube.

2. TTL, when used, means everything comes through the lens before it is measured. Flash/sensor position is very flexible for that reason.

3. See above.


Can't wait to see your pictures (and possible arrest stories) with that thing.

I can assure you that the ring light will only be incidental in the arrest report...


Ummm, how much does this thing WEIGH? How much extra time am I going to need in the gym, training to use it? :-)

It is, shall we say, substantial. Rough guess: 10 lbs, fully loaded.


I'm sorry, the quality of posting on this site have gone way down. I'd pay $400 to not have to carry this thing around.

Your refund is in the mail. As for the size, nothing smaller really solved my design criteria. I wanted to create something that would have the power to use in more real-world situations. It is much lighter than an ABR800 and a Vagabond battery, FWIW.


Could you cut the length in half by turning the flashes around and bouncing into reflectors? Here is a sketch.

I have thought about that, and might play with that a little in further revisions. Nice sketch.


how much light is wasted, bouncing backwards out of the flash, right back into your face, I wonder? Could the back of this be sealed up, and line it with silver tape?

You need easy access to adjust the flashes. But if you wanna try it, knock yourself out. Please send pictures.


Cool design. Is it powerful enough for a sunny day? A little black paint and a Nikon sticker, and it would look almost professional.

It will overpower full sun at modest portrait ranges. And if anyone reading this works for Nikon and has access to Nikon stickers, hook me up and I will pimp it out after painting...


Can't... stop... laughing.

But you're laughing with me, right? Right? Hello?


At least it wont get stolen.

Dunno... I would not leave it alone at a Strobist meetup, I'll tell you that much.


What level of SPF do you recommend for the model?

I generally only photograph models in full burkas, just to be safe. But I do put sunscreen on my face when I use it.

UltraBounce: Bare Bulb Flash, Flat as a Pancake

I was bouncing around the LumiQuest site last night and saw something pretty neat. It's a Sto-Fen Omnibounce-ish sort of thing, but it folds flat to not take up much space in your pocket or bag.

Mind you, these things are not panaceas. No matter how much you pay (some will cost you a ridiculously Scary Song) their primary use is to send your flash's light out in all directions.

Sure, if you are in a small room, you'll get some fill bounce from the ceiling and/or walls. But it would be a "Whale of a Tale" to attribute any other magical, wallet-draining powers to them.

So, what are they really good for? Omni-directional light, of course. Off-camera, these things are quite useful. The original L101 post on bare-bulb modifiers is here. A B-B mod (a Sto-Fen) was also used to light the alcove for Michael in Paris.

Given that they take up no room when folded, I'd swap out my four Sto-Fens for these things in a New York Minute if I were concerned with cubic inches when traveling.
______________________

:: LumiQuest UltraBounce Product Page ::
:: L101: Bare-Bulb Mods ::
:: Assignment: Michael in Paris ::

-30-

ISO Baltimore Studio Space

Just a shout out to the local folks: If anyone has a good suggestion for local (Balt area) shooting space that I can co-op, rent, crash, whatever -- shoot me a comment with some contact info. I'm gettin' itchy.

(Your info won't be published, and thanks much.)

-30-

Jazzing Up a Boring Computer Portrait


SuperDave Tejada is back, this time showing you how to pump up a typical, boring person-at-computer shoot using a couple of SB's. Dave is shooting corporate here, which means that (a) he can direct people all he wants, and (b) he makes lots more money than you do.

Stuff to watch for:

1. He gets good contrast and fill from two opposing light sources - left and right.
2. He has the hard-vs-soft thing going, too. Hard camera left vs soft camera right.
3. He also uses a warm-vs-cool scheme, working a CTO against a CTB for good internal separation.

You can see the final pic here.

p.s. For the viewers in the UK, "fanny" means something different over here.

-30-

Ring Flash Week: Building the HD Ring Flash

I just didn't have the heart to force-feed you another donut. Even Krispy Kremes get old after three days in a row. Logo or not...
__________________________

So, here's the main structural component of the ring flash. A 16" concrete form tube. ($10.67 at Home Depot.)

This stuff is so useful for DIY goodies. I have seen giant Dobsonian telescopes made out of this. And some killer speakers, too. (No standing waves in a cylindrical design.)

I made this two days after Halloween, if you couldn't tell. More after the jump.
__________________________


The height of your device will be determined by the length of your lens and body, including shade. Since mine was a tele, I gave the PVC tube a couple of extra inches as a auxiliary shade, so to speak.

You could make this using a wide lens. But the longer it is, the more room for the flash light to disperse inside. And thus, the more even the light on the front diffuser.

I traced a line around the cardboard tube and cut it easily with a jigsaw. I never once made a measurement in the whole process. Just eyeballed, drew the line and cut. As a guy, I am rather proud of that. And it is no loss on your end, as your dimensions will be determined by the camera and lens combo you choose to design it around.

I cheated it a couple of inches on each end (extra PVC for shade and a little extra cardboard tube at the back.) I wanted decent depth for good internal flash throw. Worked out fine.

I traced the tube and the PVC (also cut to length with a jigsaw) to create the donut/washer shape for my front Plexi diffuser. I screwed up the cutting with a jigsaw, so mine had cracks (none fatal) that I had to shore up with clear packing tape. Before taping, I also sanded it on both sides to frost it. (It was not enough, as we saw yesterday, so I ended up with an addition sheet of paper inside for more diffusion.)

This shot shows how the tube and hand-bent aluminum plate brackets mount together. It is important to allow for the bolts in the PVC when checking to see if it will be thick enough for your chosen lens.

If you look at the large version, it should be easy to see how the pieces go together. The camera mounting plate is sandwiched between the PVC and one of the brackets.

You can see the "L" brackets that hold the Plexi to the cardboard tube and PVC here, too. That cardboard tube is tough. May as well be wood.

The bracket assembly bolts to the cardboard concrete form tube, making for a very solid final unit. It went together more easily than I expected.

I think the key is transferring the correct "inner tube" to "outer tube" distance for your aluminum brackets. Get that right, and you are pretty much home free.

Here is the whole thing, put together. The flashes ball-bungee to via two sets of two holes on each side. You'll need a strap, too. Put the strap holes at about 90 degrees apart and it'll ride better on your shoulder. You'll still look like a geek, tho.

You can see the paper disc inside at the bottom here, too.

I used foil-backed tape on the outside of the PVC tube all the way around. This got the light to bouncing around on the inside. I put foil-backed tape pretty much everywhere but near the flashes on the outside. Flashes are fired at the widest setting (W/A diffusers in place) and provide very even -- and strong -- light when all is said and done.

Here is a shot from the front. The light is broad, round and plenty even. I can easily work at modest portrait ranges outdoors in broad daylight, which is great.
______________________

It is a little clunky, but hand-holdable nonetheless. Next improvements will be:

• Tripod mounts along both axes -- vertical and horizontal camera orientations.

• Spray paint it flat black, then acrylic to protect it.

• Rounded cap nuts on the protruding (1/4x20) bolts.

• Drop some money on a soft drum case to be able to take it on the road (airlines.)


Here's a photo of the business end, shot by Jeremy Reitman at the Patasco Meetup. I'll be the first to admit that this is a little, uh, gung-ho, compared to some of the earlier designs. But this thing rocks on the output and the even light, so I am one happy camper.

Oughtta have some pretty nice guns by summer if I use it enough, too...
______________________


NEXT: Test Driving the DIY HD Ring Flash


Tuesday, November 13, 2007

Ring Flash Week: Designing the HD Ring Flash

Gettin' tired of the donut logo yet? Have another... We still have a whole 'nother box...

I have been pining for a good DIY ring flash adapter that will do everything I want it to do for a year now. Every time a new design would pop up, I would want to play with it. But ultimately, I knew I would be disappointed if it would not meet my needs. So I just let the idea sit in my head and percolate a little longer.

The result is the Strobist HD Ring Flash Adapter. The "HD" stands for "Home Depot," because that's where all of the parts came from.

(More after the jump.)
__________________


Design objectives, in no particular order:

• Speedlight Based

Sure, I could drop $400 on an ABR800. They are great units, and will do everything I need. But I already own the light output. All paid for. So it seemed kinda wasteful to just go and buy my way out of my problems. So I wanted it to run on speedlights.

Besides, that would mean I could go TTL if I wanted to. (Hey, I do that sometimes...)

• Strong Enough to Use Outside

Almost every DIY setup to date failed on this one. I realized pretty early I would want two speedlights driving it, fired directly at a front diffuser.

• Even Light Around the Ring

Here was the other factor that led to two speedlights. Every one-flash design I have seen balances light even-ness with output efficiency. I needed both. I needed two, symmetrically placed speedlights.

• A Large Ring Source

I like the soft box / ring flash look. Besides, if I want tight and sharp ring light I can always mask it. Not so the reverse with small designs.

• Reasonably Inexpensive

For me, that means $50. Otherwise, what's the point? Just go buy the ABR800.

• Reasonably Rugged

Why bother to design and build it if it would not last? I love some of the folding designs that fit in the camera bags, but they fail on criteria 2, 3 and 4. So I was committed to building something a little more substantial.

• Reasonably Portable

This, I was willing to bend on. In the end, I settle for hand-holdable. I will be putting a 1/4x20 mount on it soon, tho. Monopod and ball head would be a perfect support.

________________________


Design Process

Eventually, I settled on a donut-shaped device which basically housed the camera itself and two lights. I designed it around a specific camera, the D70s, because of it's awesome sync hack. But you could use this reasonably close in full daylight with any camera that synched at, say, a 250th.

Given that the measurements are based on a camera a specific lens, I designed it around a Sigma 50-150/2.8. [Nikon|Canon] I love this little lens -- fast, sharp, light, reasonably priced.

(Any tele/portrait lens you can stick in a 4" piece of PVC should be design-capable, tho.)


The heart of the design is a 4" PVC tube: Cheap, strong, cuttable and readily available. The camera mounts to it via a ghetto bracket made out of aluminum plate strip: 1" x 1/8" x 3'.

Didn't even cut it with a saw, either. Just bent it in a vice and snapped it. Very easy. Also made the bends by holding it in a vise and doing it by hand. No machine shop tools were used in the project. Just a drill, a jigsaw, and a vice. A little sandpaper, too.


The PVC assembly was joined to an outer shell made of concrete footer tube. (Mine was 16" in diameter.) That stuff is tough. If you drill holes in it, it mounts very solidly with nuts, bolts and washers.

To the front was fastened a piece of sanded 1/8" Plexiglass. It was "washer" shaped, and I simply traced the inner and outer circles with a Sharpie and cut it with a jigsaw. I sanded the Plexi to make it frosted (both sides) but that was not enough. I also used a sheet of parchment paper on the inside as an auxiliary diffuser.

Also, it turns out I suck at cutting Plexi, so mine had a few non-fatal cracks and was laminated with clear packing tape. I mounted the Plexi to both tubes using "L" brackets.


Here is a drawing that shows the relationship between the flashes and the unit. You can tell where the efficiency comes from. Those two speedlights are both blasting right into the frosted Plexi/paper sandwich.

With the W/A diffusers on the flash and some foil-backed tape, I got nice, even light at the front.


The flashes are held to the insides by good 'ol ball bungees. Love those things.

__________________________

NEXT: How to Build the DIY HD Ring Flash


From the Bargain Basement Background Dept

If you happen to have a Jo-Ann Fabric store near you, check your circular this week. Sale items vary by locale, but they very likely have muslin (some of which comes in the 10-foot wide rolls) at 30% off (40% off w/coupon this week.) According to tipster SkepticalJS, it comes to about $5.99 a linear yard.

(Thanks for the tip, and if you score any good stuff tell us about it in the comments.)

:: Store Locator ::

-30-

Ring Flash Week: Getting Past Cliché

Nothing I blog about, save maybe Jill Greenberg, is as polarizing as is ring flash. You either love it or you hate it.

(The haters are in the minority, BTW, as the RF posts are consistently among the most widely read pieces on the site.)

That said, I'll play Devil's Advocate for a moment.

(More after the jump.)

___________________

Little Tommy G., of Burtonsville, MD, (USA) writes in to say:

" ... I just don't like the look of ring flash, and I'm not sure why all your readers are so excited about this terribly unflattering and uninteresting form of light. Granted, it's new and trendy, but it's not much better than the "3-stops overexposed direct flash" look that was big in all the fashion mags 2-3 years ago.

And it's neat to build stuff, but it doesn't seem worth the time investment to create something that so limits your shooting flexibility. ..."


Well, Tommy, your problem is simply that you are 100% wrong.

(Kidding, of course.)

And I only did the "Little Tommy" thing because this particular person used to rule over me with an iron fist as my assignment editor at The Sun. Actually, those are all valid points, even if coming from a guy whose idea of "shooting flexibility" used to be asking for a weather feature squeezed in between assignments at 2:30 and 3:15.

I digress.

And I'll admit to being a little schizo about the whole ring flash thing. For me, it comes down to how the thing is used.

I think the "up-against-the-wall" one-source ring flash shot is overused and pretty one-dimensional. (That said, I never do get tired of that Lenka photo...)

But I'll admit right here and now that after I finished building my ring light a few days ago, I shot darn near everything and everybody in the house that was up against the wall with it. The cat won't even stay in the same room with me these days.

But the new car smell wears off pretty quickly on that look. Although it is always there to pull out if you need it once in a blue moon.

What does interest me -- fascinates me, actually -- is the idea of a ringlight as an on-axis, secondary light source. And to be honest, I plan on using it more for still life than for people. I like the idea of hard edge light, filled by that 3-D, wrapped light coming from the ring flash.

I start to get more excited when I think of color contrast between the frontal and edge light, too.
___________________


More than anything else, the work of Dan Winters has gotten the ring light stuck on my brain. He uses it in a variety of ways -- as a sole light source, a primary source in a multi-light setup, or as subtle fill.

I could look at Winters' photos for hours on end. (And I have.) I would really like to be able to experiment with some of his techniques on the cheap. A DIY ring flash is not gonna make me Dan, of course. But it will allow me to play with some of his methods and see how I can apply them toward my own style.

If you are into really cool, quiet, cerebral photos, I'd highly recommend a walk through his site, BTW. And if you are a photo editor, you should hire this to shoot something for your mag in every issue. He can make anything look interesting.

Closer to home, for example, reader Michael Hui is doing some neat stuff, too. He is playing with an Alien Bee ABR800, which he uses both alone and in conjunction with other light sources. In the photo at left he used an additional bare Vivitar 285HV from camera left.

It's the latter look that I am drawn to, and I sometimes have to keep myself from faving Hui's pix automatically, as soon as they appear.

In addition to combining the RF with a hard sidelight, Hui is also using it with a multi-source, wrap-lighting scheme that is totally working for me, too.

In short, where some people see a one-trick-pony light, I see a jumping-off point for more creative looks that I simply cannot get with any other light source. So, to that end, I want to learn as much about it as a possibly can.

For now, I am a total newb. But I hope to be doing cool stuff with it soon.
________________

NEXT: Designing the DIY HD Ring Flash


Share

Twitter Delicious Facebook Digg Stumbleupon Favorites More