Monday, June 29, 2009

Yuri Arcurs: Mr. Microstock

Do you dabble in stock photography? Maybe, say, a little microstock photography?

If you do, this is the guy you are up against.

To say Yuri Arcurs has the game figured out would be a bit of an understatement. He sells nearly 2,000 images a day, 24/7/365.

Hit the jump for a video tour of his insane, made-for-micro studio, and a look at his lighting techniques.
__________


Made for Micro

I have to admit that when I first started watching this I thought it was one of those parody videos. But then I realized that Yuri (a nom de photo used by Jacob Wackerhausen) has basically beaten the microstock equivalent of the Kobayashi Maru by creating an entire facility based around the needs of microstock.

Insanity? Genius? Maybe a little bit of both:


(If you are reading this via email or RSS, you may have to click on the post title to see the vids.)

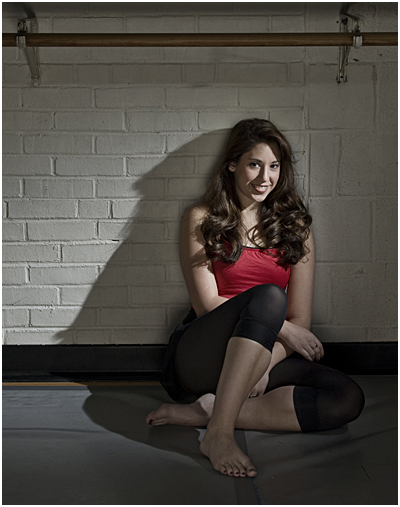
This being a lighting blog we are not gonna let you out the door without at least a little lighting tute. Yuri has everything down to a science, and his lighting reflects a quest for repeatable, predictable quality -- designed to make those warm, happy photos that make a microstock purchaser dig deep down into the couch cushions and cough up 40 cents to seal the deal. Over and over again.

(The lighting info starts at the 2:56 mark.)


You can see more about Yuri at his website, and you can also follow him on Twitter.
__________


[UPDATE, via Anders C., in the comments:]

For those who wonder about his studio: Back in January a Danish photography magazine arranged an interview with Yuri in his daylight studio (as opposed to his business office).

After driving around for a while the journalist had to call Yuri and tell him that he simply couldn't find the studio in the area where it was supposed to be - all he could find was a lot of very large, industrial greenhouses outside the city. After a few seconds with Yuri on the phone, one of these large greenhouses started flashing!

And that, ladies and gentlemen, is how you create a bloody large daylight studio: An industrial greenhouse combined with loads and loads of white, semi-translucent material.


Indeed.

Friday, June 26, 2009

Boot Camp II, Assignment 1: Results

I have now been through the 700+ photos that were submitted for SCBII's first assignment enough times to be thoroughly sick of every single photo in the pile.

Kidding.

They are great. But I did go through them a lot.

A few standouts, some notes and a lucky winner -- inside.
__________


First of all, it was neat to see so many people go to the effort to talk someone into letting you photograph them. I know this was not easy for many of you, and I hope it ended up being a growth experience. It was also great to see so many of your faces, and I will admit to that being an ulterior motive of the second portion of the assignment.

Second, I was impressed with the sheer number of photos that would have looked right at home in A-list magazines -- including more than a few potential covers. Bearing in mind that most of the readers of this site are amateurs, that rocks.

Now the hard part -- picking a winner. It is, of course, subjective. And any of at least a hundred photos in the stack could just as easily been featured here today. I had time to leave some notes on a few pictures -- although not much, as we are both finishing up moving and closing on the old house this week. (Kinda crazy around here.)

That said, I pulled up some entries to talk about and use as examples. I hope you will indulge how personal (and, thus, seemingly arbitrary) picture editing can be. The important thing is that so many of you jumped right into the deep end.

And, hopefully, benefitted from the experience.

Some of the photos below are dual-pic composites, others have the photographer's headshot in a nearby frame in their Flickr stream.

As always, click on the pic to see it bigger and see who shot it. And please take a moment to leave a note under your fave.

Enough yapping. On with the photos, and the reasons they stood out to me.
__________

Because looked like it jumped off of the pages of WIRED Magazine.

Because of the DIY biz-card gobo on the key.

Because of the in-focus background that could have been a weird distraction, but instead carried the shadows from the low-fill in a cool way.

Because the photog shot his recently unemployed dad, which probably injected a fun, purposeful shooting session / family activity into a stressful period.


Because of the impish expression on the subject's (top) face.

Because of the use of graphic lines and color.

Because of the inclusion of background context while still keeping a headshot framing. The photo has layers of of interest.

Because of the confidence exuded by the subject -- he looks like he is ready to take on the world.


Because of the inclusion of vocation-specific background, but not in a way that hammers you over the head.

Because the lighting is simple, elegant and does not call attention to itself.

Because the subject exudes professionalism and warmth -- her expression makes her look like someone you would want to work with.

Because the composition -- including contextual background -- is still tight enough to work as a Facebook and/or LinkedIn avatar and still be readable. The photo can be used in a variety of ways.


Because of the strong graphic quality.

Because of the quirky expression.

Because of the creative use of a light modifier as a quickie background.

Because of how the high-key, airy exposure brings the whole picture together.


Because he placed the subject on a background that many people miss as they are walking around on their background looking for a background.

Because of the way the expression, hair, grass and everything work together.

Because of the composition that makes the flower in the ground look as if it is in her hair.

Because the shooting angle allowed the photog to use an umbrella as key and the cloudy, overhead fill as a huge, on-axis softbox.


Because of the intensity.

Because of the tight crop, which adds to the above.

Because of the keyboard reflection being pulled off very well in the curved glasses. Not novel, but done very well.

Because of how the B&W conversion added to the simplicity of the photo.


Because the subject (left) oozes cool.

Because of how well the specular highlights were handled with the glasses.

Because of the color palette and tonal range. The internal separation is great -- the face works perfectly against the background.

Because how many sons can pull off a photo of their dad that "oozes cool" on Father's Day?


Because of the expression and connection in the subject (left).

Because of the lighting.

Because the background, which at first seemed too busy, is actually composed of the DIY crafts the subject makes.

Because of the diagonal crop to the headshot.


Because of the well-executed profile lighting. (Lighting from a little behind the subject, as here, is a better bet than straight-on profile light.)

Because of the expression and moment.

Because of the photographer seeing the design on the background and using it to add a dynamic element in what could have been a static photo.


Because of the composition of the subject (left) and how well it works with the lighting.

Because of the distillation of the photo that happens with the conversion to B&W.

Because of the connection between the subject and the viewer -- and how well the two brothers' photos go together. Probably not a bad thing to pull together a few days before Father's Day.

Because most brothers I knew at this age could not stop beating each other up long enough to pull of two photos like this.
__________


So, there are a few sweet examples in a huge field of entries, many of which could have just as easily been on this page.

To see a slideshow of all of the entries, settle into a very comfortable chair, grab some caffeine and click here.

Oh, yeah -- and to see which one of these photographers has won the Speedlight Pro Kit, the Strobist Lighting DVDs and the Trade Secret Cards for the first assignment from SBCII: Click here.

Wednesday, June 24, 2009

Two Photos that were Tough to Toss

Boot Camp II Assignment #1 yielded over over seven hundred entries, which I have thus far winnowed down to a baker's dozen. It is getting very difficult to edit them any further.

At this point, I have to look hard to find reasons to knock photos out. I just dropped two photos for no other reason than they are not really headshots. But they were both so beautiful I wanted to stick them up on the site and show them off -- and help me procrastinate a little longer in picking a winner.

One of them would look right at home in the NYT Sunday Mag, the other is an art photo mag cover waiting to happen.

Too loose to win, too good to throw away -- after the jump.
__________


Beautiful Look in Horrible Light

Jerome Love's photo of "Thulani," a youth program director in Soweto, South Africa is a wonderful example of how bad midday light can be finessed with small flashes. (Click the pic for bigger.)

If you look at the area in the right of the frame, you can see what ambient Jerome was dealing with. So he worked the shadow side of a building to build his light in the shade. He cheated the building a little to use the sun as a rim. This added a nice layer of texture to the portrait.

He used two bare SB-28s. The lack of a mod helps in the light output department. The key was high camera right, at 1/4 power, zoomed to 85mm throw. The fill was on the ground in front (on the vertical lens axis) and was set to 1/8.

Note that the key was upper camera right -- same side as the rim. This little departure from convention always adds a different feel to a lit portrait.


Bad ambient light: Free.
Two SB-28s: About $200.00.
Owning midday with two small flashes: Priceless.


I Can't Stop Looking at This One

Toni.R's timeless portrait of her 14-year-old daughter works even before the addition of the seagull, which is posed so perfectly it looks like a suspended movie prop.

The lighting is simple -- a bare SB-26, dialed way down, from camera left. It is working against the sun, which comes from camera right. (Check out the gull for ambient-only light.) Toni's light modifier -- a Tupperware bowl -- was rendered inoperative when it was accidently mistaken for the coleslaw dish.

I'll bet that never happens to Annie.
__________


These both had beautiful light, interesting composition and an atypical look. But beyond that there was a strong connection between the subject and the viewer in each portrait.

While both of these photos were technically not headshots, they get the highest compliment I can give a photo -- that I really wish I had taken them.

Sunday, June 21, 2009

Food Photography Made Easy: The Lunch Box

Shooting vittles can be as complex as you want to make it. But it is pretty easy to get elegant, well-lit food photographs with almost no money out of pocket.

Hit the jump for a gastronomic update on a Strobist cheapskate classic.
__________


Of the 1,000+ posts on Strobist at this writing, one of the most popular is the $10 Macro Studio -- a cardboard box hack that makes it almost impossible to take a bad shot of a small object.

With a little alteration, that same concept can be used to create classic food photography lighting with a light source as simple as a desk lamp. Of course, a speedlight will work great, too...


Thinking Outside of the Box

The classic direction for lighting food is from the top/back. In typical presentation, food has more width and depth than it does height. So the top/back is a logical position from which light can rake across the food to reveal texture and form.


For this walk-through I raided the fridge for some fresh tomatoes. Not complex, but nice and 3-d for illustrative purposes. Here they are with a bare light hitting them from the classic, top/back position.

This hard light almost makes the 'maters look as if they are made of wood and painted glossy red. You can do a lot to manipulate the visual perception of surface quality with different lighting techniques.


Here is the same shot with a wider lens. The light source is a bare SB-800, but it could just as easily be a desk lamp.

You could easily soften that light with an umbrella if you have one. But if your food or setting is specular, those ribs (Mmm-hmm-hmm-hmm... ribs...) are gonna give you problems.

This is one of those instances where a soft box is much better than a shoot-through. But there is no need to shell out for one if you are not shooting this kind of stuff all of the time.

Instead, you can hack a large cardboard box (quite literally) and essentially turn the soft box inside out.


So, here is the basic box -- use a big one -- cut up and placed back together to give you a sense of where the cuts are. The more of an angle you put on that diagonal cut, the more your light will come from the back. I did this one kinda middle-of-the-road, but you might want to crank it up a notch or two.

And if you use a razor knife like I did, please be careful. Or at least bookmark this page before you start. Just sayin'.


(LIGHTING GEEK NOTE: I had fun doing a quickie shot of the cut-up cardboard box. Click it to see bigger, with notes on the locations of the four flashes involved ...)


That big open square on the top is gonna get some diffusion material, so the window will do its job and improve your harsh light source. Tracing paper is ideal, but tissue paper (big, like from a gift) works great. Stretch it smooth. Wax paper will do in a pinch, too.

I scrounged a little Rosco Tuff Frost, which is tough (duh) and uniform, not to mention color-neutral. That last part is important, if you are using some type of mystery diffusor.

Also, if you are using this with a desk lamp, use an incandescent bulb (no CFLs) and set your camera's white balance to tungsten. Everything will work fine.


Here is the part you keep, and by now it should be getting pretty self explanatory as to how to use it to soften that bare flash or desk lamp. If you are more of a food blogger than a photographer, you can do this all with continuous light and a tripod -- just crank that aperture wayyy down for lots of depth of field.

(Not that this is a foodie blog, but you regulars would be surprised at who passes through here while learning to shoot stuff for their site.)


Okay, so lets stick our box in between the light and the subject and see what happens. Right away, the tomatoes look way better. I am using a sheet of black plexi as a background, to get a clean reflection of the new, slicker light source. (The umbrella would suck for this background, because of the ribs' reflection.)


Here is a pullback, which actually is a pretty cool composition. But looking at this (and the photo just above) our next problem is that the bottoms of the tomatoes are too dark. This is because all of the light is coming from the back/top.

That's an easy fix, and we do not need another light, either. We can get double-duty out of our nice main light by adding a reflector:


Since this is a no-wallet Monday, let's fix this with a folded sheet of printer paper (or, if you are over 50, typing paper...) Just fold it and stand it in front of the tomatoes -- maybe to one side, as shown. (You could stick it right in front, too for a different look.)


As you can now see, that one sheet of paper makes a huge difference.

By default, it will not overpower the main light source, either. It's a reflector, and cannot give out more light than it is receiving.


So, let's try another reflector on the other side. It may be that the second reflected light source ends up being too much. But at two cents a pop, go for it and see what happens.

Here it is close-up, which is the same photo at the top of the post. Maybe you like the extra detail, or maybe the second highlight turns you off. That's up to you -- add salt to taste.


Here is a pullback with two reflectors for clarity's sake. Depending on the topography of what you are shooting, these reflectors do not need to be big, or symmetrical -- or even white. You can illuminate those shadows exactly the way you want by placing as many reflectors -- large and/or small -- wherever you want.

Need more light? Try aluminum foil reflectors. That's what I used for this cake. Crinkle it up, then straighten it back out for a nice, smooth, pebbled reflector surface. You can choose the shiny or matte surface, too, for different looks.


Here it is, from the side angle.

Again, that SB-800 flash could easily be a desk or floor lamp. And the grey backdrop was just to hide the white wall reflection in the initial shot. Once you get the diffusor panel up, that problem solves itself.
__________


Fast Food

So, there you go -- an easy entré into food photography. If this kind of thing floats your boat, you might want to consider a medium-sized soft box, which will of course make this kind of light very easy. And it travels well, too.

If you're a food blogger and you decide to play with it, link in and spread the luv -- and post a comment so we can see what a hotshot food photographer you are now...

Tick, Tick, Tick

Just a quick reminder that the first Boot Camp II assignment is due at end of day (local time) tomorrow, June 23rd.

Lotsa entries pouring in from the procrastinators, and you can check out some of the people blogging along with it here.

-30-

Wednesday, June 17, 2009

On Assignment: HCAC Dancer


I am working on several projects this summer, the most enjoyable of which being a series of portraits for the Howard County Arts Council.

I photographed Kassi, a dancer, for this series and got a chance to play with one of the two-light techniques we talked about earlier. This was also the first chance I got to use a new boom setup that is a little heavier duty than the one featured earlier this week.
__________


Riaz Redux

I normally like to play around with new lighting styles before trying them out on an assignment. In this case, I used the small-flash lighting class in Dubai earlier this year as the guinea pig for this shoot. You might recognize the top photo as being lit similarly to that of Riaz, the first example in the two-light portrait series.

There are a couple of differences, but the grid key / umbrella fill was a common denominator for both. In shooting Riaz, I had the umbrella squished right up under the lens. With Kassi, I put the umbrella on the floor with a flash mounted to it but with no stand.

I used an umbrella swivel adapter to attach an SB-800, and stuck the assembly on the ground. The umbrella rests at about the correct angle for uplighting a low-to-the-ground subject by itself.

Ratios were done without a meter and without regard to any absolute settings, as usual. I positioned the fill light first and altered my flash power and/or aperture until I saw a nice baseline exposure for the frame.

Generally, I like to get it to a full exposure, and then drop my power level on the flash or close down the aperture until I get a nice looking floor to the fill light. The idea is to use the fill as a sort of safety net, to lift the shadows that will be formed by the key light, lest they get too dark and contrasty. If you are coming from off axis with the fill, you'll also introduce a second angle to the overall light.

I really liked the look of the low-in fill, as it gave its own shape to the subject -- much more so that would an on-axis fill. But as much as I liked the shape of the fill, I was going back and forth on the shadow that it threw over Kassi's head and shoulders.

In the end, I wanted the direction of the light, but not the shadow. So I toned the latter way down in post. There is definitely a procedural learning curve for me, even two full years after leaving the tightly controlled Photoshop environment of The Sun.

I have to remember to loosen up, as my default is typically to "do it the newspaper way." But then I remember if I were personally doing everything the newspaper way today, I would be drowning in debt and arbitrarily lopping off perfectly good body parts in a misguided attempt to get a "good return on investment."


Oh well. Back to the light.

The key, as you can see, is a gridded SB-800. We have already locked in the fill level and shooting aperture, so the key level is set by altering the flash's power level. (We can also move the flash closer or further away, but that would change the look of the light.)

Unlike the grid on Riaz, I wanted to catch Kassi's face and body with the key but mostly miss the wall on the leading edge. This way I could control the tone in the white wall, even though she was leaning against it. To do that, I didn't aim the grid at her face, but rather out in front of her face a little bit. So her face is nearer to the edge of the beam than in the center of it.

A grid on a speedlight is a very small light source and thus produces very hard shadows at this distance. But I know they won't fall too far off of the table because I built my fill light first. The combination is soft vs. hard, high vs. low and tight light vs. everywhere light brings a lot of different contrast layers into play. If I wanted, I could have used a 1/2 CTB on the fill and a 1/2 CTO on the key to add a neat color contrast in there, too.


A Bigger Boom

For another look, we wanted to do Kassi dancing. She is very athletic, and incorporates that into her routines. So we set up to light a photo of her leaping.

I knew she would be looking back over her shoulder at me, and wanted to light her face from a flattering angle. To do that, you have to find the position of her face and then get the light wherever it need to be to hit that angle.

In Kassi's case, to three-quarter light her, we'd have to be above, behind and camera-right of her face when she looked over her shoulder. So we were going to need to get the key up pretty high -- especially considering we'd be going through an umbrella, too.

For that I used a bigger, heavier-duty boom than the Interfit model we talked about earlier this week. I used a Paul Buff counter-weighted boom arm attachment on a 13-foot light stand. I got this to be able to get my bigger flash heads up high. And while it is not super heavy duty, it is sufficient for that kind of work.

You buy it in two pieces -- the stand and the boom arm. The stand is a heavy-duty, 13-foot stand, which is also a great thing to have kicking around when you need it. The boom assembly includes a two-section extension pole, a multi-angle clamp and comes with an 11-pound, slide-able counterweight. They total up to $160.

Needless to say, this is rock solid for a speedlight, and I also have been happy with it in a supporting role for both my SB's and my WL's.


So, here's the setup. The key light is above/behind/camera right, through an umbrella. There is a back/separation light (an SB-800) hiding way back at camera right on a compact, 5-section stand.

The key light location was trial and error, done as Kassi worked through a few practice leaps. In the end, it was a perfectly logical location, given the position of her face. Kassi's leap put her about two feet in front of, and to camera left, of the umbrella.

The fill was a bigger problem, as we could not just open the shutter to let if build up the ambient. By balancing that way, we would have lost the shutter needed to freeze the leap. So it would all have to come from flash.

It had to be soft, come from close to on-axis and reach back to light the back wall, too. So I needed a physically big light source, coming from the camera's direction and pretty far back. Fortunately, our room was a neutral, light color, so the wall 15 feet or so behind me became my modifier.


I fired a WL 600 into that wall, building a nice, soft, directionless fill that would be far enough back to reach back to the background wall without losing too much oomph. My shooting position was about three feet in front of the light.

If you are in a neutral room, always consider your walls as possible huge bounce surfaces that you can employ as everything from a soft key to a humongous soft ring-like fill. But you'll need some power if you are going to use it over a large area.

This is one of many examples of a way in which you can use a monobloc with smaller flashes. Ironically, the SB is my key and the WL 600 is the fill. This doesn't make a lot of sense, unless you consider how much more efficient a close-in, umbrella'd light is than another light bounced way back off of a wall and having to carry another 30-40 feet after that.

Having a big light in your back allows you wallpaper fill light over a large area while accenting with speedlights.
__________


Read More: On Assignment

Q 'n A

Meredith, of Jackson, Mississippi asks:

I'm in the process of setting up a studio in a new space. We were trying to pick paint colors, and the rest of the building has a black ceiling.

The photo studio, I think, should obviously have white walls instead of some crazy color. But then we were questioning the ceiling color -- should it be white, or black? (It is a very small room.)


Which would you do? If it sounds arbitrary, give it a little thought before making the jump.
__________


Meredith, if you think about it, you probably answered your own question when you brought up the room size. The classic color for a studio ceiling is black, since that controls unwanted reflections better than any other color.

You can always put a light up there if you want top light. But you certainly won't want it all of the time, and that is what you'll get to a large degree when working in a "very small room."

Small rooms are the most difficult for controlling stray light bounce, so the smaller your studio is, the darker you will probably want to paint the surfaces. If you can't escape light walls, you want to create some "negative fill" reflectors out of a flat black surface of some kinds.

Bonus points: Paint your reflectors white on one side and black on the other, and you'll have it both ways. But the main point is that you want to be able to control the bounced light.

And dark surfaces -- including the ceiling -- will help you do that.

Sunday, June 14, 2009

For Over-the-Top Lighting Without an Over-the-Top Budget


Pictured above is Joe McNally's assistant Drew Gurian acting as a voice-activated boom during a recent desert shoot (detailed here).

While this boom is perfectly serviceable, one cannot always find a Drew hanging around in the desert when top light is needed. For the Drewless, an excellent and inexpensive speedlight boom solution, inside.
__________


The third cool thing I came across in Paso Robles (here is one and two) was a very slick little boom/stand photographer Sean Rolsen brought along.

It is designed as a flex-reflector holder (it even comes with the clamps) but it does double duty as a sweet little speedlight boom.

It is the Interfit Combi-Boom Stand, and the little joint where the stand turns into a boom is where the magic happens. The boom arm actually collapses into the main tubes of the stand itself -- you can even continue the boom arm straight up for extra height if you want.

But if you pull it all the way out, it rotates. Then you slide it back into its little swivel clamp and you have a speedlight boom. It does not come with a counterweight, so this thing collapses nice and thin. But the opposite end of the boom has a hole where you can hook an improvised weight up to do the trick. A camera bag or something should fit the bill nicely.

The combination pic below shows a detail of the boom joint, and how it operates. Looking at Sean's, it seemed just about perfect for lightweight speedlight use. But I would not consider it heavy duty by a long shot -- and I wouldn't put a lot of unnecessary torque on the clamp, either.

(If you have it set up right, with your scrounged counterweight end extended enough to balance your flash reasonably well, there would be no reason to over torque it anyway.)


There is no way you are gonna hang an AlienBee on this thing. A speedlight is about as far as it is gonna go. And it is gangly enough to not want to stick an umbrella up there in any wind at all. But for top light using speedlights in a nice, small package, it is hard to beat -- and an umbrella would be fine indoors.

The elbow mechanism is pure genius, and the folks at Interfit are to be congratulated for that. (Those are the same guys who just debuted the "Strobies".) Also of interest is the price -- under $100.00. For lightweight, occasional boom use (and a stand when you do not need the boom) it appears to be a great solution.
__________


:: Interfit Combi-Boom Stand ::


(Photo at top courtesy Bobbi Lane)

Thursday, June 11, 2009

Dustin Diaz's Daily Dose

A number of people have pointed me to Dustin Diaz's 365 Project. And while this is certainly not the first of its kind to come down the pike, Dustin has inserted a couple of twists that make his project right up our alley.

Get your One-A-Day shot, inside.

__________


Light and Steady

First of all, Dustin is using much of his photo marathon to explore what he can do with flash. And while that sounds all laudable and romantic and stuff, I can tell you from experience that there is nothing like a long-term project to expose your "camera expertise" as nothing more than a bag of tricks -- and a shallow bag of tricks at that.

At least that's been my experience when doing long-term projects. Which is exactly why you do them, of course -- to grow, practice, discover your limits and then expand them out of sheer necessity.

But Dustin has added another Strobist-friendly aspect to his daily grind: Lighting diagrams for many of his photos. That's right, not only is he shooting a lit photo a day, but he is also spelling out his techniques for anyone following along.


If Only I Had that Kind of Time...

So, what kind of loser has enough free time on his hands to light, shoot, diagram and publish to the web non-stop? (aside from the obvious, of course.)

Well, if you are a Gmail user, you have Dustin to partially thank for it. Dustin was an engineer on that team at Google. As for myself, I am not sure how that Gmail tech stuff works. But you can get a basic idea with this video.

Dustin worked at Yahoo before that, and recently moved over to Twitter. In fact, he announced his resignation from Google with a tweet. The guy's got flair, I'll give him that much.

But suffice to say, he is a plenty busy guy to be tackling a significant project like this. And if you are interested in trying a 365 yourself, I got a chance to shoot some Q's at him about his year-long journey thus far. So I'll just shut up and let him do the talking.

(As always, click on any of the pix to get to the Flickr page, which in turn will point you to his lighting diagrams.)
__________


Dustin Diaz on the 365

Q: Talk a little about the framework for the project. Has this been harder than you expected, or has your lighting grown easier and more intuitive because of the repetitive nature of it?

Doing a "365 project" is of course, not uncommon among photographers. To give some brief history, I had already been taking pictures several months prior to even beginning the project. In regards to daily shooting, I have been a photographer for four years.

You know the old saying -- "you need a camera to take pictures". So I carried mine everywhere. However, moving into the 365, the point was not to see if I can push the shutter every 24 hours (that's easy) but rather to invoke the challenge of being a creative editor. Choosing just one image from a bunch is hard -- really hard. And then starting that process all over again the next day, well, that's just exhausting.

I have, however, found it easier over time in deciding what photo I want to take each day by simply focusing on single-themed photos. This is as opposed to going out and taking a variety of photos and then having to decide between having "too many" photos at the end of the night.

In regards to being "harder than I expected," it has been. But that's only because expectations continually change, and the level of expected quality grows and having an audience that gives constant feedback is terrifying! But once you have an audience, you can't stop. Or at least, I can't.

As far as "lighting" goes (since this is the Strobist blog, after all) it's a double-edged sword. It's easy to fall into the trap of taking the same photo using the same light settings, but in different locations. But part of the goal of the 365 is to try new things, make mistakes, and do things out of the ordinary.

For example I never thought I'd be running in the middle of traffic, leaving a tripoded camera in a windy suicide lane, clamping lights to people's garages, or paying homeless teenagers to trigger the shutter. But to quote a friend, it's like "taking crack, responsibly." Being a daily strobist is hard, yet addicting, but one must be responsible enough to put the gear down for a day, and then let your next idea wait another day.


Q: Speaking of that, has the project revealed the limitations of your bag of lighting tricks? Are hitting a wall, or are you growing as a result of those exposed boundaries?

Yes, there are limitations, but first, a quote from Michael Freeman from his book The Photographer's Eye:
"The important decisions in photography are those concerned with the image itself: the reasons for taking it, and the way it looks. The Technology, of course, is vital, but the best it can do is to help realize ideas and perception"

Thus, in one sense, to say one is only as good as their equipment is a bad outlook. I am, however, at a point in my photography career where I've set myself up to mostly "not worry" about gear. Between my wife Erin and I, we have six speedlights and six PocketWizards. Needless to say, I don't feel hard done by when it comes to lack of light. The only real limitation is my imagination (for lack of a cheesier expression). And no amount of gear is going to solve the problem of making a good photograph with meaning. So yes, this is difficult.

From an Engineers perspective, one would think there's only so many combinations of lighting setups before you're doing the same tricks over. And nobody wants to be a one-trick pony — at least I don't.

But to this point, there are only three things that have gotten easier:

1) leaving the house
2) setting up
3) tearing down


Therefore, the biggest stumbling block each day is the "what" and "where"-- and the occasional "how much time do I have before midnight," which has happened on several accounts.


Q: You famously swapped horses from Google to Twitter. At Google, there is a decent-sized community of photographers, and even a pretty tight group of guys into small-flash lighting. Is there a similar cadré at Twitter? If not, have you seen any interest from others due to your project?

Google is an Engineering company. They have a photography mailing list. Most of the subjects that popped into the list were related to pixel density, f/stops and lenses with an infrequent link to someone's personal photos requesting a critique.

None of these are bad things, as they represent the culture quite well. And as far as I remember, very few were into strobist photography. I had helped organically grow one small group within the Gmail team, and it became quite fun for a lot of us.

On the flipside of the coin, I am more interested in the art of photography. For example, learning the inverse square law was fun for a few days. But in the end, it's only a mean to an end. Taking photographs that actually evoke emotion is what I am after, and light plays a major factor into creating that feeling.

Nevertheless and to the point, Twitter is a much smaller company (in regards to employees). And there is no photography community. If anything, there is a strong coffee cadré, which I will happily embrace. The goal was to lead the Frontend Engineering team, not seek camera friends.


Q: What advice would you have to anyone considering a 365 project? I.e., in retrospect, would you deliberately choose a broad or narrow visual framework, and why?


For anyone crazy enough to do anything out of the ordinary for 365 days, you WILL get tired. But specifically for photographers, find inspiration in other places besides photo websites.

Watch an episode of LOST or Heroes, then perhaps go buy a comic book. (Hey, I'm not even into comics, but there is some good strobist inspiration in those things). Or better yet, just leave the house knowing you can't come back without taking at least ONE good photo that you're happy with.

And lastly, reflect often. Notice your own improvement and try to out-do yourself — not others. It does not take a 365 to do this. I mainly chose my custom 365 framework to bring forth challenges that were appropriate to what I wanted to get out of it. Therefore broad or narrow, whichever framework someone chooses, I believe self-challenges are always a great way to better oneself.
__________


Oh, and Speaking of Twitter

Back at Strobist International HQ, we know we have been extremely neglectful of late in the Twitter department. It started off on it last summer, with more enthusiasm than long-term strategy. Then the upstream conversation quickly got to take up far too much time in the workday. It was kinda like trying to take a sip out of a fire hose.

Right now, it is still dormant. But I am finally off of my travel merry-go-round and trying to work out a system that will be sustainable. If you want to be onboard for whatever ends up happening, you can click to follow here.

The only thing I can promise is that, for a little while at least, it'll basically be the sound of crickets chirping (tweeting?) in the distance. But when I decide how to light it up again, you'll be the first to know.
__________


Links:

:: Dustin's 365 Site ::
:: Dustin's Lighting Diagrams ::
:: Follow Dustin from the Heart of the Twitterverse ::

Wednesday, June 10, 2009

[OT] PSA: Careful With Those iPhones, People

I will be the first to admit that the iPhone is a great little device for photographers to carry around -- web, phone, portfolio, camera, etc. But they can bring with them a completely new set of dangers. You can be tempted to be shooting pictures when you probably should be concentrating on other things.

Regular readers of Chase Jarvis' blog already know this, but he was recently involved in a minor traffic incident while filming a promo for this Friday's talk at the Art Director's Club of Denver. It was even caught on tape:


As if that is not warning enough to be aware of your surroundings, now McNally is having attention-deficit-related problems, too:
__________


A word to the wise is sufficient: Let's be careful out there, people.

I you are in Denver, head over to the ADCD this Friday. And if you are anywhere else, check out Joe's completely redesigned new website.

Just make sure you look both ways before crossing the street.
__________

LINKS:

:: Chase Jarvis Blog ::
:: Joe's New Digs ::
:: Art Director's Club of Denver ::

Tuesday, June 9, 2009

Boot Camp II: First Assignment

UPDATE: DEADLINE REMINDER -- This assignment is due at the end of the day, your local time, on June 23rd.
__________

There is an old saying: The cobbler's kids have no shoes.

The translation of which, for us, is that many photographers do not have a recent headshot of themselves.

Your first assignment will allow you to rectify that situation, and perhaps lend a helping hand to someone who may recently have been affected by current economic situation.

Done correctly, this assignment will yield both a model for you, and a photographer for your own headshot.
__________


The first Boot Camp II assignment is set against the backdrop of a national unemployment level in the U.S. that is hovering at 9.4%. Which is to say that you almost certainly know someone who is out of work. And many other areas (including localized pockets in the U.S.) have even higher unemployment rates.

So, rather than photographing your hand-painted Dungeons and Dragons figurines in your late-night living room studio yet again, we are going to put you to some good use for a change. People who recently have lost their jobs are likely working overtime on social networking, resumés, etc. And a nice headshot can be a very helpful thing for them.

To be clear, you can choose anyone you want to photograph, and any person will be a valid subject for the assignment. But if you are going to be making a headshot anyway, why not point that effort somewhere it can do some good? And as a bonus, you'll have someone you can swap places with so they can take a nice headshot of you. (Just show them how to grab focus on your nearest eye, recompose and shoot.)

If you are a total newb and don't know where to start, might I recommend the L101 Corner Headshot tutorial? You can almost certainly do better than that, but it will get you off on the right foot.

Coincidentally (not really) we also just finished up a three part series on some different ways to approach the lighting on a headshot. (Here, here and here.) You don't need a lot of gear to do this one -- every shot in this post was done with either one or two flashes. (And no, I am not going to walk you through all of them. It's time for you to do some thinking.)


Make it Appropriate

If you are shooting an out-of-work accountant, do something that is fitting to his or her skill set. Unless, of course, they are using their job loss as an excuse to launch a career in stand-up comedy or something. You would not shoot an actress the same way you would photograph a CFO.

Work to make a portrait that will fit your subject. This is also good practice for creating photos that work within the boundaries of a publication and/or assignment. And far from being a hindrance, you'll find that these kinds of restrictions tend to help you by narrowing down your choices.

A really good headshot will work well either as a small mugshot or as lead art in a double truck. Don't dismiss a headshot just because the subject matter is about the size of a football. Some photographers build entire careers out of tight portraiture.

Of course you will be paying attention to the light. But once you work that out, don't forget to make a photo. Work with your subject to get an expression, a moment, a little extra intensity, a look, some levity -- something.


Adjust to Your Skill Level

Headshots are everywhere. One might serve as booking mugs at your local police station, another might be next month's cover of WIRED magazine. The beauty of this first assignment is that the difficulty level can be adjusted to the photographer.

At the very least, as a newb you'd be looking for a clean, elegant professional-quality headshot. But if you are more advanced, you can pretty much go anywhere with it.

You know where your comfort zone is. Make sure you get the bases covered. But if that is easy stuff for you, try to stretch a little. Headshots are easy to get into and offer endless opportunity for creative growth.


How to Submit Your Assignment

I am serious about the "shoot both ways" aspect. To complete this assignment, you will need to turn in two photos -- the one you shot of them and the one they shot of you. Ideally, you'll combine them in Photoshop or some other imaging program. Just cut and paste them side-by-side.

If you do not have the software to do something like that, put both photos into Flickr, turn in only your photo of the other person, and link to the corresponding photo of you in the caption. (Alternately, you can upload them at the same time so they are right next to each other in your stream if you do not know how to create an html link in the photo's caption.)

Don't go all vampire on us -- you'll need to have both photos to fulfill the assignment. Please do not submit just half of the job.

And for the introverts, this is the only assignment in which you will be required to photograph another actual human being. Screw up your courage and ask someone if you can photograph them for a school assignment.

If they say, "Hell, no!" and beat you up just for asking (after all we are talking about an irrational fear here, right?) then just ask someone else. Maybe someone a little smaller (and not very fit...)

Your assignment is due by the end of the day (your local time) on June 23rd. Don't be late.


How to Tag it

First, upload your assignment to Flickr. Then join the Strobist Group, if you are not already a member. Submit your photo to the group using the "add to group" button just above your photo. Do not wait until the last minute to do this. Flickr apparently has a waiting period before you can submit to groups.

Oh, and since you are adding it to the Flickr Strobist Pool, tell us a little bit about your lighting in the caption. That way, you'll be of help to someone else.

If you need technical help on the Flickr stuff, try this thread. Please read the thread before asking any questions, lest someone reply that "your father smelled of elderberry" (or words to that effect.)

(UPDATE: They have already started in with the general craziness, so you can skip to the more relevant stuff by jumping to this point if you like.)

After you have submitted your assignment, tag it with the following term:

SBC2ASSIGN1

If you are successful, your photos should appear in this search within a few minutes. Please, only submit one entry. For most people this will be two photos, side-by-side, combined into one. As we are hoping to create an inclusive slideshow, please do not tag photos which are not appropriate to this assignment with the SBC2ASSIGN1 tag.

For the same reason, please do not turn in any photos which are NSFW. As we noted yesterday, breaking these rules will get (at least) your photo removed from the Strobist pool, and thus, this assignment. Thanks much.

Please note that your photo must be tagged correctly and in the Strobist group pool to show up in the search.

If you want to ask questions, or otherwise discuss this assignment, you can do so in this thread.

And you can check out some of the other bloggers following along, here.


And the Winner Is ...

One winner will be chosen from qualified entries. That person will receive the following, shipped anywhere:


• One Speedlight Pro Kit (more info)

• One Strobist Lighting Seminar 8-DVD boxed set (more info)

• One set of Strobist Trade Secret Cards (more info)


Winners Never Cheat; Cheaters Never Win

Since there is prize booty involved, we have to keep it fair. I do not wanna see your previously shot headshots popping up as entries. To some extent, the fact that you will also be including a headshot of yourself in similar light will help to keep the bad guys honest. But just to make it even harder to game the system, the following photo will be required from the winning entrant before any prizes are sent anywhere:

Winners will be required to submit, on request, a shot of their subject, taken in the same shoot, holding up one finger. This is for authenticity verification reasons only. So, don't forget to shoot a frame of that while doing your assignment. Just in case you win.

(And let's keep it to the index finger, please...)

Shooting Movie Moving Posters


Via Rob at the always excellent A Photo Editor, a very cool vid from photographer Alexx Henry on how they are now bringing movie posters to life.

My first thought: Minority Report.

If you are going to start putting these displays out in public, go ahead and outfit them with motion detectors and retinal scanners and be done with it.

Way cool -- and there is even some info on lighting in the video, too.
__________

More Alexx Henry: Portfolio | Blog

-30-

Monday, June 8, 2009

Boot Camp II: Introduction

Welcome to Boot Camp II, a series of assignments designed to help the newbs to get off their collective butt and actually go shoot something.

If you are more experienced, you are more than welcome to participate. But understand that, at least at first, we'll be dialing the degree of difficulty back a little.

Details, and a couple of items of interest, inside.
__________


What to Expect

This summer, you will receive four assignments. Each assignment will have a specific subject matter and scale, and will be designed to introduce you to four different areas of photography.

Our theme this summer is the worldwide economic meltdown, so everyone please sell all of their stocks to buy gold and ammo if they haven't already.

Long-time readers will already know that we don't take world economic crises (or much of anything else) too seriously. In fact, we would rather tickle a credit crunch under the chin -- or maybe sneak up behind it and deliver a wedgie -- than cower in fear what might happen in the future if we spend enough time worrying about it.

After all, what can we really do about it? Nothing, right?

Well, maybe not. We can always do something. Even if it is small, it is still something. So each assignment will contain a way in which it can be used to do something good in the face of certain, worldwide economic doom.

It might be the assignment itself. It might be a variant in which you can choose to participate. But the point is that this need not be pointless busywork. You can accomplish something good with each of these shoots if you want to.


Okay, Let's Make This Interesting

Each assignment will also come with an associated prize pack. We have some nifty things lined up that certainly will be of interest to anyone who reads this site.

Shortly after the deadline for each shoot I will choose a single winner, based on quality, lighting, appropriateness to the assignment, the alignment of the stars, what I had for breakfast that morning, etc. Conveniently, with a judging panel of one, each decision will be unanimous.

The winner will receive the prize pack, with free shipping to anywhere in the world. The contents will be labeled as a gift, which it is, so hopefully that might even get you out of duties if your country so imposes.


How to Participate

The assignments will be submitted through Flickr. By now, you should have already created a Flickr account if you did not already have one. If your country's government is so worried you will see a boobie (or a guy standing in front of a row of tanks) that they block Flickr, there are workarounds.

Download Firefox and install the Access Flickr! 1.11 add-on and it will usually get you in.

Mind you, this is only a suggestion from your shining, world-class democracy that values intellectual freedom so long as you do not stand near a train station brandishing a camera. If your government might track you down and lop off your goodies for doing the Flickr end-around, that's on you.


Fraud Squad: Two Important Notes

From experience, I have learned that when there are prizes involved, people will try to game the system.

We do so want to make sure you are not tempted to enter your various, pre-existing portfolio pictures as assignments. So each assignment will also a little security code that the winner will be required to provide before any prizes are coughed up. More on that later.

Second, the biggest benefit from these group assignments is in seeing how people from around the world handle the exact same assignment you just shot. To that end, I would like to put up an all-in slideshow of the entries up on the main site, just as we did with the water drops.

To do that, we have to rely on people tagging their assignment photos -- and only their assignment photos -- accurately. The tags will be designed so that photos could not "accidentally" get swept into the slideshow.

Since the photos also will have to be dropped into the Strobist pool to qualify (more on that later) there is some recourse available. Tagged photos not appropriate to the assignment will be removed from the pool, thus removing them from the slideshow and from prize consideration.

And depending on how badly the bounds are breached, the photographer may themselves be removed from the Strobist group -- or permanently banned. The idea is to be inclusive with the slideshow. So please do not take advantage of the tagging structure just to be an ass.

This kind of thing would be at the expense of all who entered honorably. And we can only promise that you will be given a fair trial, immediately followed by a fine hanging.


Follow Along at Home

Are you a blogger? If so, you are encouraged to follow along in public. After all, why crash and burn in obscurity when you can do so in front of the whole world?

If you want to participate in a meta-tagged way, it's very simple to do so. Just link into the appropriate assignment page in your posts, and include the intact phrase "Strobist Boot Camp II" (no quotes necessary). Then, your post should come up in a Google blog search which will be linked from each and every Boot Camp II post.

That linked search (results are last-in, first-out) should be good for a few drunken visitors stumbling in over the course of the Boot Camp and long after. What the heck. It's not as if you were swimming in fantastic post ideas for the whole summer, right?

That's all for now. The first assignment drops in tomorrow.

Sunday, June 7, 2009

Hands-on With the Speedlight Pro Kit

We blurbed these when they came out a ways back, but I just got a chance to play with them last month in Paso Robles.

Inside, more on the Speedlight Pro Kit, a video showing just how specialized the internet has become, and what's in it for you.
__________


Combining aspects of both the Lumiquest and Honl stuff, the Speedlight Pro Kit hits a lot of high points.

For about $125.00, you get a combo that allows you to make a double-paneled diffusor, a large grid, a large bare reflector, two snoots and two grids. They share parts from each other, but can be used together to create four different mods at once, as shown in this example.

I got a chance to play with them last month, and they are well (and uniquely) designed. In fact, I liked them enough to immediately start tweaking them.

For starters, you'll definitely want to use a StoFen-type diffuser (either yours or theirs, sold separately) along with the big reflector or big grid. You want to spread that light out to make use of the full size of the source. Otherwise, what's the point?

Additionally, my immediate thought was to mod the big grid with a thin sheet of tissue paper on the back side, to provide diffusion right behind the grid. This effectively gets the light soft(ish) and gridded at the same time. This would make a big difference for close in gridded portraits. Without the tissue, the light would be hard and gridded. You could split the difference with a StoFen (or similar small diffuser) and the internal light from the reflector.

The grids themselves are spartan, if strong. They are hand-cut-and-stacked Coroplast (corrugated plastic) with rectangular channels. These channels are what determines the aspect ratio of the beam, so expect a soft rectangle shape to the beam. (If you want a pure circular beam, go with straws for channels.)

Overall, they are well-made, and very versatile. The only potential problem we saw was possible light leakage around the (double) diffusor. This is a super easy fix, with a little tab of gaffer's tape. Nothing to be concerned about at all.


There's Niche, and There's Niche ...

How specialized is the internet?

Specialized enough to where you can now watch a walk-thru video of a kit of third-party modifiers designed only for speedlights -- and homegrown from Malaysia.

I am so glad to be alive in 2009.

Herewith, everything you need to know about the Speedlight Pro Kit, complete with a soundtrack of genuine, authentic Malaysian bluegrass music.


And why am I telling you about these today? Because the Speedlight Pro Kit is part of the prize pack from the first assignment from Boot Camp II.

Which starts tomorrow.
__________


Available here:

:: Speedlight Pro Kit (USA retailer) ::
:: Speedlight Pro Kit :: (HQ -- Malaysia and UK retailers)
:: Behind-the-Scenes Shoot Video ::
:: Don Giannatti Review ::

Wednesday, June 3, 2009

Variations on a Two-Light Theme, Pt. 3

Finishing up our quick series on two-light headshot ideas, we finally come around to something a little more mainstream looking. Today, two different spins on umbrella key used with on-axis fill.

More, inside.
__________

For the first two, we used a gridded flash and a gobo'd SB-III, respectively. Today we are going for a little more of a classic look, then putting a twist into it.

Steven, above, was lit entirely by flash -- no ambient contribution in the exposure. The key was an SB-800 in a shoot-thru umbrella, positioned right over the top of the camera. You can see the setup shot here:


(Setup shots courtesy Syl Arena / Paso Robles Workshops. Click on any pic for bigger.)

We used a white wall as a background, but dropped the wall to dark grey by moving everything away from the background to underexpose it. (All about the relative distance.)

We could have easily gone to black by moving further away. The point is that you can get any tone you want by depriving the wall of light -- or adding light to it.

Since we did not need to use the second light for the backdrop, that left us free to use it as fill. Our second light was an SB-800 in an Orbis ring flash adapter.

This two-light combo now gives us complete control over subject key, fill and background levels. The fill, obviously, being determined by the power level on the ring flash.

We can place the umbrella wherever we want, to shape Steven's face however we want. We don't have to worry about the shadows so much, because we are erasing them to whatever extent we want with on-axis fill.

And because we have control over the fill level, we can ease that key over into a more dramatic position. Just by moving the key around a little, we can give this same setup a little more attitude.


Enter, "Tokyo" Bill. (We had an extra Bill in the class, and we had to tell them apart somehow.)

With Bill, we can really rack that key light around to far camera left and work that Obi-Wan thing with his hoodie. Bill was damn-near ready to whip out a light sabre before we finished.

(That, of course, would not have fit into our two-light limit. But it would have looked friggin' cool.)

We can move the key around to sculpt his face and work the edge of his hood because we are not at all worried about the fill light in the deep, dark recesses under there at camera right. This is where on-axis fill shines, as it can worm its way into just about anything.

If you can see it from the lens axis, you can light it. As much or as little as you want. Here's the setup:


When using two lights like this, I find it very simple to think in terms of, "one for shape, and one for detail." You control the form with the key, and control the depth of the form with the fill.

That fill can be an off-axis strobe, or an Orbis (or Ray Flash, or ABR-800) or it can be ambient. All have advantages and disadvantages.

But working that shape-vs. detail balance can allow you to get many different looks with just a couple of speedlights.

First, Riaz, then Brett, now Steven and Bill. So Just a few quick and dirty, all-flash two-light headshot looks that you can whip out anywhere the ambient is controllable.

Which you may find very useful, starting next week.

Share

Twitter Delicious Facebook Digg Stumbleupon Favorites More