Friday, May 30, 2008

Barn Doors and Blue Dragons

After reading Zeke's Nice Photo review of some pretty spiffy $10 speedlight-compatible barn doors, I ordered a set and did a little playing around recently.

Probably not using them the way they were intended, of course. I went with on-camera flash on a point and shoot...

___________

My son, Ben is growing up fast. He's seven years old and playing on his first competitive team -- the "Blue Dragons" in the local soccer league. He's looking more and more like a big kid every day, which as a dad is both a good thing and a sad thing to me.


Usually, the growing up process is a gradual thing in which you only notice the changes after they have happened. But in his last soccer game he drove end-to-end and shot one past the goalie for his first goal of the season (shown at left).

Then he just stood there with a bemused smile on his face. ("Wait, I did WHAT?")

He was a different person right from that moment. He has the soccer bug 110% now, and wants to score two goals in his next game. We watch highlight reals from the pros on YouTube together.

His soccer season is almost over. They play their last game today, and have a chance to end the season with a winning record.

He's not much for posing for pictures. But I am trying to make shots of him now that show the mix of little kid and big kid inside. Which is where the SP Systems barn doors came in.

I have been experimenting with the "fill-first" technique I talked about with Jessie and expanding that into other lighting styles and ratios.

Barn doors basically allow you to control the spill of the flash in four different directions. Sort of like an adjustable snoot. For this shot of Ben, I used a Canon G9 with an SB-800 mounted on the hot shoe and a set of SP Barn Doors clamped to the flash. (I am pretty sure that's the first time that combo has ever been used together...)

I like the way the light looks. When you are paying attention to your ambient flash balance and restricting light, even on-camera light can have a textured, subtle look.

I knew from experience that I only had a minute or two before I'd lose him. So I got into manual mode, got a good ambient exposure, dropped it down just a stop, and then added flash set in manual mode. (This was shot outdoors, in shade.)

I just chimped the results with flash and quicky dialed in a power level that looked good on the screen. The barn doors allowed me to just rake some light across the fence and the top part of his face to keep it interesting.

Note that I am specifically not mentioning f/stops, shutter speeds and flash power levels. Those numbers are not really important -- it is the process of choosing where your fill will be, relative to your main light, that is important.

Using a subtle lighting ratio and restricted beam can even on-camera light look a little unusual. And the hard quality of the light isn't so tough to deal with when the ambient is supporting it so closely. The one thing I did not like was the shadow behind the camera left ear, so I fixed that in post. (Hey, it's a snapshot, okay...)

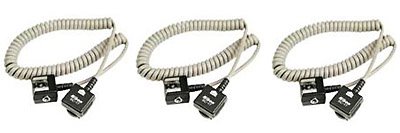
As for the barn doors, they will fit the big SB-26s, and even the little SB-800s if you build up the side opposite the little clamp with some gaffer's tape. They fold up nice and small, too. Very nice.

And in just a couple of minutes I found a new way to play with a new light mod for a go-to technique on a headshot. I'll definitely be playing more with this in the future.

But not this afternoon -- I'll be busy shooting a soccer game. Go Big Blue.
______________

Related:

:: Nice Photo - Barn Doors Review ::
:: DIY Barn Doors ::
:: Blue Dragon Fevah: Catch It ::

Wednesday, May 28, 2008

A Flash of Inspiration

It's spring, and that means "Athletes of the Year" photos for many newspaper sports shooters. We get that same assignment every year, and with it the challenge to make the photos look new and different.

Naples Daily News shooter Greg Kahn came up with a novel way to capture the movement of his subjects this year by using an inexpensive continuous light source that can be found at any Home Depot -- rope lights.

Check out his blog post on how he did it, and be sure to click to see to the paper's sweet-lookin' final layout.

(Thanks to James for the heads-up in the comments!)

-30-

Tuesday, May 27, 2008

Now Available: Strobist Lighting DVDs

UPDATE: Are you reading this from outside of the US? Strobist DVDs, now in their sixth printing, are now being shipped from the US, the UK and Asia. This should significantly reduce shipping costs, time and duties from international readers. (Details at the end of the post.)
__________


What began last summer as an idea over a pair of delicious Chipotle burritos is now here: The Strobist lighting seminar is now on DVD.

Keep reading to find out what it is, whether it might be suited for you, and how to get it.

Right off the bat, many thanks to those of you who have expressed both interest and encouragement over the past months -- and especially to those who helped on the project. Yes, everything took longer than I expected. But in the end I think we came away with something that will pull together the learning process for a lot of people.


NOTE: Throughout this post, I have included photos which were shot for the DVD. You can see more photos here.


Before I get to what it is, I want to explain what it is not.

First, it's not slick at all. I'm not into the infomercial-in-the-studio type of thing, because (a) it's not my style, and (b) that is not the way things happen the real world. Or at least, in mine.

Being a self-funded project, we were presented with a continuous series of hard choices and priorities. For every choice that had to be made between content or bells and whistles, we went for content.

Basically we were just hanging out and shooting. It could not have been more casual. It was hot and we were dressed for it. Or rather, undressed for it.

Rochelle, above left, got to enjoy a nice, cool pool for this shot. Whereas we got to sweat through heat, humidity and yellow-greenish sodium vapor lights.

A bad day in shorts and a T-shirt is better than a good day in a suit, I always say.

I was mic'd and we had still photos popping up onscreen as we shot. We decided that shooting in HD would have left us with way many terabytes of raw footage. So we chose to shoot in plain old DV so we could more easily go long-form with the content.

In the end, the look may have been closer to home movies than high-end video. But the net result was that we were able to include many more situations with the same resources. Besides, mine is a face that benefits from lower resolution.

We started with the idea of creating a two-hour DVD and trying to condense as much as we could into that. When the dust settled we had eight DVDs and about ten hours of content. The price will be $139.00 US. (Which, if you are in almost any other country, is probably getting cheaper every day due to our plummeting dollar...)


What's On It?

The first disc is a discussion about lighting gear -- what you need, how it works, syncing options, etc. This is for the inevitable people who will be watching the series without having read Lighting 101.

Discs two through five are from a lighting seminar that was held in Columbia, MD, last September. A bunch of cool folks dragged their butts out of bed early on a Sunday morning (I am not sure Katy the Night Owl ever totally woke up until after lunch) and we talked lighting and shot photos all day.

The format was similar to that of the lighting seminars I have given in hotel conference rooms in many different places over the last two years. Looking at the morning session, I can see now that I was clearly a bit nervous at the idea of going straight through a day like that live on film. But by midday that was long forgotten and we were having fun.

(Seminar photo by David Hoffmann. More here.)

As is the usual format, the morning was for theory (Lighting 102 format) and the afternoon was for shooting. The photo at left is one of the shots from the afternoon.

As an example, I have uploaded a ten-minute clip of this shot being done in the conference room:

This is typical of the seminar sessions and how we shoot and talk the results through. Just working in the environment we have (i.e., usually not much) and improvising through different lighting techniques. This, like all of the shots on the DVDs, is technique-driven and designed to show different ways to light using small flashes.

We did several other shots that afternoon, but as is always the case we never have the time or environment to do all of the examples we want. So the remaining DVDs (six through eight) are a series of nine location shoots in which I was mic'd and had stills popping up as we were shooting.

We did head shots, indoor and outdoor portraiture -- even an eleven-person group shot in a room that can best be described as sadistic for small flashes.

I also decided to do something that ended up being very difficult as a photographer -- to leave the camera running while I made mistakes and tried to solve problems. Sometimes it is not pretty. But I feel that the best way to learn is not just to learn camera technique, but to see how others solve problems when the curve balls start coming.

We decided to air it out, too. Rather than just editing down to highlights, I think it is valuable to see pretty much the entire workflow, to the extent it is practical. (This would have been much more pleasant if I were a tall, lanky supermodel. But I do try to make up for it with bad jokes.)

Some of the problems we faced were painfully obvious and thoroughly complained about -- my plan to bounce lights off of the group portrait room evaporated when the ceiling turned out to be 30 feet high and dark-paneled. Oh, and with a curved, dark wooden background, too. And way dark. Yeesh.

But that is what we often get, and I believe that being able to improvise your way through those problems is an important skill.

We shot in conference rooms, in fields, in a gym, in busy hallways -- as was the case for the shot of a kendo practitioner at left. (How could I turn down that red background?)

One of my favorite things about photography is working around the limitations of a shooting environment. We never set foot in a studio. This is not about expensive gear and/or exotic locations.

Heck, we even did one shoot with a Canon G7 just for kicks. But some of the problems were more subtle, and/or personal in nature. You will recognize those, too, and how we solved them -- even if we could not comfortably articulate them out loud at the time.


Who Are They For?

Granted, most of the pros reading this will likely look at all of the photos and say, "Yeah, I can do that." And that's great.

But it is easy to forget where we were when we all started out. For what it's worth, when I write for the blog my target is usually myself as a 22-year-old (green) pro. I would put these DVDs at the level of advanced amateur. Especially for people who can learn better by watching someone actually doing something -- and having them think out loud during the process.

For all of the good things about photography, one of the worst is the fact that we so often shoot by ourselves. We never get to see others' workflow and thought process. That is all changing now with the web. And I am trying to nurture that change in small part with this project.

It is important to note that no great new lighting secrets are revealed on these DVDs. We work every day with the same gear, and the same laws of physics. And if you have been reading this site since the beginning, the vast majority of the material will be familiar ground -- although all of the shoots are new and done just for this project.

But for many people, I think watching the process is a big aid for learning. And I hope that seeing it done will be of benefit to many of you who quietly lurk but maybe feel uncomfortable throwing your photos into the Flickr pool. I especially want to help to jump start you folks.


For Readers Outside the USA

Three things to mention. First, Midwest Photo will ship worldwide. But if you are anywhere in the EU, it will be cheaper to get them from The Flash Centre in the UK. For those of you in Asia and the Middle East, they are now shipping from Dubai, too. Details and links below.

Second, the DVDs are coded Region 0 (which is, essentially, region-free) and are in the NTSC format. So you should have some way to play NTSC DVDs (many players play multi formats, as do many laptops) whenever you are. There are no plans to go PAL or SECAM any time soon.

Last, for those of you who read English better than you hear it, the DVDs are subtitled in English. So if you can read the blog, you should be able to understand the DVDs.

Especially on that last point, (and for everything else) I would like to thank Bill Millios, a long-time Strobist reader and my partner on this project, for his insistence on including subtitling with the DVDs. Bill happens to be hearing impaired, but sold me on the subtitles for a variety of good reasons. I would not have thought of that, and I think many more people will be able to understand the videos because of his foresight.

More on Bill at his site: Hopeland Studios.


Questions/ Ongoing Discussion

I have set up an ongoing discussion thread for the DVDs. If you have questions/comments arising from the various shoots or seminar, etc., please post them here. I am starting this thread rather than a normal comment stream, as the Flickr thread makes for a more efficient discussion venue.

If you have any shipping-related questions, those should be directed towards MPEX rather than placed in the discussion thread.
____________


Strobist Lighting DVDs are available Midwest Photo for $139.00, and at The Flash Centre in the UK (and EU) for £102.35 incl. VAT. No duties to UK/EU if shipped from TFC. And, as of August 2009, they are also shipping from Gulf Photo Plus (US$139.95) in Dubai, which should reduce shipping costs and times throughout Asia and the Middle East.

And special thanks to Rui M. Leal for his comprehensive "Review from the EU" here.

Saturday, May 24, 2008

Google Talks on YouTube

Last fall I had the pleasure of visiting Google's headquarters in Mountain View, CA, to speak. It's an humbling experience -- not only for who you are speaking to, but for the caliber of people they have brought in as guest speakers in the past.

They have a series on YouTube called "Authors@Google," where they have videos of some of the people who have come to speak at the campus. And they are very much worth browsing through and viewing.

Among the archived videos available for viewing are Barack Obama, Hillary Clinton, John McCain, Joe McNally, Robert Fra…..@#%%&**#$$&&%#….hey, wait a minute, Joe McNally???!!!


Yeah, that Joe McNally. And screw the 10-minute limit, too. This baby runs over an hour. Highly recommended -- as are most of the Google talks archived on YouTube.
__________

Related Links:

:: Joe's blog post about visiting Google ::
:: My trip: On Assignment -- Steve at Google ::
:: Catalog: AtGoogleTalk's Videos ::

Thursday, May 22, 2008

Interview: Platon and Putin


We've featured Platon before, what with the Eliot Spitzer photo, and the cool videos on his site. I love his simple lighting, and even more so his entire approach to portraiture.

If you have ever been nervous before a big shoot, you'll really appreciate his video interview about shooting Vladimir Putin for Time's Man of the Year cover. Every time I hear Platon talk it makes me want to re-think my whole approach to shooting people.


Thanks much to Rob over at APE for the heads-up.
_________

Related:

:: Platon Shoots Eliot Spitzer ::
:: Three Platon Videos ::
:: Platon: WSJ Ad Campaign ::

-30-

Wednesday, May 21, 2008

A Commenter Calls SB BS...

UPDATE: Joe gives some very good background info and perspective on his lighting choices here.
____________

"Joe McNally is a great photographer and I respect his work, however that collection of strobes is absurd. Was that really necessary?

Personally, I think this was an elaborate hoax to see how stupid most strobist readers really are.
"


Well, yes, actually, they are necessary. Keep reading for the reasons why.


Why the SB-800 Arsenal?

1. You lose power on every step you go up in FP sync. That is because the pulsing nature of the flash loses a lot of light that is merely falling on the black part of the thin slit as it travels across the focal plane.

2. Joe was working right into the sun, which as you might guess is an even higher EV than shooting with the sun as a light source.

3. He also was pushing the flash(es) through diffusion material, which eats up another 1-2 stops of light.

4. Seven flashes are not seven times more powerful, photographically speaking. You double the power (and add one stop of output) when you add the first flash. Then it takes TWO more flashes to get one more stop. Then FOUR more flashes to get the next stop, etc. So Seven flashes gets you two extra stops and change.


And as for the idea that it would be easier/cheaper to just throw up a monobloc and battery pack, that may be true on a dollar-to-dollar basis. But the speedlights with FP/sync allow you to crank down the shutter to control that ambient, which is the basis for the entire photo. No so the monoblocs.

And, for the record, we do not have any stupid Strobist readers. Just ones who may not yet understand a specific lighting technique. Which would, on frequent occasion, include yours truly...

Sunday, May 18, 2008

Joe McNally Desert Shoot

UPDATE: Joe has posted Joe has posted his version of the day, with his stills from the setups seen below.

What do you do when you get the chance to hang out with Joe McNally, shooting in the desert for an afternoon?

You go, that's what you do. And that's exactly what happened to me the day after finishing up teaching at Gulf Photo Plus earlier this month in Dubai.

Video, learned tidbits, setup shots and desert delicacies, after the jump.
_____________


The video runs about 6 1/2 minutes, and was done with a Canon G9 point-and-shoot camera -- video, setup still shots, voiceover audio in the truck on the way back, too. This one really got stepped on in the YouTube upload process, but I have placed a full-res version that can run full-screen here for downloading. (Fair warning: It's 68 megs, but it looks much better.)

So, what do you do during an afternoon shooting in the desert with McNally? You watch, take notes (or video, if you are sneaky and say you "need it for your blog," and learn as much as you can.)


That's Joe on the left, as if you did not already know, setting up 7 SB-800's to be used as a single, powerful TTL light source. On the right is Sid, our grip (and fellow dumbstruck photo student).

Joe's setup process for the SB-800's is this: Sid unlocks the Land Cruiser, (we traveled in style) Joe whistles, and all of the SB-800's jump out of the bag, set themselves to "remote" and channel 1-A. Then they mount themselves to Justin clamps and leap up onto a "C-stand." Joe has them well-trained when it comes to the CLS wireless stuff.

(Joe actually carried the stand manually from the truck to the shoot site himself, because the site of fully-ladened C-stand running across the desert on its own would have freaked out Lenka, our model.)


Why seven speedlights? Because he wanted to punch through a diffuser in a high ambient light environment. He was using high-speed, focal-plane sync -- a fancy-pants Nikon thing that works wonders at the cost of lighting efficiency. I would explain it better but it is late, and I am on allergy meds. You are lucky I am using punctuation at this point.

But with multiple SB's, you can make up for the efficiency issues. And when you have as many SB's as Joe does, well, you can pretty much do whatever you want WRT light levels. A military helicopter actually flew by about a half-mile away from us. I would imagine that Joe could have spun that C-stand around and lit it, TTL, at f/8 at ISO 200.

He started off soft on the light, then lost the diffuser and went with hard light against the sun. As you can see, the SB's were from front camera right, and the sun was from hard back camera right. I later became a VAL/Videographer, filming with my little Canon and holding a rim light (yet another SB-800) from back camera left. It was nice to feel useful, but I probably looked like the biggest geek ever. Just stick a photo vest on me and be done with it.


For the second setup, he shot right into setting, hazy sun and pushed an umbrella in real close. Just three SB's in this one, which after seeing seven aimed as one source seemed positively weenie.

The umbrella was shielded on the bottom, which I had read about in "The Moment it Clicks", but never actually tried. I can tell you I will be trying it from now on. It painted Lenka's face beautifully, and totally left the sand alone. The result was a shot that looked lit, but with an environment that was left unspoiled. Just a really nice, simple tip that will stay with me.

Another thing was watching Joe's interaction with Lenka. He has been doing this for so long (Joe apprenticed with Mathew Brady) that his interaction is constant, quick, loose, and totally unforced.

I often wince at meetups as someone will take a shot and proceed to lose their model for the next 30 seconds while they chimp and work out technical problems. I would like to thing that I am not quite that bad. But in comparison to McNally, I felt like that guy.

No use in lighting a photo only to polish it off with with crappy photog-subject interaction. We all need those follow-through skills and it was great to watch someone work it so well.


For the last setup (things were moving fast as the sun was quickly dropping and Joe had a plane to catch) we used the unshielded umbrella with a gold Lastolite panel (underneath Lenka's face) to get a quick clamshell-style light.

There was a question in the Flickr comments of the previous photo (the one with w/Joe sitting, above) wondering if his legs in fact constituted a fill reflector. I didn't ask. But in retrospect I thnk that might be one of those in-the-know, pro secrets that the truly-greats like McNally hold back on telling people.

Finally, we also got a chance to sample a rare delicacy, the sand truffle. I would describe it as an "acquired taste". But who knows -- thinly shaved in an omelette it just might work.

Joe has posted his version a of the day, in which he displayed highly suspect picture editing skills: He led with a shot of me and ran all of the "Lenka" photos as secondary art. It's good reading, after you scroll down about four inches...

And feel free to download the full-res movie if you like. It is much better quality -- and bigger -- than the YouTube version. Especially on the stills.

Friday, May 16, 2008

Talkin' Trash: Free Light Mods

(Updates at bottom)

News photographers always keep a trash bag or two in the trunk of their car. They have lots of uses -- waterproofing in the rain, keeping your cold gear from fogging up when you walk outside on a hot day, cleaning out the trash in your trunk (nah)...

Enter my friend Aaron, who works at Google. FYI, he's the guy who manually types in the phrase, "Did you mean, 'vacuum?'" when you misspell the word in a search. Aaron just added a new use for white trash bags: Light diffuser.

He just wadded the bag up, stuck it (and a CTO gel) on his main light, shot on tungsten WB and left his rim light ungelled for this cool self portrait. Typical Googler, he is ahead of the curve on Lighting 102, where we'll be doing this same gel technique very shortly.

(You can see his photo bigger here.)

Pretty neat, IMO. So, to the list of free stuff offered to employees at Google (gourmet food, bikes, massages, etc.,) you can now add, "light diffuser." Just find the nearest trash can and have at it.

As for the look, Aaron was inspired by photos of the SF Jazz Collective. As jazz is all about improvisation, you have to think they'd approve of his idea.
_______

UPDATE: Just got a text msg from Aaron, who is on a work trip to NYC, has just stepped into the B&H retail store for the very first time. Be afraid, Jayita. Be very, very afraid...

UPDATE #2: Good news: Google sends you to NYC to lecture on the company dime. Bad news: Your trip coincides with a visit by Joe McNally (and free lecture) at the Mountain View HQ. (D'Oh!!!)


-30-

Wednesday, May 14, 2008

On Assignment: Controlling Daylight, Pt. 2

A couple weeks ago, in part one of this OA post, we talked about getting a good ambient exposure and knocking it down a couple of stops to use it as fill.

This is all well and good if the ambient has the right quality of light to use as fill. But what if the ambient looks like crap?

Well, you can always establish use a second flash to establish your desired fill light before creating your key light. The process is the same, and it gives you lots of control in less-than-ideal ambient situations.

The photo above was taken in roughly the same light as the photo in the earlier post. The quality (and quantity) of the ambient fill was fine, actually. But in this case I decided not to use it, to make a point.

In the same way I can use the ambient as fill and work a couple of stops above it with flash for a main light, I can also work a couple of stops above the ambient with my fill light, and then go a couple of stops above that with my main.


This photo is lit almost entirely with one flash with a shoot-thru umbrella, just above the camera. It is very soft, forgiving and wrappy. Also a little boring, IMO. Nothing wrong with it, per se, but if I was gonna use just this light, I would move it up a little, and maybe off to one side to get some nice modeling.

But as fill, it is ideal for laying down a base exposure and controlling the depth of my shadows when it is time to add the main light.


Okay, so lets add the main light now, in the form of a speedlight equipped with a Honl 1/8" speed grid at upper camera left. The ratio is so tight (not even a stop difference from my fill light) that it is almost not noticeable. But if you look closely, you'll be able to detect a "crispness" around Jessie's face that is not evident in the fill-only photo.

Subtle, to be sure. Maybe too much so. But the point here is that you can easily control the main-to-fill ratio, and get crisp, subtle looks from lights you normally associate with being sharp and edgy.

But the beauty in laying down fill light with a second flash is not only in being able to choose the quality, but also the ratio between the fill and the main. By simply dialing down the umbrella'd flash, you can set your internal contrast level wherever you want.

You do not need nice, even ambient to do this, either. SInce you are establishing your lighting environment with a second, soft flash, this can be done anywhere you can get a couple of stops up over the ambient. This is any indoor wall, for instance.


As you can see in this setup shot, the umbrella (a Westcott double-fold shoot-thru) is establishing a splotch of soft fill light and the grid spot is coming in to highlight her face. (My shooting position was tucked up under the umbrella.)

You do not have to stop with just establishing a lighting ratio, either. You can cool the fill light and warm up the main, too. In fact, in this shot I threw a 1/4 CTO gel on the gridded flash to accent her face a little more.


Looking at the top photo again, you should easily see all of the pieces for this lighting scheme easily falling into place: Lay down a nice, soft, neutral-colored fill. Drop it a coupla stops. Add in some warmed up grid at upper camera left to spotlight the face. Done.

Jessie has a great bone structure, and can take a little bit of edge in her light. I could do the same lighting scheme with a less forgiving face, but I would probably tighten the ratio up a bit. That way, you can go with a little edge to your light and still be kind to someone's face if they need it.

The takeaway from parts one and two is to be aware of both the quality and quantity of your fill, whether it is natural ambient or something you create yourself.

By gaining control over the fill first, you create exactly the palette you want when you add the final main light.

NEXT: Night Chopper, Pt. 1

Tuesday, May 13, 2008

Somebody Get This Kid an Agent.

UPDATE:This photo was shot indoors -- Jeff posted a lighting setup shot here.
_________

One of the best things about running a site like this is watching people use light to elevate their family photos. Every day, someone drops a photo of a baby (or kid, or sweetie) into the pool that looks like it could have jumped off of the pages of a magazine.

Jef79m used a DIY beauty dish at camera left and a shoot-thru umbrella at upper camera right, both with speedlights at half power to overpower daylight. But that still wasn't enough soft light to fill in all of those Butterball wrinkles.

Note to the photographer: If you lose your memory card, it might be in Mackenzie's arm somewhere...

-30-

Monday, May 12, 2008

Light Fare at The Bar

My favorite part of attending a week-long photo conference is hanging out with the other shooters and students in the off-hours. In Dubai, this meant almost nightly trips to the "Vista," a restaurant on the top floor of our hotel, seen at left.

The food, drinks, views and company were outstanding. And if we seemed a little sleepy while teaching the next morning, it was likely because we had closed the joint down the night before.

The last evening saw us too tired even to make it to the top floor. So we crashed at the hotel bar on the bottom floor. It had weird, low-level lighting and was full of tipsy sedate photographers -- a perfect environment for a Canon G9 and a slaved SB-800...

The fact that you can control the G9 in manual mode, and that the SB-800 has an excellent built-in slave, makes for an easy, impromptu off-camera light setup.

Everything happens in manual -- the G9's ambient exposure, the built-in flash, and the SB-800. This is what allows easy use of the Nikon and Canon gear together. If you are used to working in manual, this combo is very quick and easy. You just work out your most important variable, and go from there.


Pick Your Most Important Variable

In every flash/ambient exposure, you have to first decide what factor is driving the decision-making process. In this instance, it is something a little unusual: The camera's ISO.

I say that because great camera that the G9 is, I do not like to go above ISO 100 if I can help it. Small-chip noise starts worsening at ISO 200. And if I can get away with ISO 100 in a dark bar, I can do it almost anywhere.

I was shooting in full manual. In addition, I had the G9's internal flash set on manual at the lowest of three output levels. All I wanted was enough flash to set of the SB-800. Which ain't much.


Everything Else Solves Itself

So, back to the thought process. ISO 100 is driving the train. What comes next? Wide open aperture. For the G9 that means ~f/2.8 - f/4, depending on the focal length of the zoom. This gives the best least hideous shutter speed possible in the dark room at ISO 100. In the end, I was hanging out in the 1/4 - 1/2 second range. Sometimes I would hold the camera still and sometimes I would move it a bit for effect.

Now that you know an ISO and an aperture -- say, f/4 or the sake of argument -- your other values fall into place. Next in line would be to find a power level and distance for the SB-800 which exposes your subject properly. What I like to do is to choose a consistent working distance for the SB, and dial in my power level with a couple of quick test shots.

In this instance, it was at 1/32 power with a working distance of about 3 feet. I added a diffusion dome to make the light go in all directions -- bare bulb style. Now, anywhere I stick that flash I will have a properly exposed photo at a light-to-subject distance of 3 feet.

Generally, I would just put the flash on the table -- in the direction in which I wanted the light to hit. I also would put something between the flash and my shooting position to gobo the direct light.

All that is left to decide is the shutter speed. And in manual mode, this is easy. I just use the camera's meter to dial my shutter in so that the environment is ~2 stops underexposed. In most instances, In this case, we were down into the Hail Mary shutter speed settings. No problem -- the flash is freezing my subject.

I can also dial in whatever amount of flash/ambient contrast I like via the shutter speed. And everything else is already taken care of by the other exposure choices.


Drink With the Left Hand, Shoot with the Right

Take young Adam -- just 12 years old -- who came all the way from the UK take classes, ask questions, and offer to sleep on studio floors. Don't laugh -- that is exactly what I would have done at his age.

Among the students, it was very easy to see exactly who had made the decision to get the absolute most out of the conference. We had them pegged by the end of the first day. And between you and me, those guys had the right idea. Bravo.


After-hours at the bar just meant more time for editing and second guessing the day's work. The guys in Chase's class were particularly hard-driven. They did a three-day, full commercial assignment class. Soup-to-nuts -- real commercial brief, models, location, editing and post. Wish I could have taken it.

This may have been a first in the photo class of this kind in the world, especially given the authenticity of all of the components. I would have given my left tes right arm to have a class like this as a 22-yr-old.


Way down at the other end of the ambition scale, the instructors were totally prepared to relax and unwind in the after-hours. Witness Chris Hurtt (who spent the week getting people off of the "green square" and saving them money on post cards) pondering the intricacies of an orange vase lit from the inside by an SB-800.

I know what you are thinking: He's three sheets to the wind.

But if you knew Chris, you would know that this is a perfectly normal expression for him. I had better photos, but the customs folks made me delete them at the airport before I left the country.

Next time you have a fun, after-hours thing going on, give this stuff a try. The manual lighting and exposure process may seem a little complicated at first, but it is not. And it is surprisingly fast to set up -- even if one is not safe to drive at the time.

We did some fun stuff in the Dubai classes (and out in the desert) and I will be posting more within the next coupla weeks.
___________

Related:

Dubai Photo Set (still uploading)
Joe McNally: Overpowering the Sun in Dubai
Lifehacker: How to Hack Your Canon Point-and-Shoot

Thursday, May 8, 2008

Ray Flash Redux

There were lots of questions following the earlier review of the new Ray Flash Ring Flash Adpater.

I have tried to answer them best I could -- and found a video to boot -- after the jump.
_________

Ring Flash Q-n-A

Q: This is pretty neat with one exception. The design of it and the way it flops down, won't it block the infrared focus assist on the SB800?

A: Yes, it will block the AF-assist light on the SB-800. But FWIW, I am not sure that this thing is that much of a run-and-gun light source. (At least, that is not the way that I would use it.)


Q: What is this? No Konica-Minolta/Sony flash units? That's a pretty poor business choice... (Ditto other question, re: Sunpak/Vivitar)

A: Dunno which other flashes are coming, but you have to understand that Nikon and Canon comprise the vast amount of the DSLR market. They have to go where the numbers are, at least at first.


Q: A quick search for "Ring Light" or "Ring Flash" on eBay lists a lot of ring flashes that sell for less than $100. So what's the advantage of a ring flash adapter over such an eBay flash? Are the eBay ones restricted to macro photography?

A: I actually have bought, tried and discarded a couple of those types of flashes. They are far too weak (and the light source size far too small) to be very useful for subjects other than macro.


Q: Looks like this would block the front of the flash body. any idea if it kills the built in wireless flash capability of say a Canon 580exII? Could I use this unit and still fire another canon flash off-camera?

A: It does block the front of the flash, because it channels it to the ring light area. Being a Nikon guy, I tried it in SB-800 Commander mode to see if it would control other flashes wirelessly. It did.


Q: By saying "But they counter it by not releasing the light fully until they are an inch or two from the top of the ring, going around. Seems to work great." ... Do you mean that the light output is evenly distributed around the whole ring?

A: If the light were emitted all of the way around the ring, it would definitely be hotter up top, which would be closer to the flash. They balance this out by not starting to release the light until it is just a little bit of the way around the circle. The end effect is a pretty even lighting effect around the ring.

(You can see a good, albeit brief, visual example of this in the video below.)


Q: Okay, I'm operating on zero sleep, but what if you want to use your PWs in addition to the ringlight? Are you out of luck?

A: That depends on whether or not your camera will trigger a PW from the PC jack when a hot-shoe flash is mounted. Some will, some won't.


Q: Who wants to bet that there will be a $29 knock-off available in/from Korea within 3 months? It looks pretty backwards engineerable.

A: I'd eat my hat. This thing has a pretty complex light distribution system. Second thought, I would not be surprised to see a piece-of-crap knockoff. But this thing is actually more complicated that it looks from a distance.


Q: I've noticed it's $50 cheaper if you're a Canon user yeah!

A: FYI: That appears to be the older model. It is not as efficient as the new, thinner model.


Q: I'm sure the Gadget Infinity folks already have a prototype in the works.

A: We actually gave them an engraved invitation to create one about six months ago, and they pretty much dropped the ball. Shame, too.


Q: I'm a bit confused - is this the same product as that: ( http://www.ringflash.cz/en_index_go.php? )

A: That's the older, less efficient model. Same principle, though.


Q: I would like to see some evidence that this attachment wouldn't overtstress the the plastic hot shoe, otherwise add a new 580 EX II to the price package.

A: Can't speak for the plastic hot shoe flashes, but on my SB-800 (with a metal hot shoe) there did not seem to be much stress at all on the shoe or the foot. I would think that they would already know it if flashes snapping off were a problem. Having used it on mine, I am not worried.


Q: It looks a little small. I think you'd need something a lot larger (maybe 12-14" across) to get the proper ring light "look".

A: It is a little smaller than the ABR or other big-powered ring flashes. But at portrait distances, it seems to fine. Personal preference, tho.


Q: Anybody know where these are available in the UK, only one I managed to find was on Amazon.co.uk but it was a Nikon fit and I have canon 580EX II.

A: Yup. EU Types will want to look at Flaghead Photographic.


Q: Looks exactly like my Flaghead ring flash that I got for exactly 292 dollars US from Bob Rigby in the UK. They are fun to use and handy beyond. I use it with my G-9 and a canon speedlight. Needs a 1/4 CTO, just a tad bit cool straight out the cow.

A: (As if on cue.) Thanks for the gel tip. I'll try it!


Q: Does it work with high-speed (FP) flash?

A: Yes -- remembering that it is totally passive. It'll handle close-in portraiture outside using the FP synch stuff.
______________


For a better look at it's size, thickness, how it attaches, etc., check out this YouTube video, which we have conveniently dubbed for our readers from The Netherlands. Please bear in mind that this man is not a professional actor, but merely a normal photographer person such as yourself:

Tuesday, May 6, 2008

DIY: David X. Tejada's Beauty Dish

Corporate shooter David X. Tejada has been mentioned enough times on this blog to legally qualify us as stalkers.

(Hey, whatever it takes to let him know how much we truly love him. Besides, no one has issued a restraining order yet.)

But if we were not following his every move, then how would we know that he has taken a cue from some of the speedlight beauty dish designs floating around and created what is maybe the best version yet?

A cheap plastic pot, some paint, a CD case, and Dave's The Moment of Zen: A $2.39 convex mirror from an auto supply store. Check it out, here.

-30-

Monday, May 5, 2008

Just Another Boring Monday at the Office

We wrapped up teaching in Dubai on Sunday, and some of us have a couple days left over for R&R.

Having figured out that there was not actually anything in the Dubai stores that we could afford to buy, Joe McNally and I spent the day in the desert shooting.

You'd think we could get through this vacation without having to work so much. But, nooooo -- he hadda drag our butts out to the desert with a Land Cruiser full of flashes and a Czech model named Lenka.

Lahf, she can beh such eh struggle, no?

We spent the afternoon and twilight there, where we learned things like how to set off seven SB-800s at a time and basic camel avoidance techniques.

I am pretty sure the UAE military saw all those strobes going off on their radar. They sent a Chinook chopper into the desert to strafe us take a look.

Much more to come later. We shot video, setups, sound, etc. -- all via my trusty little Canon G9. We'll be working up full posts on both blogs. FWIW, I have several posts to come out of the Dubai trip. We have been having great fun and doing lots of lighting.

McNally has been shooting rings around us -- with a point-and-shoot, natch.

But tomorrow, no more hard labor. It's time for a dip in the Persian Gulf...
_________

UPDATE: Whoa. It never occurred to me that our model, Lenka, could have been the same Lenka that was in the 2006 DIY ring flash post. But comparing the two photos, I am now about 90% sure it was the same person.

I will have to find out via email after I return. What an amazing coincidence if so.

UPDATE #2: I was 90% sure, and 100% wrong!


-30-

Sunday, May 4, 2008

Lighting 102: 6.2 - Gelling for Tungsten

In the last L102 post, we talked about some of the problems we have to face when gelling to work under fluorescent light. Gelling for tungsten yields similar, but different problems.

Fortunately, tungsten is easier -- and more forgiving.

First of all, when we gel for tungsten, we use an "CTO" gel, which is orange and converts our daylight-balanced flash to tungsten (or incandescent). This means that our little flash has basically been turned into a normal light bulb, as far as light color is concerned.

As you can imagine, this is gonna be pretty orange. But when you are shooting in a tungsten environment, you need to get your light consistent. And CTO'ing the flash makes the flash orange, so your flash and ambient now match. Setting the camera to the tungsten white balance setting (usually denoted by a little "light bulb" symbol) corrects for all of this and brings all of the lights back to daylight.

Except when it doesn't. And there is the rub.

Like fluorescents, tungstens are not always the "correct" color. In fact, a bulb's color can change radically - even moment to moment.

How? By being dimmed.

If you do not believe me, dim down a tungsten light in an otherwise darkened room. Watch as it gets redder and redder. They go almost pure red right before the dim to "off".


TIP: If shooting in a dimmed tungsten room, try to get the lights cranked all the way up. You will get a higher ambient level -- easier for balancing. And you'll get truer tungsten colors -- easier for gelling to balance.


Knowing this, you should now realize that you cannot perfectly balance for all tungsten lights with just a CTO gel. And even if you could balance for everything, you probably would not want to.

First of all, as with our fluorescents, when color converting we can only gel our flashes for something we can reliably correct with white balance settings. And custom white balance is not very useful, because you would have to match the flash's gel pack with the custom color to complete the process.

If you do shoot regularly in, say, the same room with the same whacked-out color, it might be worth it to test a build a gel pack that matches the room light for your flash. Then you could cancel it all out with a custom white balance. But on a daily basis, this is impractical when shooting flash.

Fortunately, flash and tungsten get along pretty well when not perfectly balanced. The main thing is to get your flash correctly CTO'd and balance that at the camera. Then let the ambient tungsten do what it is gonna do.

It frequently will not be perfect, but it will be much better than if you had not gelled at all. And you can also vary the background color effect by how much ambient you choose to include, remembering that the ambient component is controlled with the shutter speed. Balancing down lower with ambient (more stops underexposed) intensifies the color. So bring it up a little so smooth it out.

Long story short, the bad news is that with tungsten, you have a color problem you might not have previously considered. But the good news is that you do not need to be as exacting with tungsten light, so missing it a little is not a tragedy.

CTO and Window Greens explained, we will jump into some fun stuff next -- color key shifting.

NEXT: Assignment: Work That CTO

Thursday, May 1, 2008

Lighting Tip: Neuter Your SC-17

Nikon's SC-17 off-camera TTL flash cord is a great little addition to your kit, and you do not even have to be a Nikon shooter to use it. They are so cheap, I have several. And I recently put one under the knife.

Keep reading for he how and the why.

The SC-17 is basically an extension cord for your hot shoe that carries all of the various TTL connections. A flash, connected to your TTL-enabled Nikon via an SC-17 cord, may as well be connected to your hot shoe as far as the signals are concerned.

But the fact that it is off camera allows you to get better light, of course. I have written about this earlier, when talking about the strobe on a rope technique.

No longer manufactured, the SC-17 cords have since been replaced by the new (longer) SC-28, and the more expensive SC-29, which includes an AF-assist light. I like the SC-17 because you can find them on eBay pretty cheaply now.

You can link up to three SC-17s and still retain all of the TTL functions. Or if you are handy, you can splice a CAT-5 wire in there and run it about 50 feet, still keeping TTL.

But TTL is usually not what I use it for. In fact, I am trying to kill the TTL stuff for a specific reason. When shooting both with my Canon G9 and with the Nikon D70s, the trick to getting high sync speeds is to fool the camera into thinking there is no TTL flash connected.

If the camera senses a TTL flash, it will lock the sync at a max of 1/500th of a sec. Which is not what we want. So, we want a dumb, hot-shot-based sync cord to fool the camera into thinking there is not a fancy, TTL flash attached.

To do this, we will unscrew the little screws at the camera mount end of the cord and snip a few wires. It's easy, really, so don't worry about having to be a surgeon or an electronics wiz.

When you open the case at the camera and, you'll see five wires. The two wires you want to SAVE are:

1. The wire that connects to the big center post in the bottom, and
2. The wire that connects to the fail on the side.

These two wires constitute a "dumb" sync circuit. These are the two you DO NOT want to snip. The other three wires carry TTL info. Snip them and the TTL connection goes away. This also makes the SC-17 into a very good little hot-shoe-based sync cord for any brand of a camera with a hot shoe. No proprietary Nikon circuitry to worry about, either.

And for ultra-high sync stuff, this is better than using a Pocket WIzard. Because the electronics in the PW actually self-limit your sync to about 1/1000th of a sec. Not so a dumbed-down SC-17 (or a straight PC cord, for that matter.)

Some have correctly pointed out that an un-neutered SC-17 will work just fine as a dumb sync cord on a Canon. Bu I prefer to knock out those TTL circuits all the same, just in case there is some weird crosstalk going on that might harm the camera. Also, I use the cord for the Nikon D70s for the same reason. So it needs to be snipped for that reason, too.

If you do not want to ship your cord, you can always tape off the contacts at either the camera or flash connection point. But the cords are so cheap I prefer to just keep a snipped one along with my straight ones.

For multi-light setups, I will cord one hi-speed-sync flash and slave the others for multiple light setups in hi-sync situations.

Another thing: If you keep several SC-17s in your bag, you can chain the TTL ones together for a full TTL cord. But if you introduce one neutered cord into the chain, the whole chain goes non-TTL.

So, I keep three SC-17s in my kit -- two smart and the other one neutered. This gets me the best of both worlds when I am cording an off-camera flash.

Related posts:

:: How-To: Strobe on a Rope ::
:: Search SC-17 on Strobist ::

Share

Twitter Delicious Facebook Digg Stumbleupon Favorites More