Tuesday, May 16, 2006

DIY Macro Strip Lights

UPDATE: Here are these macro strip lights in action, used on a sports section cover shoot.
__________
I am batting around an idea for a pretty cool illustration. It's a macro shot, and it involves some fairly tricky lighting. I could give you more detail, but then I'd have to kill you.

Since I haven't shot (much less had published in the paper) the illustration, I can't really throw the idea or photo out here yet. My kids do so enjoy eating, and you guys don't pay squat. So the paper still makes the rules. And Rule Numero Uno is that it runs in The Sun before it shows up on Strobist.

But that's not to say that I can't do a little thinking out loud on the problem-solving process. And this shot sure has plenty of problems to solve. Here is my take on one of those problems.

I am going to light it on three planes. And the light from each plane will need to be kept from spilling onto the other planes.

To that end, I need light for the bottom/sides of the subject that will wrap around it horizontally, yet not spill up towards the top vertically.

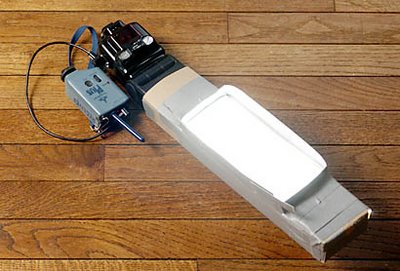
I need a light that is hard (and "featherable") in the vertical direction, yet soft in the horizontal direction. In short, I need a tiny little strip light.

At times like this I call the entire Strobist R&D team into action, with orders to spare no expense in the creation of this one-off (actually, two-off) lighting tool.

Thus, only the finest cardboard (that I can find in my closet) and gaffer's tape was used. Not trying to impress you here, but the budget for a custom lighting tool such as this can run upwards of forty to fifty cents.

Hey, good light ain't free.
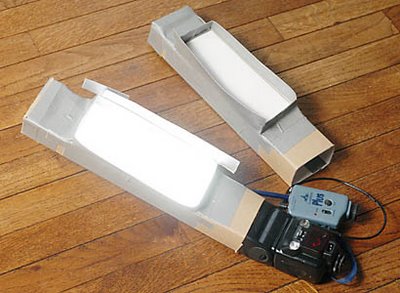
All kidding aside, what we have here is basically a set of modified cardboard snoots. I made them out of a shirt box (used, of course) a sheet of typing paper and some gaffer's tape.

I made them "inside out" so that that shiny white cardboard side of the shirt box would be on the inside, to bounce the light around more efficiently.

I basically made a set of rectangular snoot-type tubes and closed off one end of each tube (to keep the light from spilling out.) Then I cut a rectangular window in each, and covered that with a sheet of typing paper to act as a diffuser.

A little tape was used to hold the thing together. This was the last of my grey gaffer's tape - I'm getting black next time.

The tape ridges on the side are my best approximation of what I will need in terms of light spill control. This will likely be adjusted and/or augmented while I am shooting.

I like doing macro stuff because it is easy to make whatever kind or shape of light source you need on the fly, for next to no money.

Oh, and remembering that I am going to orient these things horizontally, I would point out that that is a really crappy thing to do to a hot shoe mount. And we are trying to keep those little buggars from breaking, remember?

The solution is to not use the hot shoes to mount the flash. I will likely bend them to about a 45-degree angle and bungee them to a light stand, using the interior angle of the bend to hold it to the stand with the ball bungee. I'll do pix of the set up with the time comes, and blog it when the story runs.

Now to solve my next problem: Making the object appear to float in mid-air...
Monday, May 15, 2006

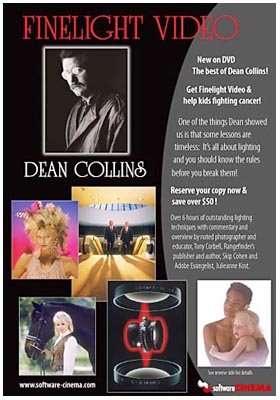
Dean Collins "Best of Finelight" Coming to DVD

I cannot put it any more crystal clear than this: Buy this DVD set.

You want to learn about light? This guy will teach you. His name is (was, sadly) Dean Collins, and he was one of my biggest influences early in my lighting days.

The subject is high-end lighting from the 80's and '90's. And truth be told, he is about as anti-Strobist as you can get, equipment-wise. But he knew his stuff better than anyone, and was one of the very best teachers I have ever studied - in any genre.

He studied with "the masters" in Europe (who only let him use one light until he could do an amazing amount of stuff with it.) He went on to become a master in his own right, and a very gifted teacher.

His use of humor and no-secrets style in the teaching process makes learning from him a fun and effortless experience. And he has so much to teach you. I owe much of my willing-to-try-anything attitude about lighting to this man.

He died last year after a brief fight with cancer. It was a great loss to the photo community.

And tonight I see where they have converted the highlights of his studio (and location) lighting tutorial series onto a six-hour DVD set.

The set will go for $179, but they are knocking $50 off of pre-orders before June here.

If you are interested in learning about light, there is nothing that I can recommend more that learning from this guy. In fact, if you have to choose, drop this site and learn from Dean.

The subjects range from large scale (as in, how to light a Porsche) to portraits (complete with dated '80's hair styles) and even macro stuff. The cameras were larger formats. The strobes were far more powerful than my SB's. But the theory is sound and very applicable to your daily grind. This is a base from which to build your own pyramid of lighting experimentation.

I am so glad they are bringing his work back for today's generation of photographers to see. If I can get ahold of an early copy, I will post a full review.

As he always said, learn the rules first. Then learn to break them.

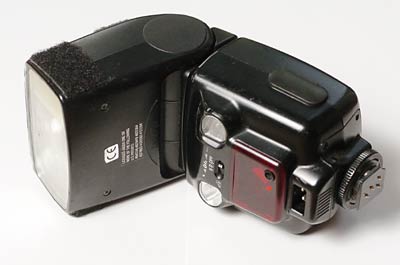
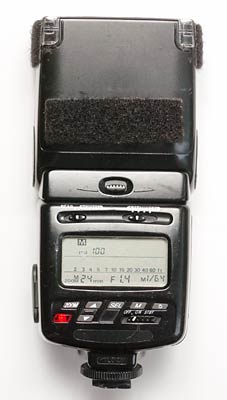
For a Few Dollars More: The Nikon SB-26

Anyone who has been reading Strobist for a while knows that I think the Nikon SB-24 is the best bet for the starving student's entré into the world of off-camera manual flash. With an external PC connection and full manual control over a 5-stop range, it has what you need without your paying for what you don't.

But for someone with a little flexibility in their budget, the more recent (circa mid-90's) SB-26 may be a better call. And if you are moving from just one flash to two, the SB-26 is a no-brainer. It can be had for around $100 at the time of this writing.

NOTE: If the earlier readers swoop in and snarf up the sub-$100 examples, don't blame me. Well, OK, I guess technically you could blame me, but they were just faster on the draw. So try to wait for more stock or troll eBay for a while to grab a good deal. But bear in mind that you are likely to be bidding against each other for the few days after May 15th, when this post goes up.

The SB-26 does everything the SB-24 does, plus the following:

• Full manual control over a 7 f/stop range.
• A built-in bounce card.
• A built-in diffuser panel for ultra-wide beam width.
• A "delay" function (more on that later.)
• A built-in optical slave. (Schwing!)

Now, before I go into detail on the features, I want to give you a word or two about keeping these vintage flashes alive.

First, USE THEM OFF CAMERA. I'm not making a value judgement (for once) on your lighting skills. It's just that the hot-shoe foot is the vulnerable point on these flashes. An SB-24, or -26, or whatever, could theoretically last you a whole career if it is happily firing on a stationary stand. That's because there is no torque on the hot shoe foot.

But if you are shooting on-camera, say, stalking Sean Penn or English soccer hooligans, well, that's another kettle of fish. You might catch an elbow (or a brick) to the head and your flash foot could go 'bye-bye' real fast.

Even if you use them on stands, a good policy is to not stick them straight out so all of the pressure is on a horizontally-mounted shoe foot. Mount them vertically (or as near to vertical as is practical) and use the swivel head to do the pointing. Way less torque. Way happier flash foot.

That said, if you snap one off, all is not lost. There is a good discussion (and link resources) for getting it fixed (even DIY-style) over at Sportsshooter. (Link will open in a new window directly to the discussion.)

Now, back to our regularly scheduled programming.

The seven f/stop range is really sweet, especially for close-up work. There are times when I have had to dumb that down even a couple more stops with neutral density filters. One-sixteenth power can be way too much at a few inches in distance.

The "delay" mode is, as far as I know, unique to this model of flash. Here's how it works. Say you are using an on-camera flash in the auto (or TTL) mode. You can use the SB-26 in manual mode stuck out in the background somewhere as a back/rim/whatever light and it will wait until the other flash has finished firing before it fires.

Why is this important? Because if it fired at the same time, it could screw up the other flash trying to work in its auto or TTL mode. (Usually this means the main light would not put out enough light. That's bad.)

How does it know when the flash is done? It doesn't. There is simply a "delay" switch on front of the flash. (Set it to "d.")

Does it matter what kind/brand of camera/flash is used for the auto/TTL front light? Nope. (Sweet, huh?)

What does this cost me? Well, other than a few bucks more to get this flash instead of an SB-24 (or -25) it costs you a third of a stop on your max synch speed. Most SB/Nikon combos max out at a 250th synch. This setting limits you to 1/200th, to account for the delay. Not an issue in the environments where you are likely to need to be filling dark backgrounds.

Now, for the other feature that makes this an ideal second light: Built-in optical slave. It'll see your other flash fire and fire the SB-26, either in "real time" or in the delay mode. For our purposes, it'll usually be real-time.

Now, this is not a fantastic slave. But for typical environmental portrait set-ups, for instance, it works great. You can help it along by making the SB-26 the strobe that fires the weaker light of the two, if there is a difference. Theory is, if one flash is going to set off the other (using light) you want the slaved flash to be receiving the bigger shot of light - not the other way around.

The other way to increase your efficiency is to point the front panel (that's where the slave eye is) of the SB-26 at the other light. Since the head rotates and tilts, this is almost never a problem. And of the SB-26 is firing into an umbrella, you're golden. That umbrella acts as a big relector, catching your main light and sending it right into the sensor.

These babies sold for $350 (and adjust that for ten years of inflation) back in the day. And now people have visions of "$B-800's" dancing in their heads, so they sell them for a song. Why, thank you, Mr. Rich Photo Hobbyist Guy.

All in all, a great little light. And believe me, if I was still looking to pick up a couple more of them, you would not be reading this article yet.

Right Back Atcha

I have gone through the Reader Links page and moved the (commented) URL's up to live links on the main post.

Some of Strobist's readers are doing some cool stuff, and you should check these sites out. And don't forget to add your info and URL in the comments section so I can migrate the links up to the main page next time around.

Click here to open the Reader Links page in a new window.

And, speaking of reader contributions, the Flickr Strobist Group is kicking some major buttocks, as Forrest Gump would say. We are one serial flasher away from having 75 members, with people sticking up new photos every day.

Boo-Ya.

Saturday, May 13, 2006

Joe McNally Lighting Seminars at NPPA Convention

On June 23-25, Joe McNally will lead workshops on location lighting at the National Press Photographers Association's convention in Tampa, FL. Joe is one of the best lighting seminar guys going. He moves fast and gives out a lot of good info. (He's the guy who did the "Speed of Light" DVD.)

His seminars are highly recommended, as is joining the NPPA if you are a PJ type.

Friday, May 12, 2006

Bogen 3373's Back in Stock

Finally!

For the bazillion-or-so readers who have e-mailed me saying that those sweet little Bogen 6' Retractable 5-Section Light Stands were darn-near impossible to find, they seem to be back in stock. And in black, no less. (Although the photo shows chrome, the 3373 is black.)

It's about time. I've been itching to pick up a third one for myself.

On Assignment: Dealing With a Difficult Subject

(Photo by Ben Hobby)
You do enough assignments and soon enough you'll have to photograph someone who is (a) picky, (b) knows exactly how they think their photo should be shot, and (c) is not exactly giving you very much raw material to work with, if you know what I mean.

Such was the case for a young-but-enthusiastic Ben Hobby, 5, when I asked him to help me with my profile photo for the new Flickr Strobist Group.

It's Friday night and the missus is off on an overnight Brownie camping trip (big fun) with my daughter, Emily, 7. So it's just us guys. And we have full license to rearrange the living room. (As long as we fix it back exactly the way it was before the girls come home.)

This lighting scheme is a little unusual for me as I used no less than four SB-strobes for this photo. Which is about three more than my lazy butt usually drags out.

It is a continuation of my theme-du-jour, first explored in the Women's Lacrosse Portrait in the last On Assignment.

The kicker here is the background, which is a blank wall lit by an SB-24 (on a stand in a snoot) shot through a ficus tree. I love shooting strobes through houseplants to make interesting light. Luckily, my wife is a certified Green Thumb, or I would shooting light through a plastic house plant.

Technically, this is called using a "cookie," which is short for "cookaloris." And if this technique just got you wondering what else you could shoot a little strobe through to make funky light, well, you are starting to get it, my friends.

Anyway, here is just the background, which was lit by a strobe in a snoot high and to the right (as seen in the bottom photo below.) The pattern is always cool and infinitely variable, depending on where you place the light. Go wild.

(For a quickie one-light portrait, you can fire a single strobe right through the plant and stick a person in that funky light pattern. Just make sure they can see the light through the leaves. Then their eyes will be in the good part of the light, and not in a leaf shadow. Get them away from the wall to get their shadow out of the frame, though.)

And we could have done this with one light, too. But since Pizza Hut for-some-reason takes 45 minutes(?!?!?) to deliver to our house, we had time to do something more complicated.

Ben was a big help, moving the camera around and firing off plenty of test shots as needed while I set up the lights.

Then I would stick him in the chair and adjust the lights further.

If this looks a little 1940's Hollywood, that is because it is similar to the studio-mill "glamour-style" lighting of that era. It's totally cool/retro now (IMO) and a little edgier because a tight snoot (and no fill light) is used for the main light.

This wide shot shows everything. We have one light firing from high right at 1/4 power, through a tree to the background. A snooted SB on 1/16th power (slightly high and at camera left) on the face, and two snooted SB's at 1/64th power as back/rim lights (as in the lacrosse photo.) Click on the photo to bring up a big copy in a new window so you can see what all is going on.

The camera's shutter is set at 1/250th (for the top photo) to minimize ambient light contamination. (I shot at a slow shutter speed for the wide photo to bring up the ambient so you could see the light placement.)

One big mistake: The right backlight (the strobe, itself) cast a shadow in the ficus pattern that I did not notice until just as the pizza was arriving. I could have easily fixed it, but the pizza was hot and us boys were hungry.

Priorities, you know.

Camera: D2h
Lens: Nikkor 85/1.4; 17-35/2.8 for the wide shot
Exposure: 1/250 at f/8; 1/4 @ f/8 for the wide shot
Strobes: 4 (various model) SB units, on manual, on stands
Triggers: 2 on Pocket Wizards, and 2 (SB-26's) used their built-in slaves

Top photo © Ben Hobby - AKA "Strobist 2.0"
Other photos by David Hobby

Next: Lacrosse Cover, v2.0

Share

Twitter Delicious Facebook Digg Stumbleupon Favorites More